
Usage
Basic can refer to the following steps:
- Example Vault Selection
- Scenario 2
- Scenario 3
After extracting the complete package, the main folders are:
According to your usage scenario, select one of the scenarios, and follow the steps one by one!
Example Vault Selection
After extracting the complete package, enter LifeOS Pro/Example Vault/. It contains five filled examples, from easiest to hardest: LifeOS Pro Memos Vault, LifeOS Pro IPO Vault, LifeOS Pro GTD Vault, LifeOS Pro PARA Vault, and OPC LifeOS Vault. Each has a matching Blank Vault beside it for your own main vault after learning the workflow.
Choose by the bottleneck you need to remove, not by the longest feature list:
- No stable daily capture habit; you only want bullets and tasks -> Memos.
- You want the fewest categories needed to turn sources into useful output -> IPO.
- Tasks are scattered; next actions and waiting-for items are unclear -> GTD.
- Projects, responsibilities, and reusable knowledge all need structure -> PARA.
- Products, customers, revenue, and delivery need one system -> OPC.
The recommended order is Memos -> IPO -> GTD -> PARA -> OPC, from lowest to highest upkeep. It is not a mandatory migration path: start with the simplest structure that solves the current problem, or skip ahead when the need is clear.
Templates share Markdown, periodic notes, and task syntax, but they are not
one-click skins. Memos can keep every old daily note while growing into IPO,
GTD, or PARA. Conversions among those three require reviewed reclassification.
OPC normally starts in its Blank Vault and receives selected material. Never
overwrite working settings with a Blank Vault's .lifeos/settings.json. See
Upgrade from Memos.
After installing the LifeOS Skill, an agent can run the migration. For example:
The agent records the scope, preserves periodic notes and custom templates, merges only confirmed structural settings, and proposes destinations in bounded batches. Files stay in place when links, attachment ownership, or name collisions are unsafe. The profile manifest changes only after target entry points, task queries, and links have been checked.
LifeOS Pro PARA Vault
A complete CODE/PARA practice for users who already need to manage projects, ongoing responsibilities, and reusable knowledge together. Start with Memos instead when daily capture is not stable yet.
LifeOS Pro IPO Vault
In knowledge management, IPO typically refers to the process of Input, Processing, and Output. This model describes the entire journey of knowledge from acquisition and processing to application.
In the IPO model:
-
Input: This marks the starting point of knowledge management, involving the collection and acquisition of information. Input can include data, documents, research, personal experiences, external information, etc. The quality of input is crucial to the entire knowledge management process.
-
Processing: At this stage, the input information is analyzed and refined to make it useful and applicable. Processing activities may include analysis, synthesis, evaluation, interpretation, storage, and sharing of knowledge. The goal of this phase is to transform raw data and information into valuable knowledge.
-
Output: This is the final stage of knowledge management, where processed knowledge is applied to real-world problems to create value. Output can include decisions, solutions, new products, improved processes, training materials, etc.
Can be simply understood as a simplified version of the CODE/PARA practice, it greatly reduces the entry threshold for beginners. Users only need to focus on input, output, and themes, and easily record, organize, and use notes.
At the same time, you can also base this on it to design your own note system and workflow without PARA, which is a very imaginative feature!
LifeOS Pro GTD Vault
GTD is better for users who want the vault to answer "what is the next action?" before anything else. It keeps the project concept, but separates execution into inbox, next actions, waiting-for items, someday/maybe, reviews, and archive.
Choose this vault when:
- Your day contains many small tasks, follow-ups, and delegated items.
- You want to stabilize the task system first, then grow the knowledge base later.
- You already understand the GTD Capture → Clarify → Organize → Engage → Review loop and want to use it directly in LifeOS.
The GTD vault uses tags such as #gtd/next, #gtd/waiting, #gtd/someday, and #ctx/*. Project notes remain the source of truth; action pages aggregate what should be done or followed up now.
OPC LifeOS Vault
Best for one-person companies, side businesses, consulting services, or indie products. It organizes operations through a CEO dashboard, seven departments, input/output pipelines, and .AI.md pages.
LifeOS Pro Memos Vault
Recommended for Logseq, flomo, and usememos users. It enables periodic notes only and disables PARA and theme notes by default. The filled version demonstrates bullets, tasks, and review with two daily notes and one weekly note; the daily template stays empty while weekly-to-yearly templates keep task and record queries.
After learning, open LifeOS Pro Memos Blank Vault as your own main vault instead of clearing the example.
Scenario 1: Upgrade from LifeOS to LifeOS Pro
If you have used the Basic, simply enable the new plugin in the existing repository, PRO version is compatible with all functions of the Basic:
- Copy the 'plugin/lifeos-pro' directory to the ' .obsidian/plugins' directory
.obsidian directory is a hidden folder, if you cannot see it, you need to display it through the following method
- MacBook: Use the shortcut key Command + Shift + .
- Windows: In the current folder, select "View > Show", then select "Hidden items" to view hidden files and folders
-
Copy the existing LifeOS configuration file from ' .obsidian/plugins/periodic-para/data.json' to ' .obsidian/plugins/lifeos-pro/data.json'
-
Find the Basic LifeOS plugin in the third-party plugin list and disable it first to avoid conflicts caused by running LifeOS and LifeOS Pro at the same time
-
Find LifeOS Pro in the third-party plugin list and enable it
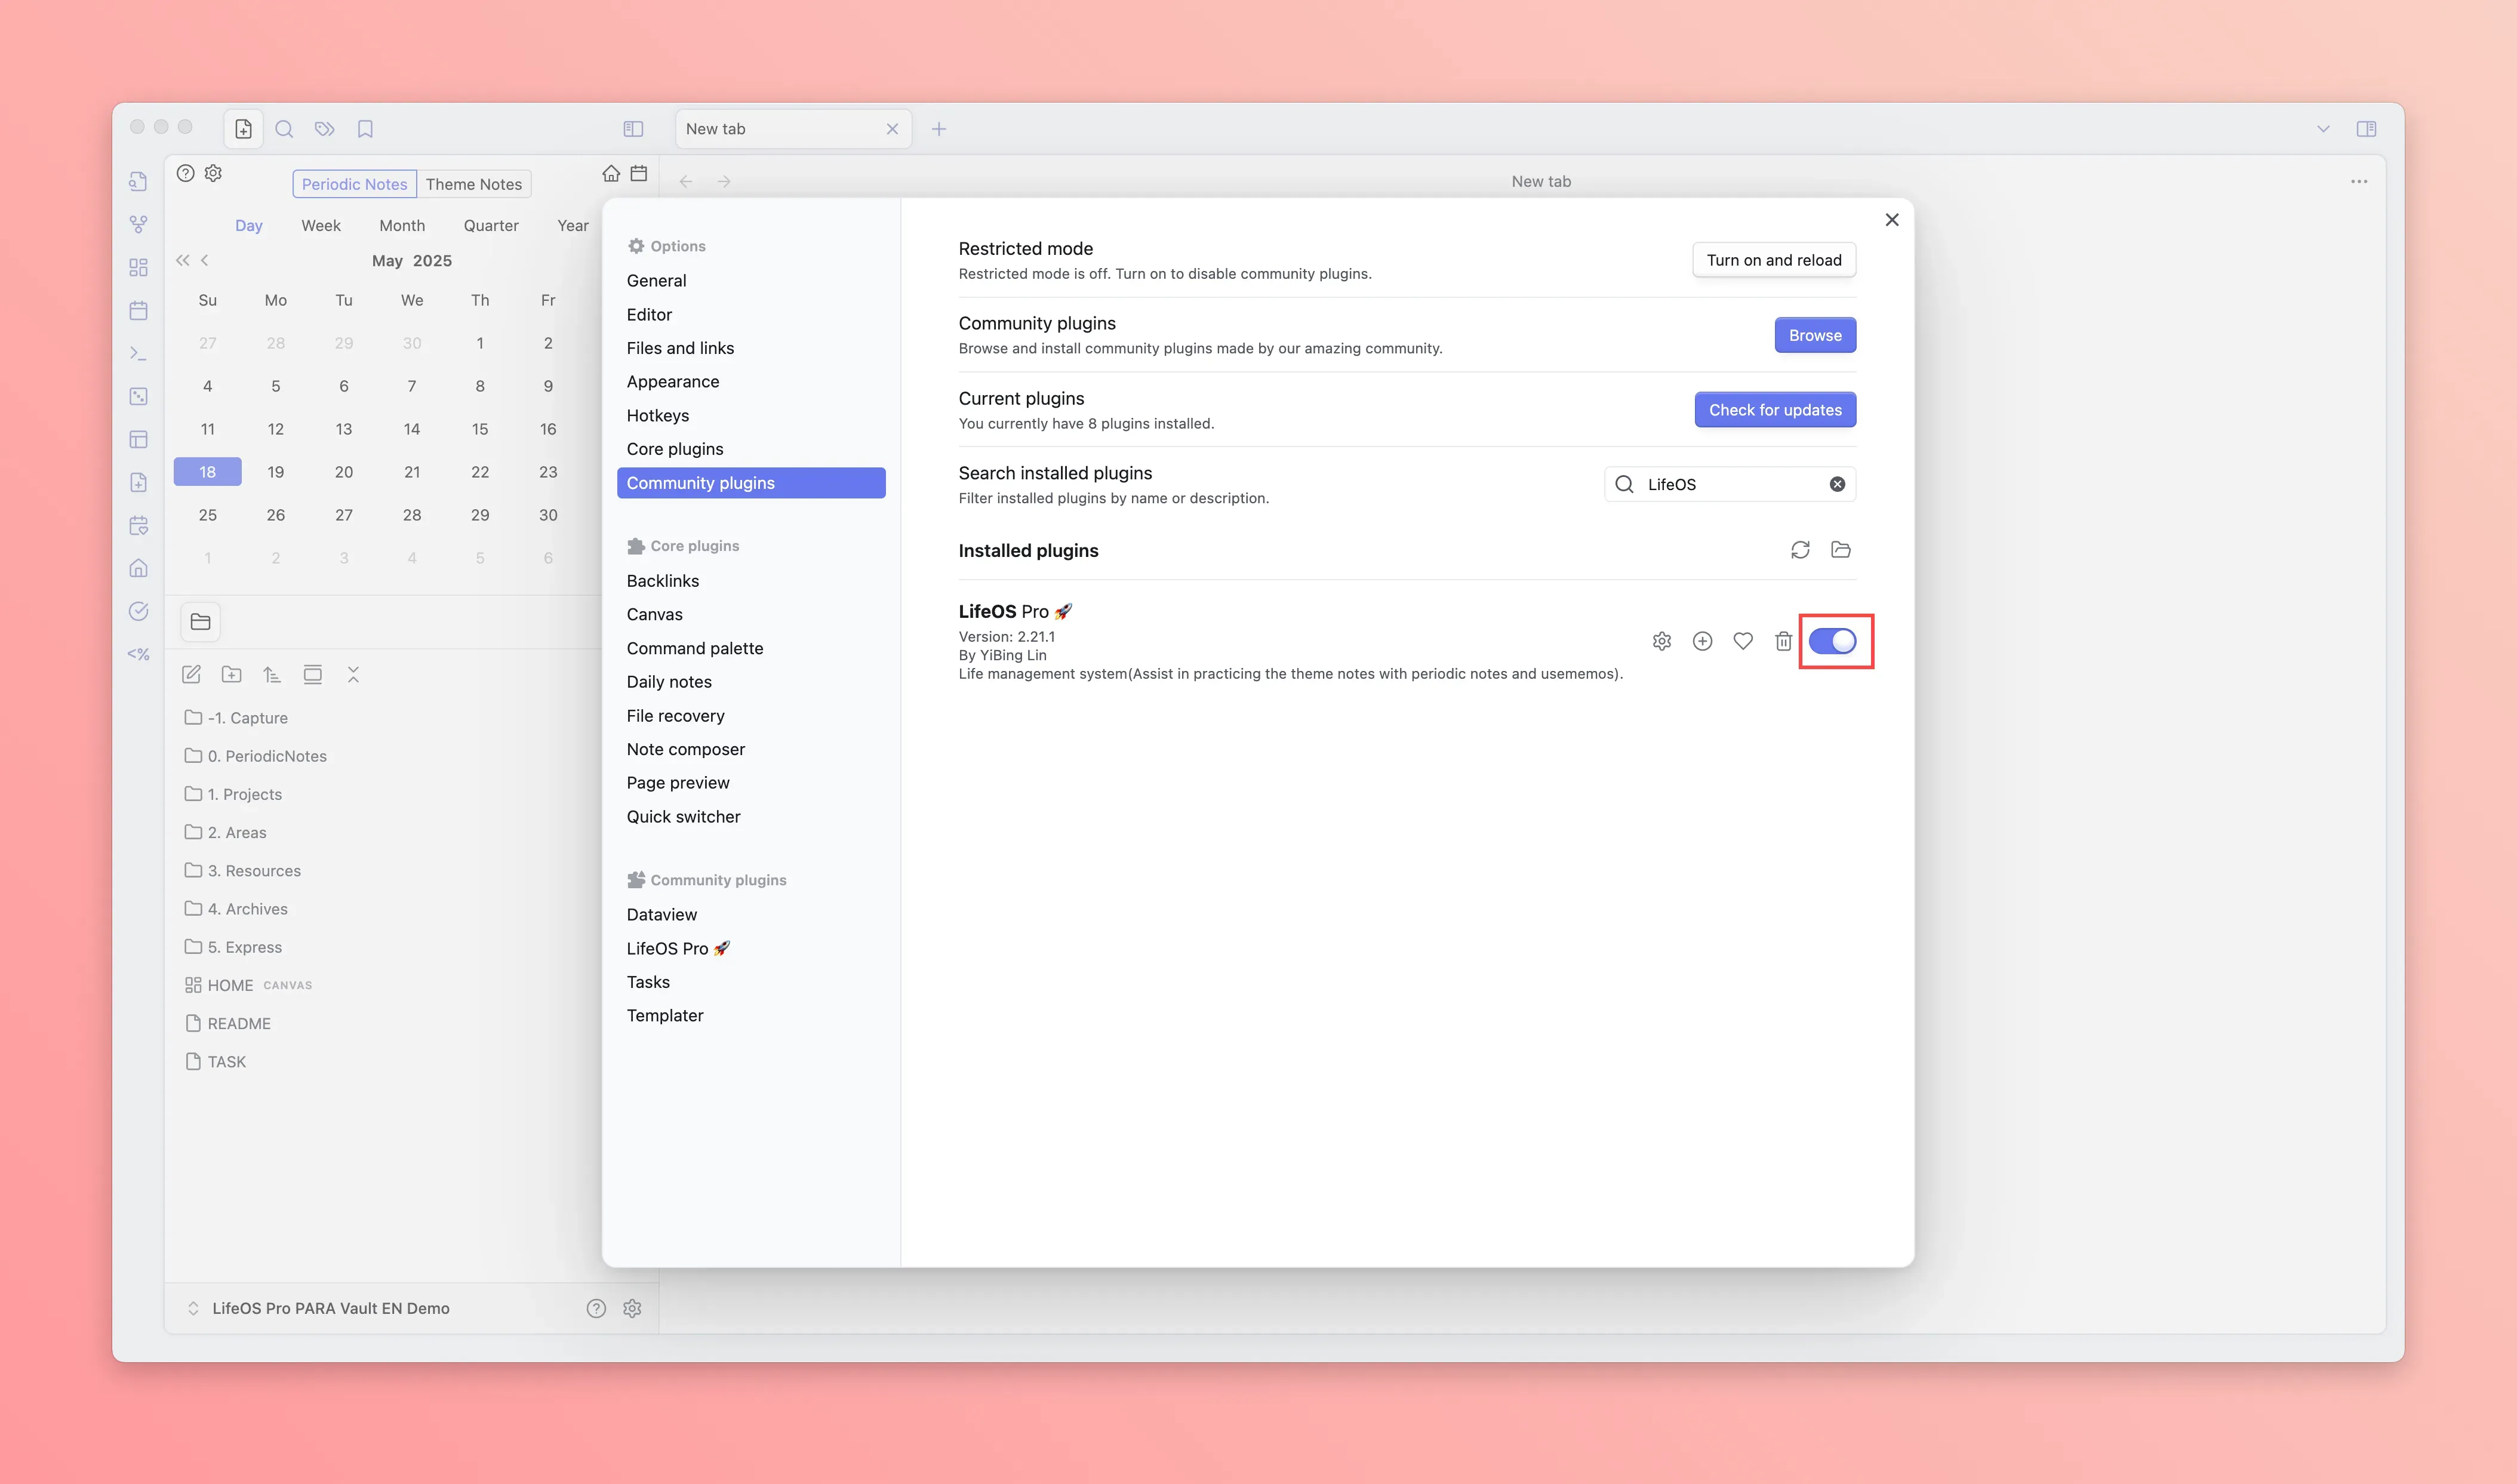
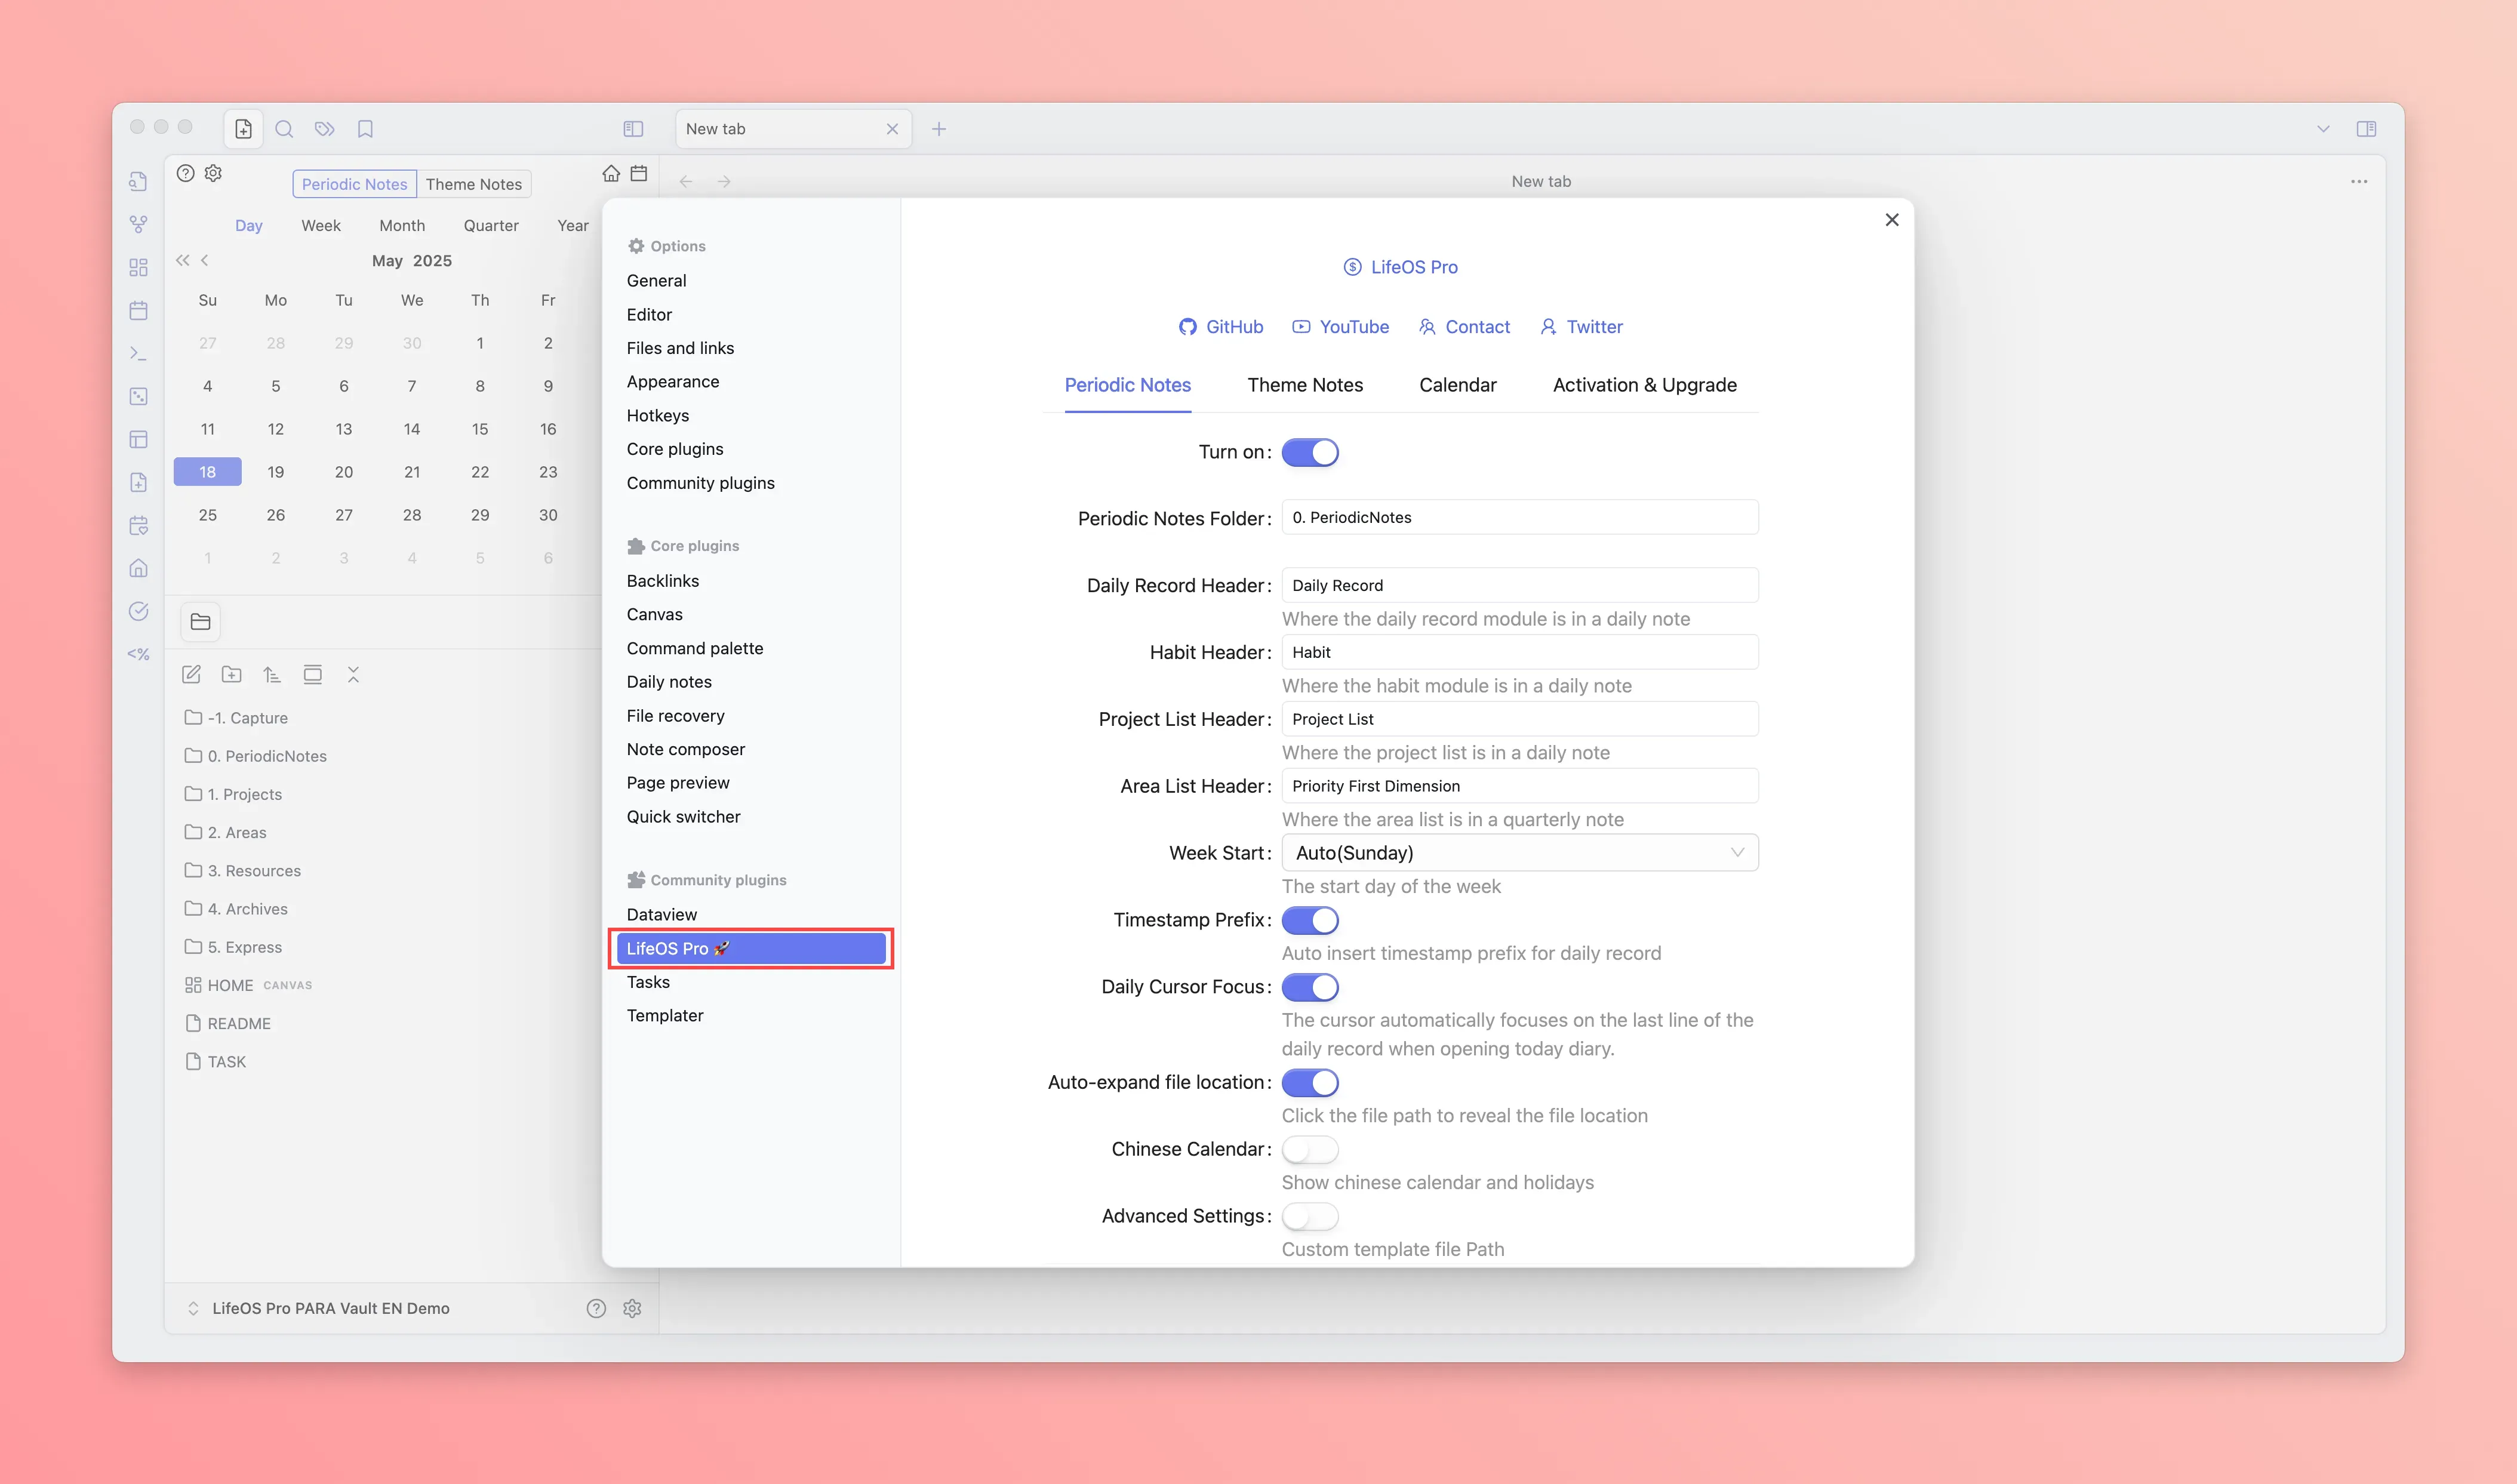
- Open the LifeOS Pro plugin configuration page in the 'third-party plugin'
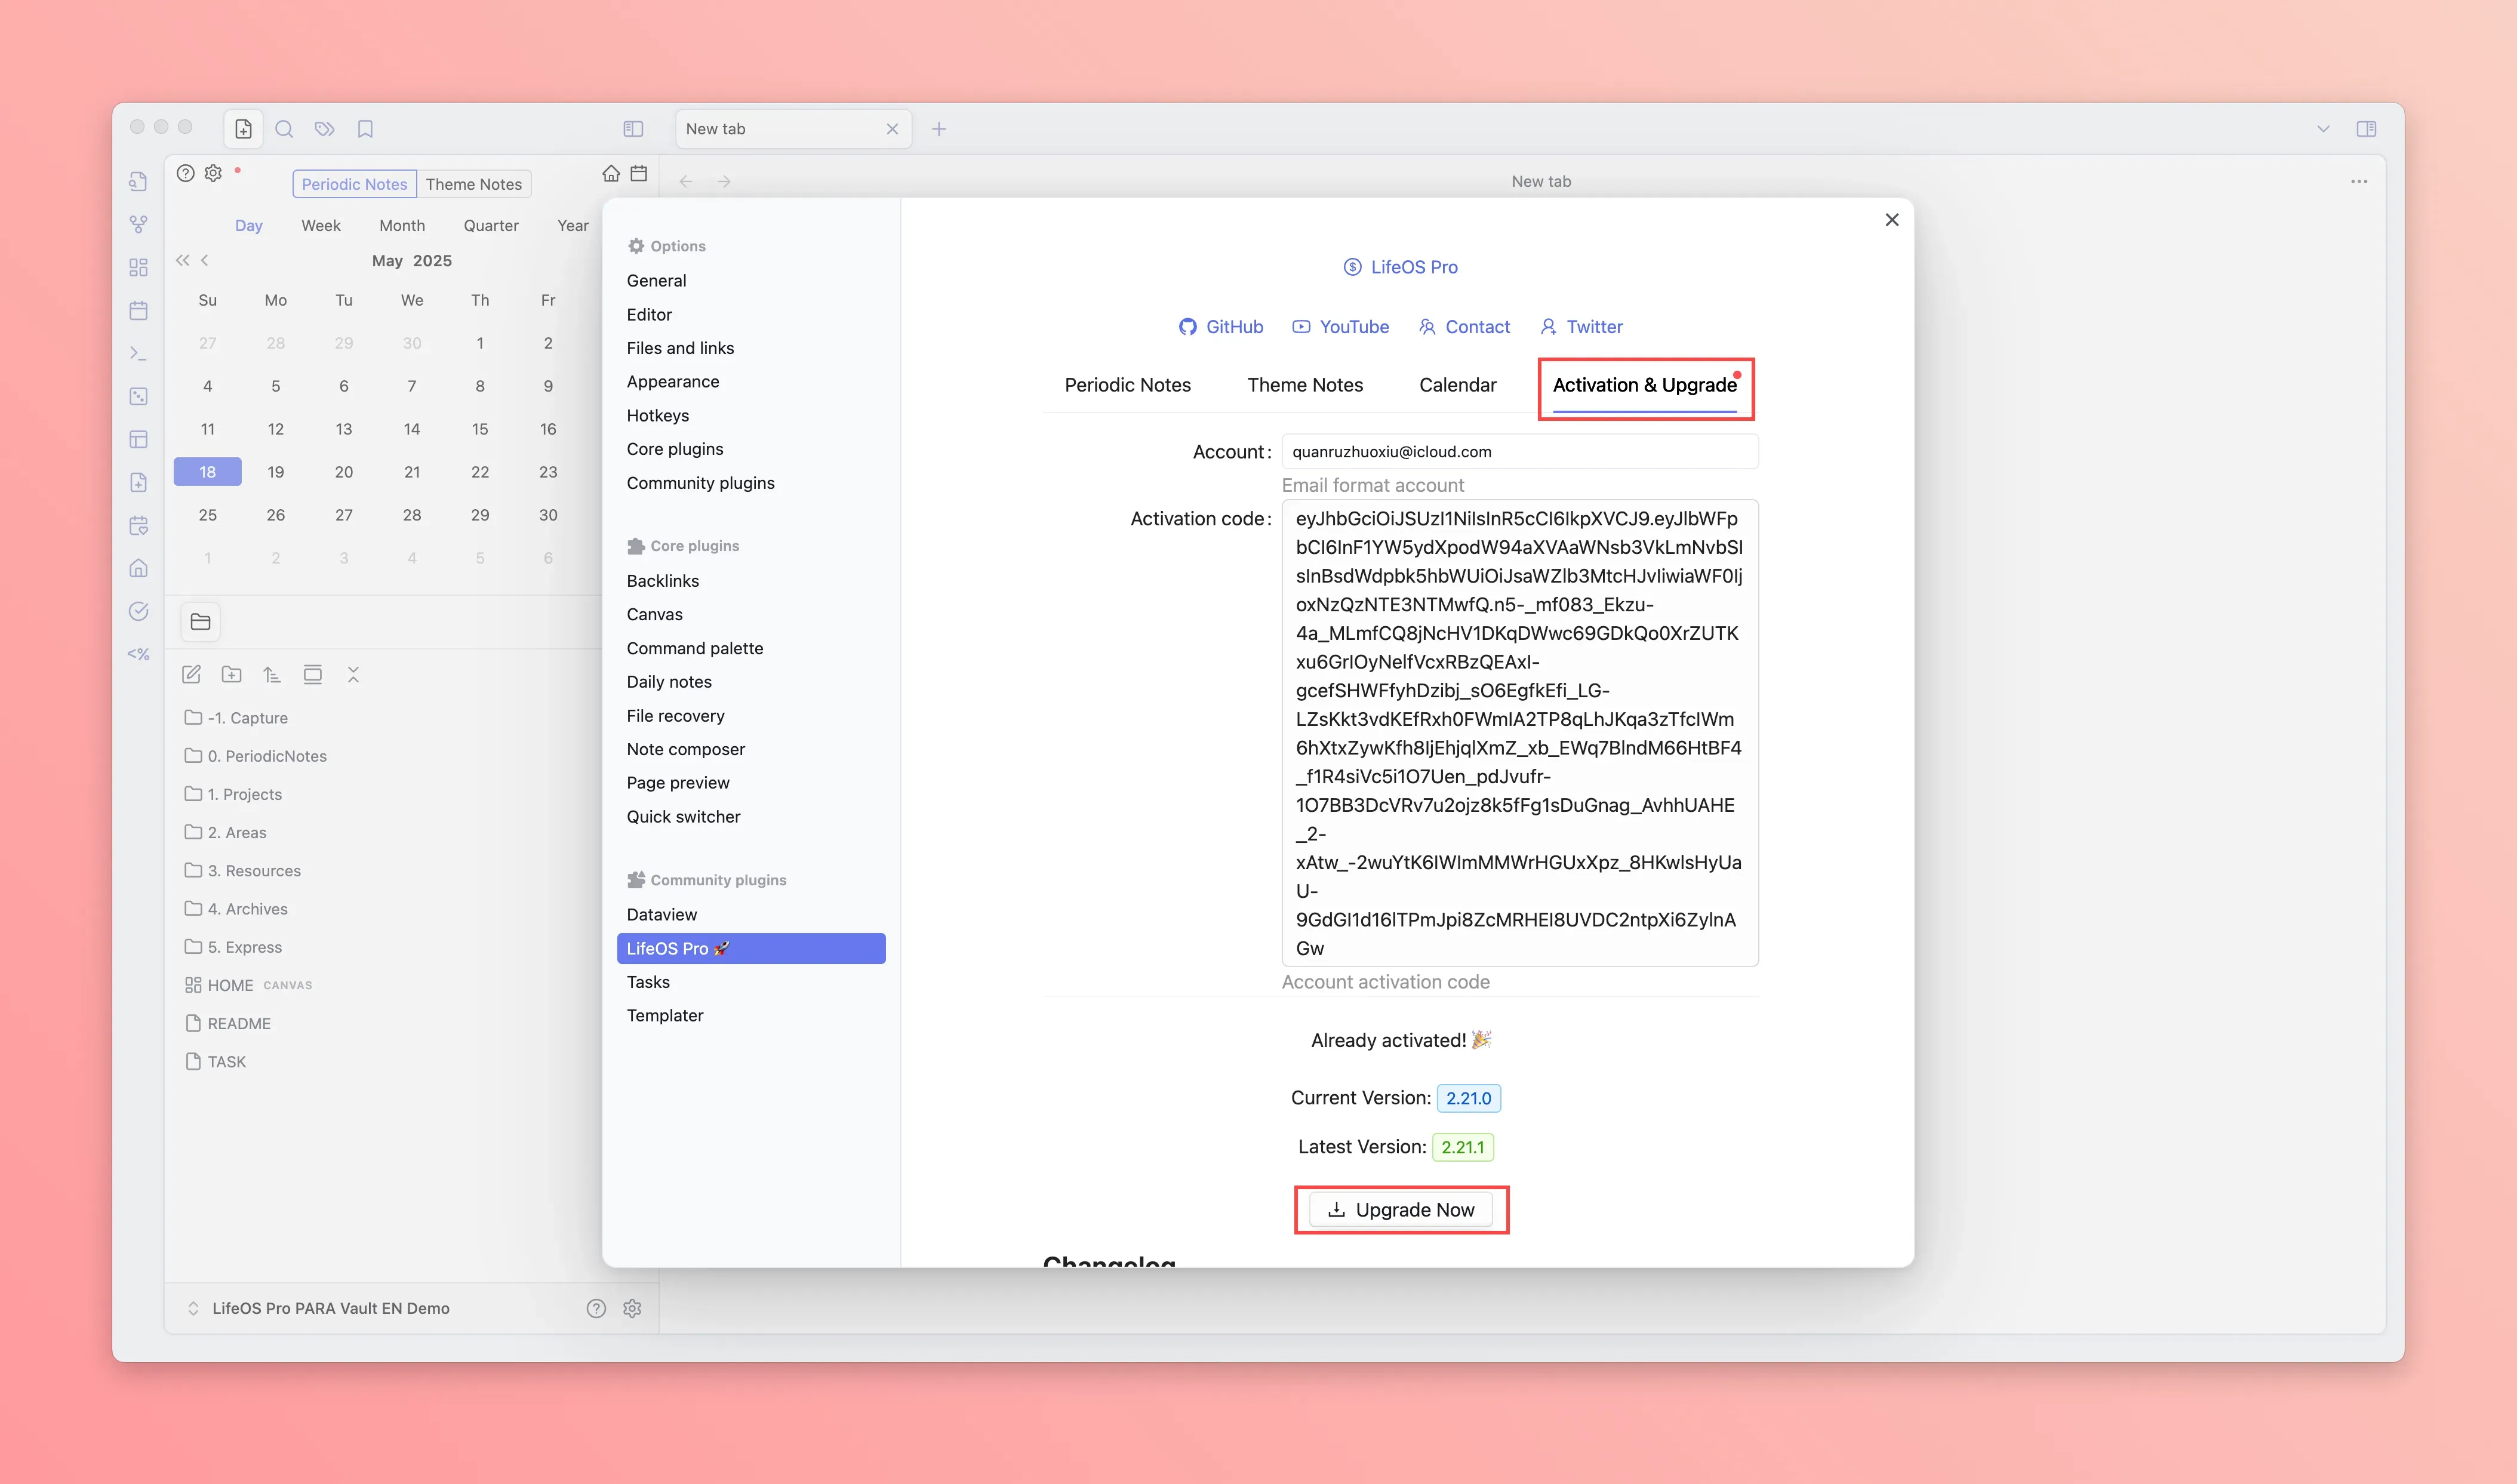
- Click the 'activate upgrade' panel, input the email and activation code (usually in the email you received), and click the 'upgrade now' button at the bottom to upgrade to the latest version of the plugin
-
Restart Obsidian
-
The left sidebar will show the 'calendar', 'home', 'file new' icons, click to experience
-
Go to Pro Version to view more usage instructions
Scenario 2: Use Existing Example Repository
-
Open Obsidian, choose "Open local repository", enter the extracted
LifeOS Pro/Example Vault/folder, and use the Memos -> IPO -> GTD -> PARA -> OPC easiest-to-hardest order to open one of the five filled examples:LifeOS Pro Memos Vault,LifeOS Pro IPO Vault,LifeOS Pro GTD Vault,LifeOS Pro PARA Vault, orOPC LifeOS Vault. Remember to select "Trust repository author and enable plugins".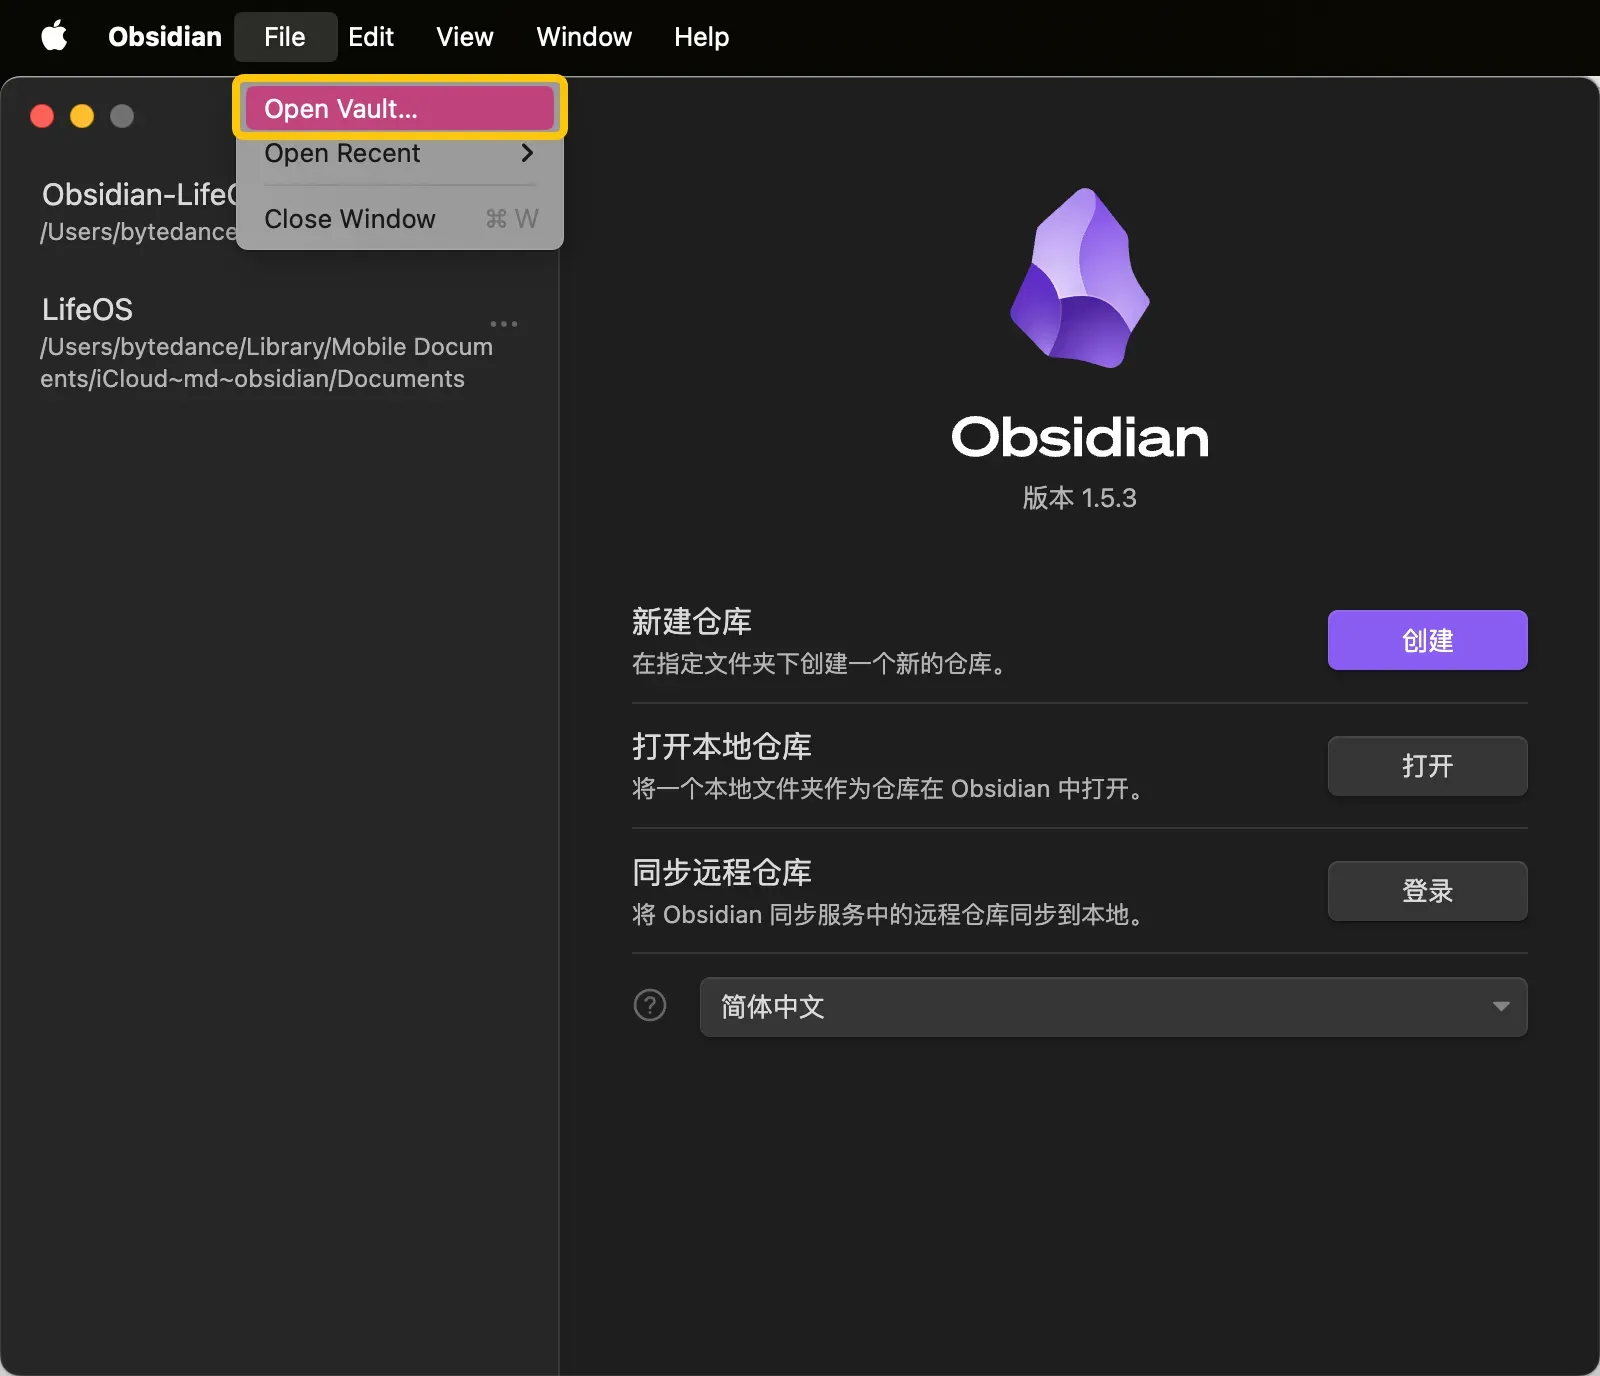
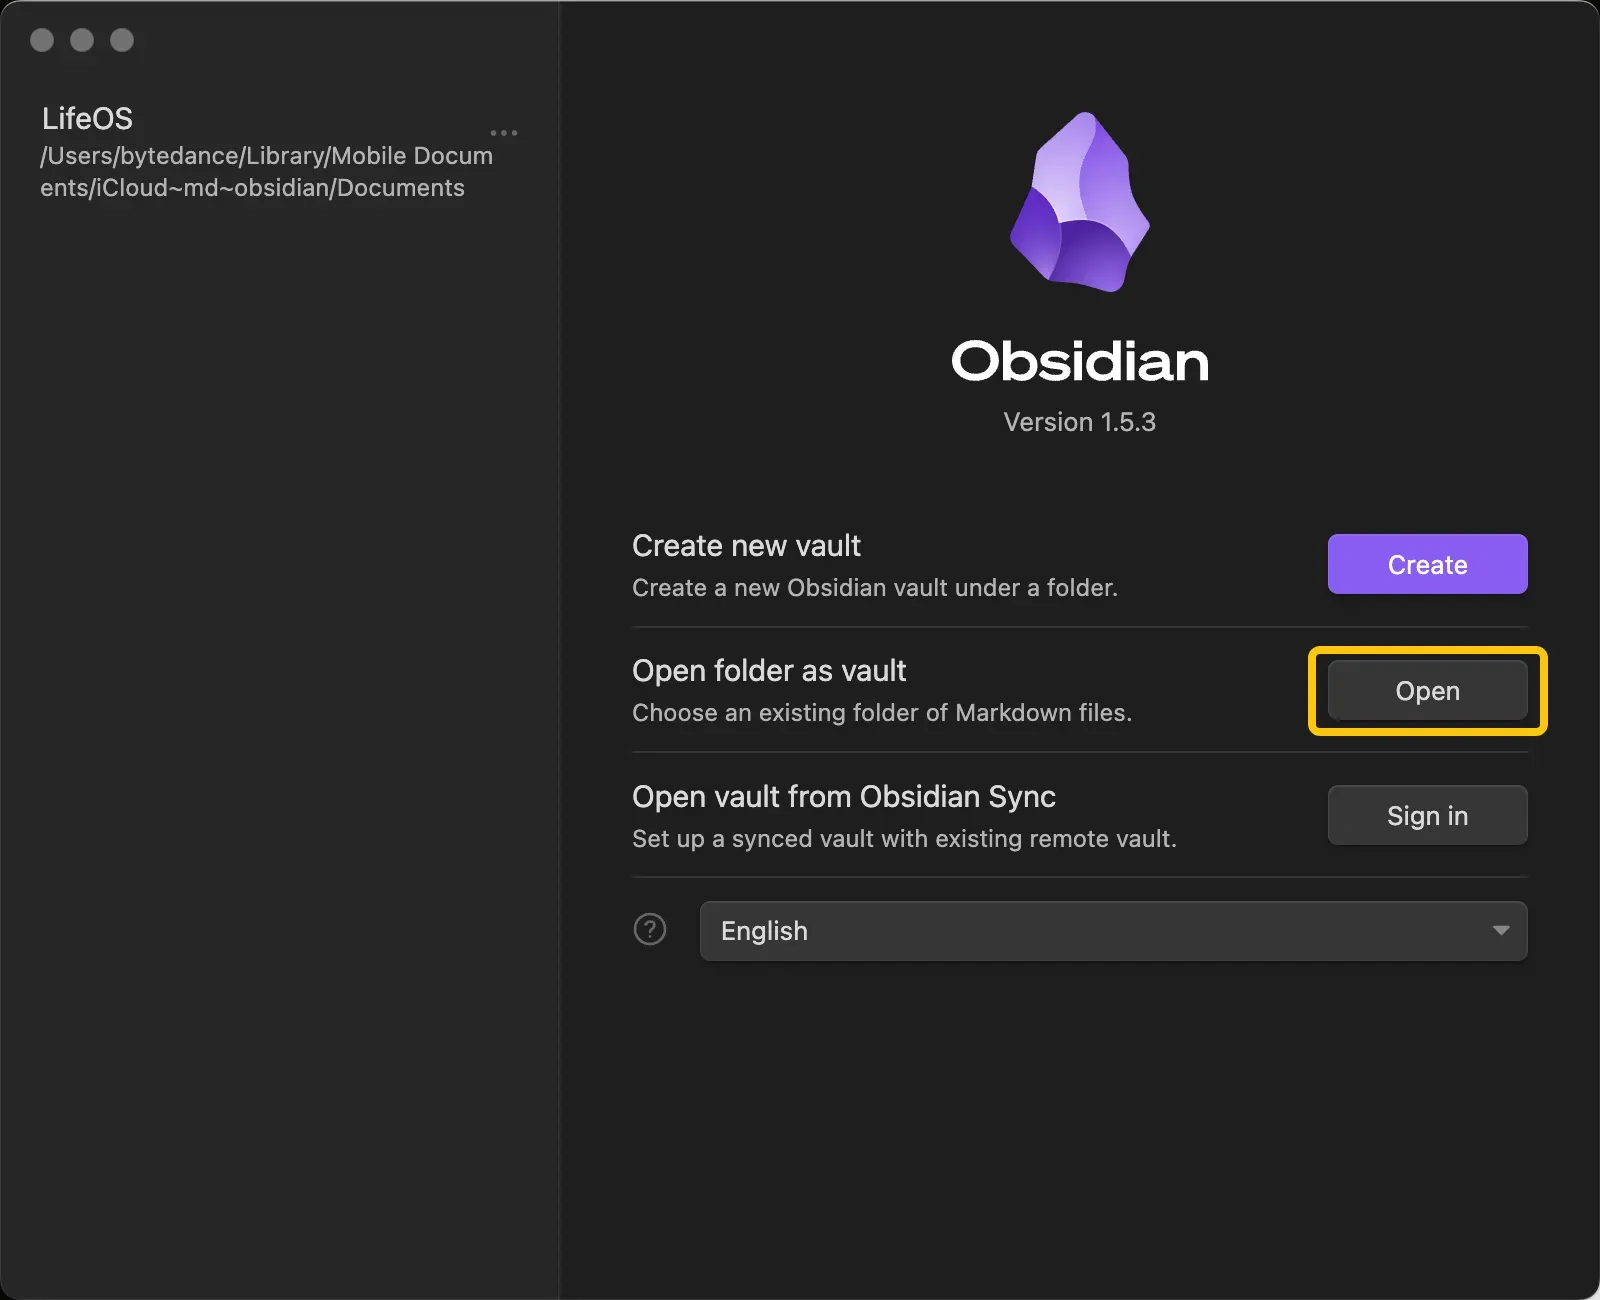
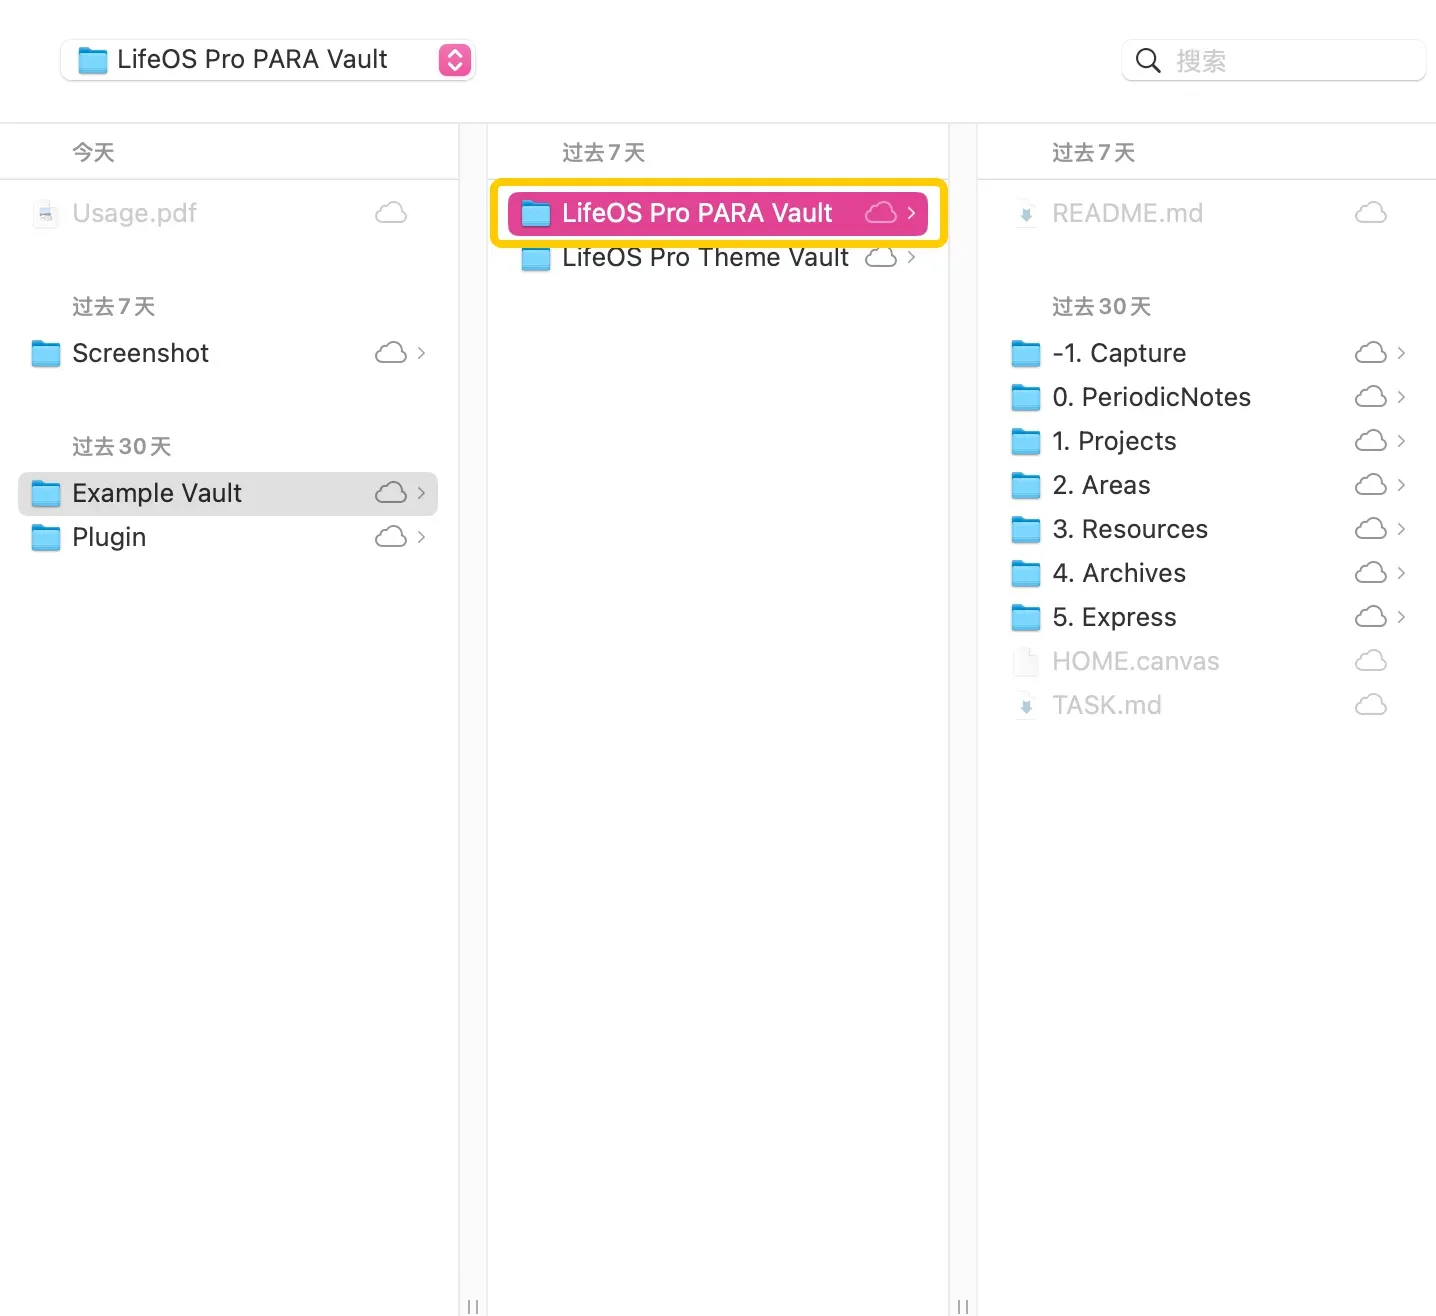
-
Open the LifeOS Pro plugin configuration page in the 'third-party plugin'
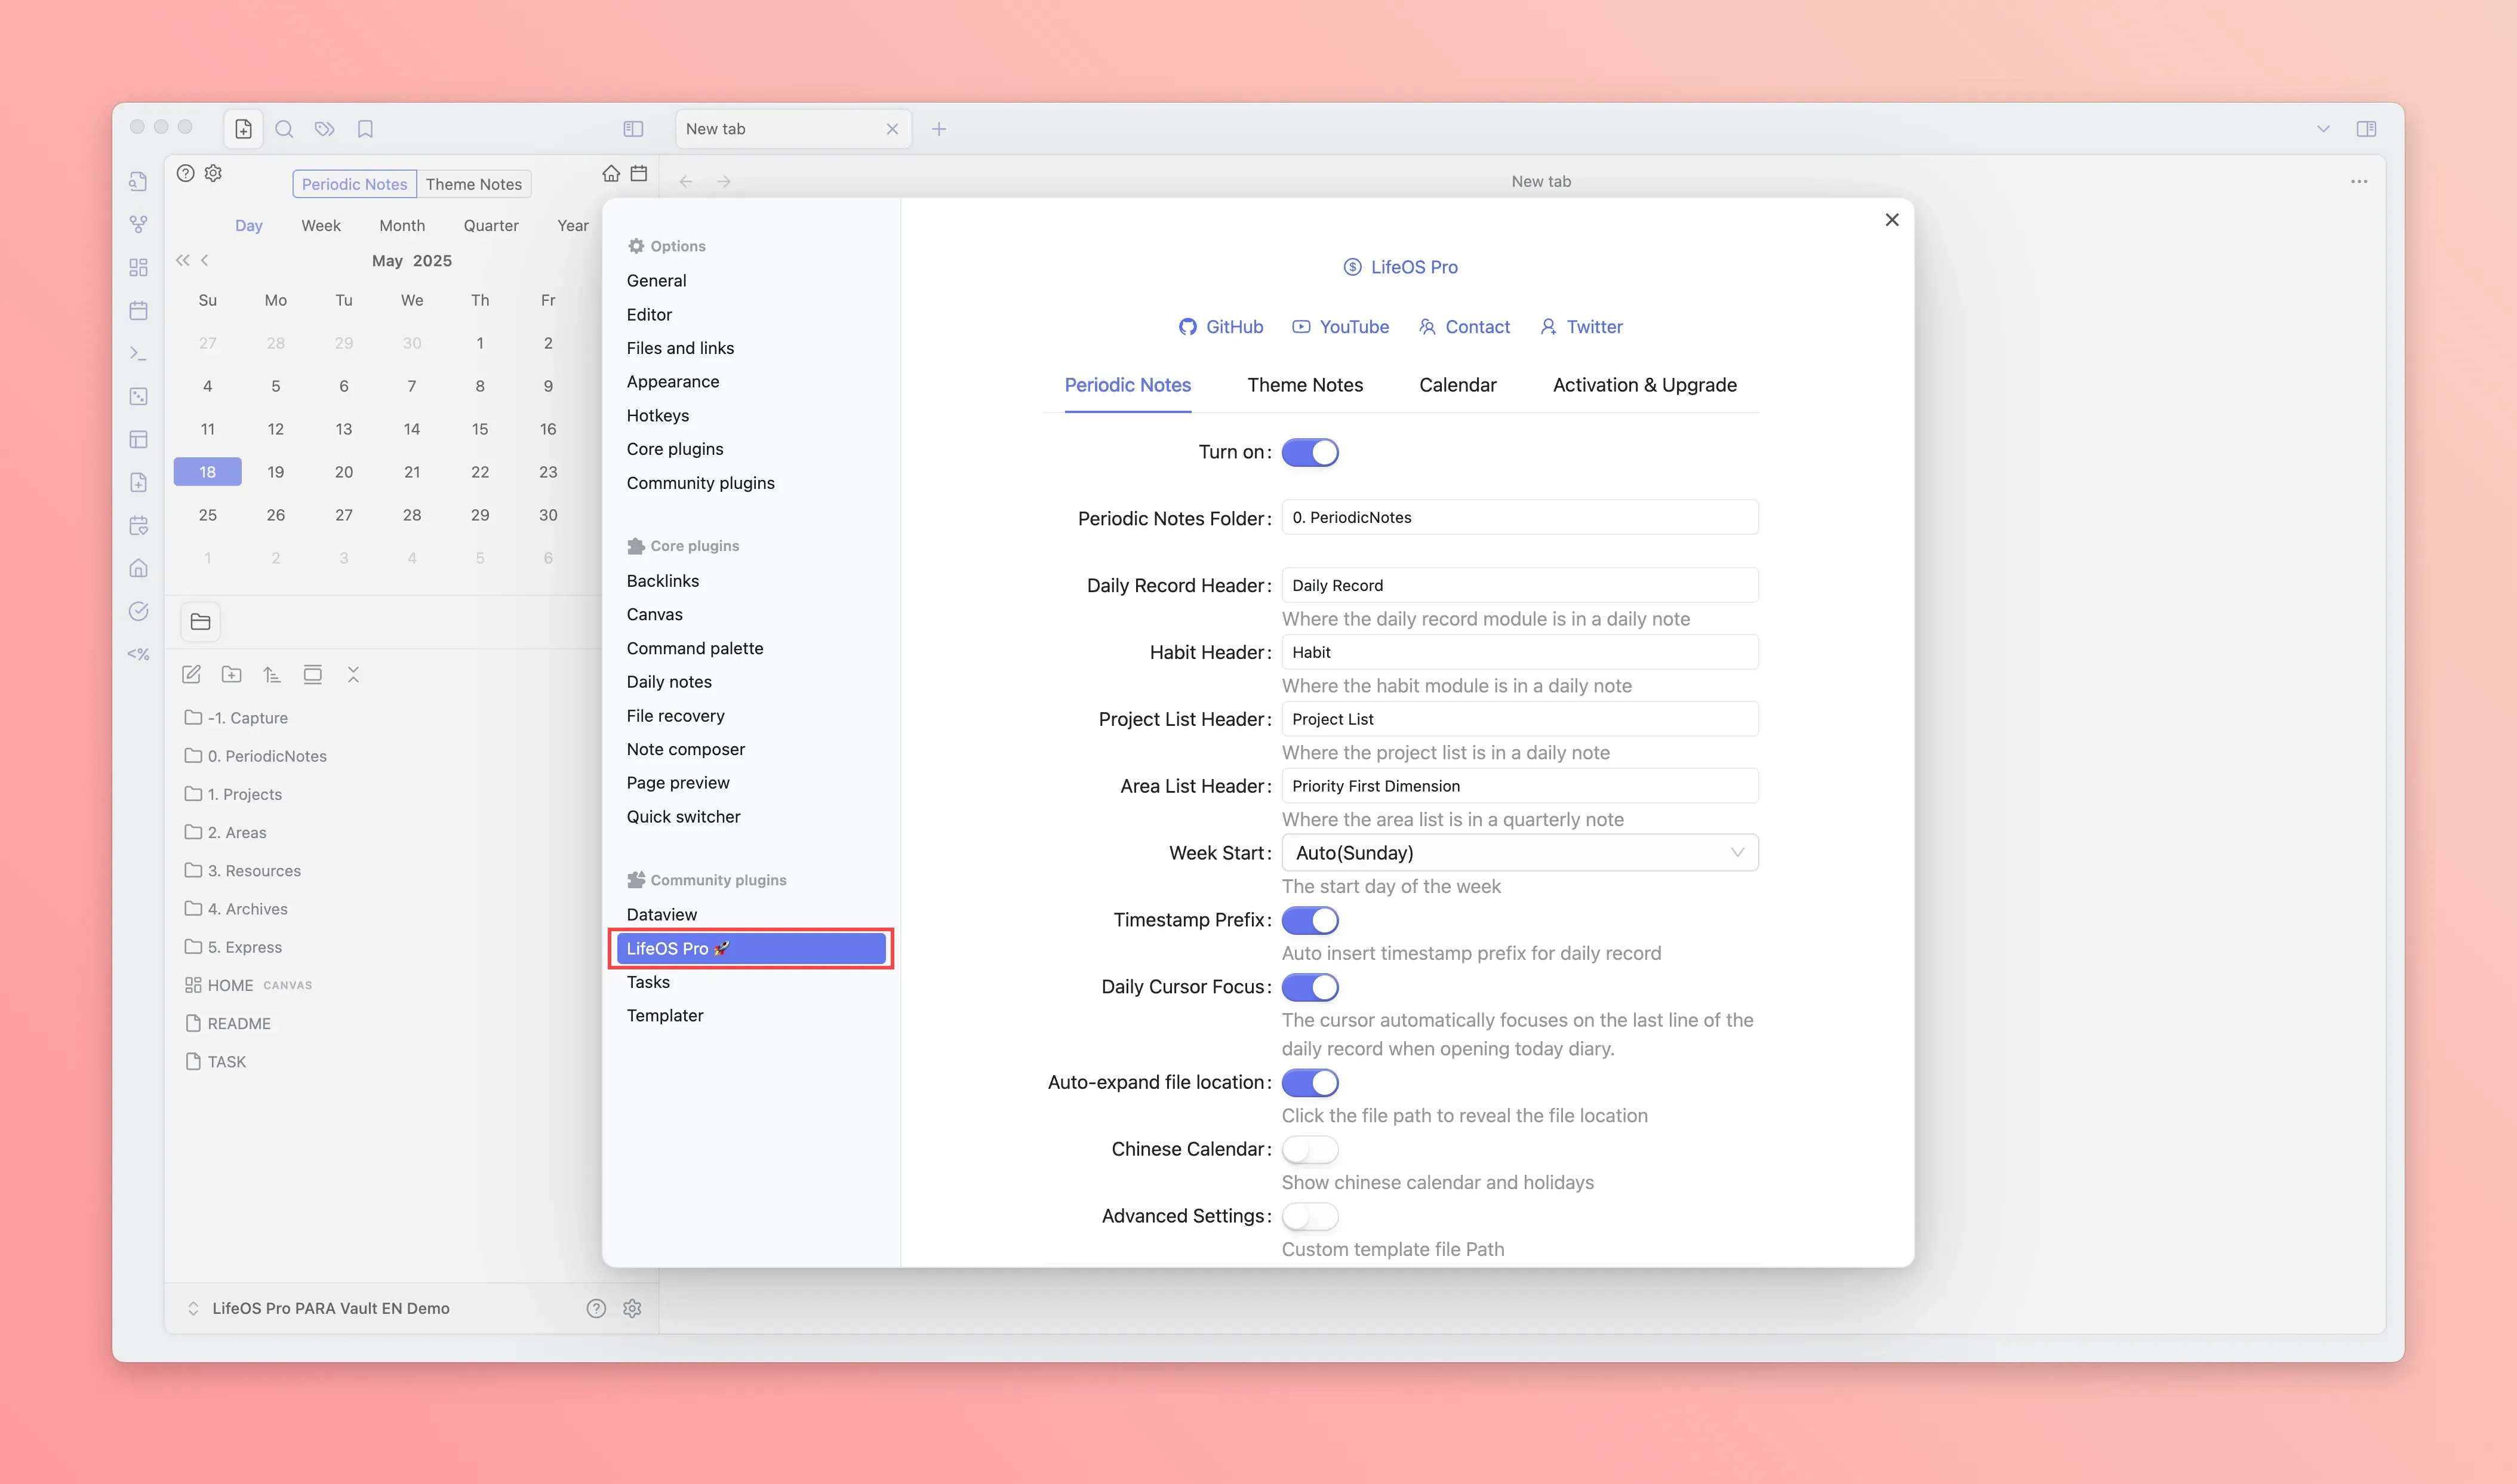
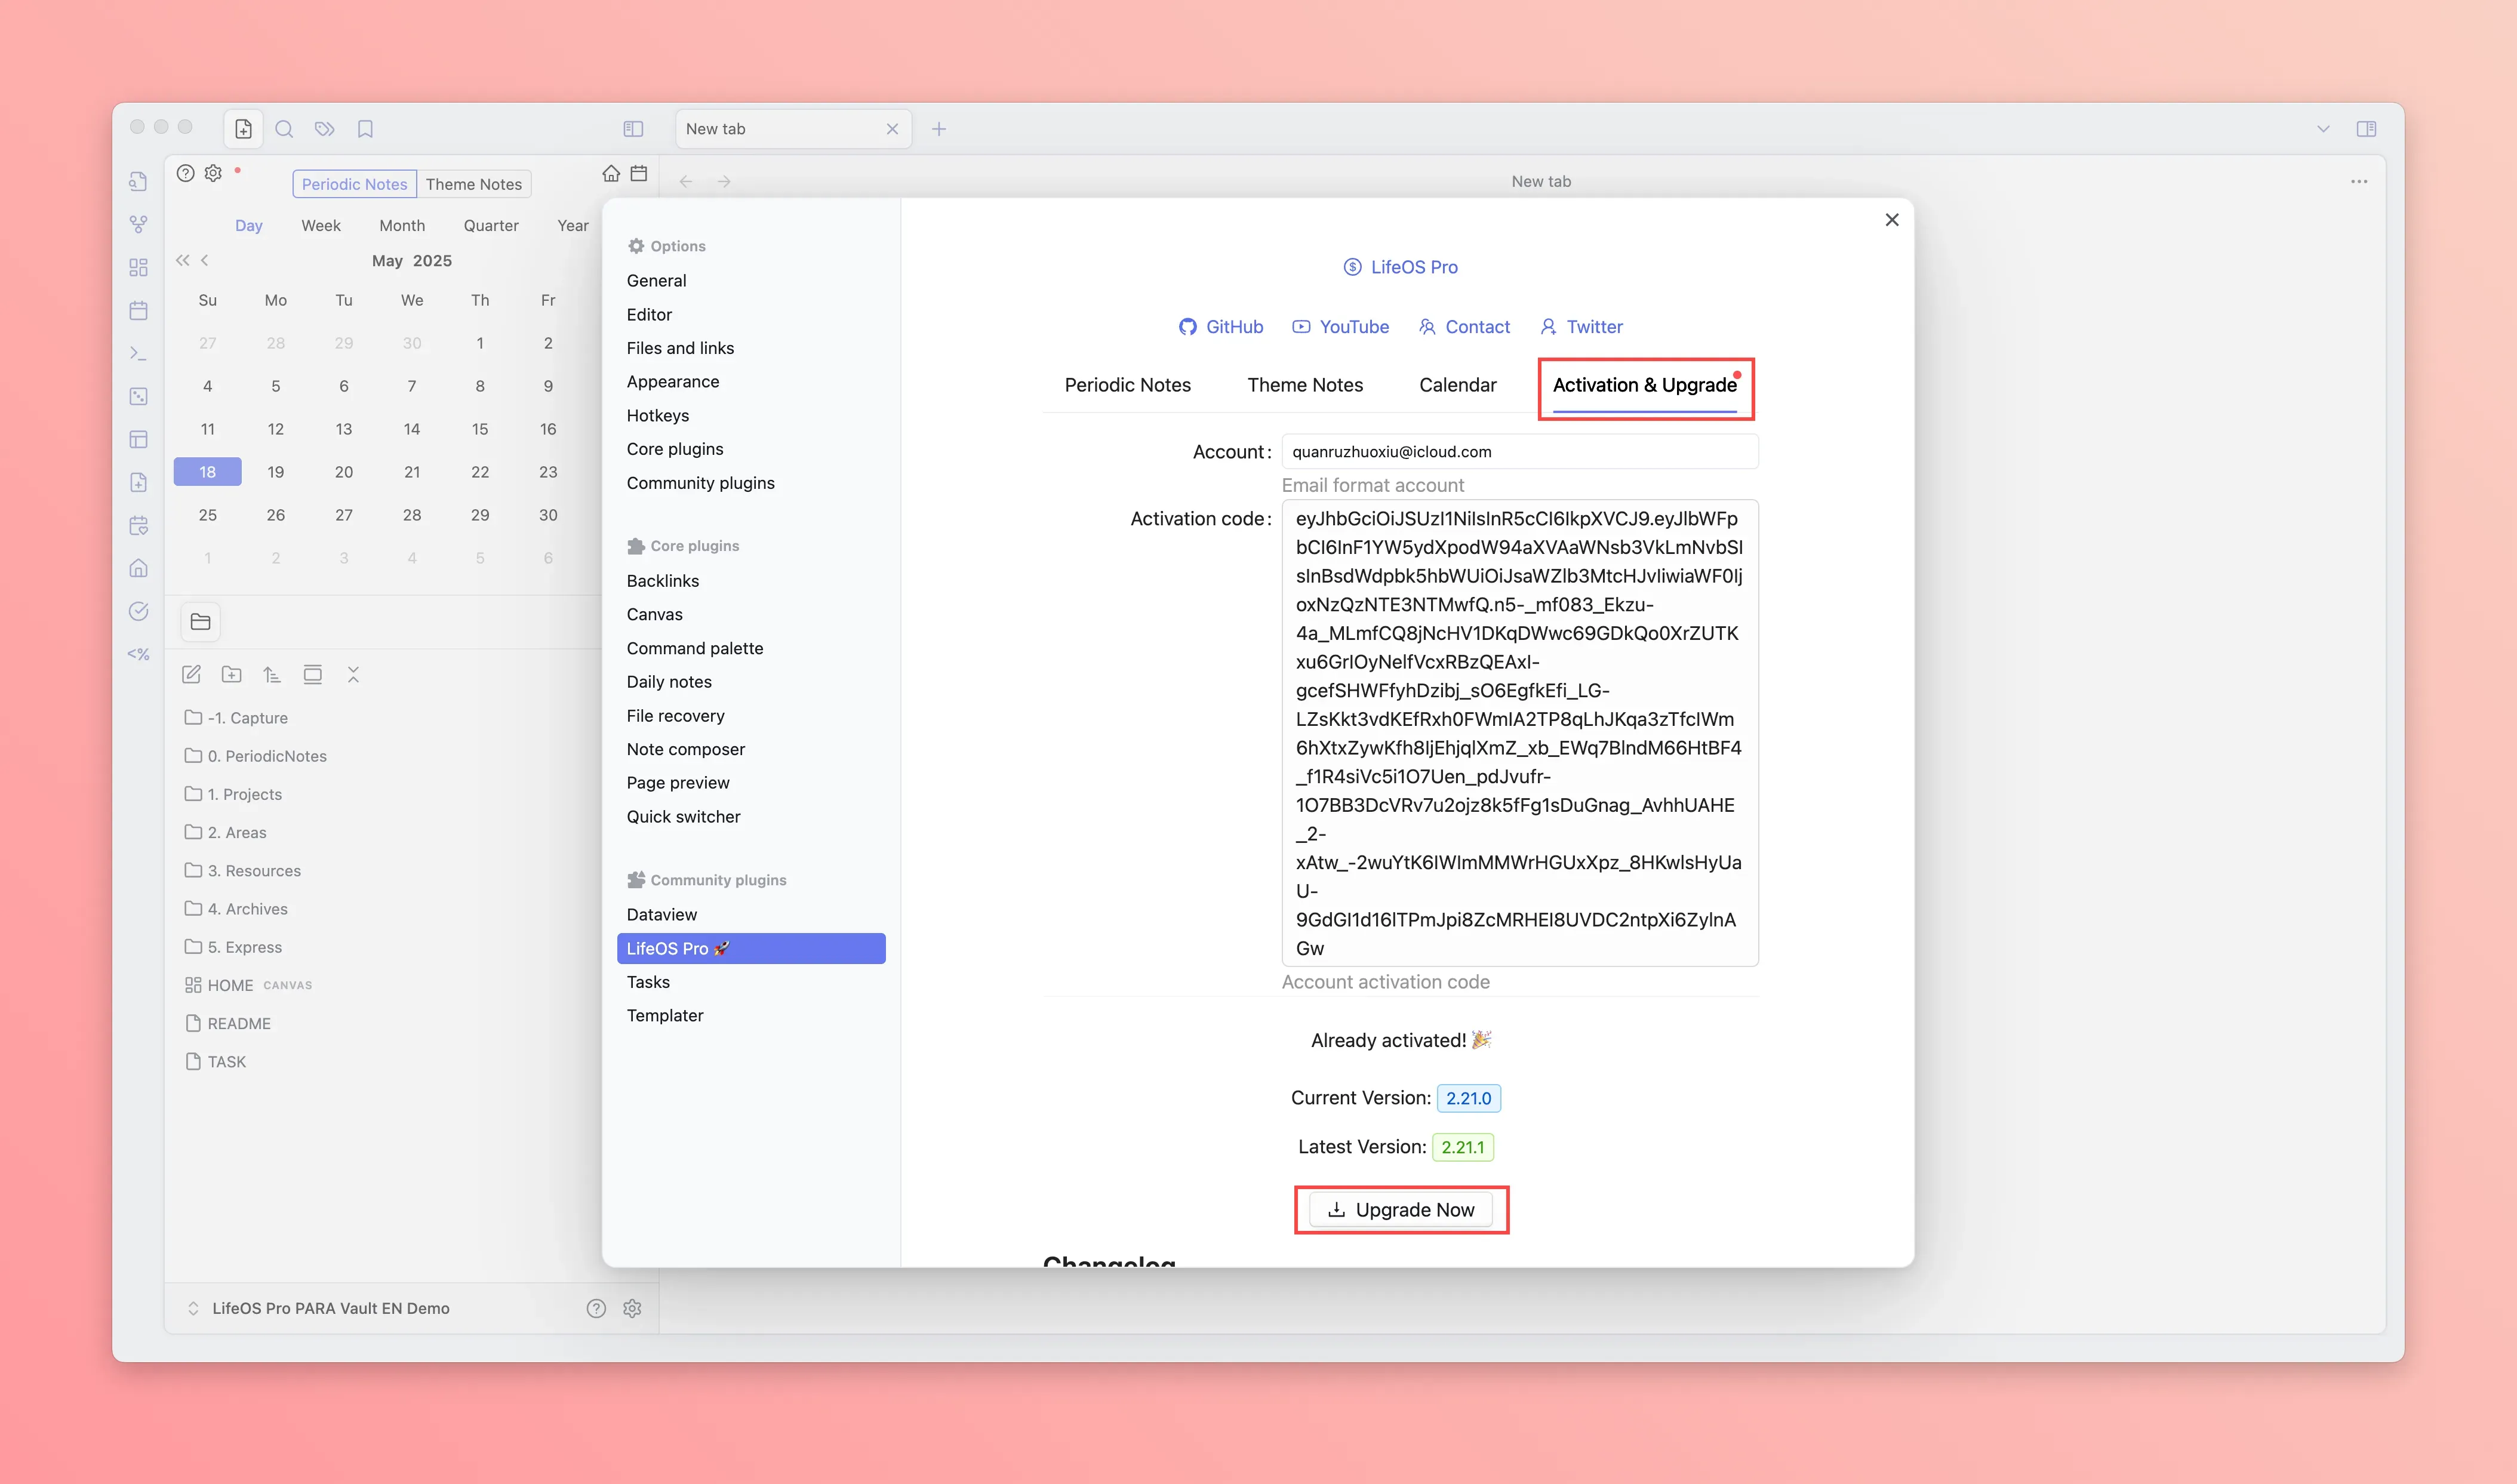
-
Restart Obsidian
-
The left sidebar will show the 'calendar', 'home', 'file new' icons, click to experience
-
Go to Pro Version to view more usage instructions
After learning the workflow, do not manually erase the sample content. Open the matching LifeOS Pro Memos Blank Vault, LifeOS Pro IPO Blank Vault, LifeOS Pro GTD Blank Vault, LifeOS Pro PARA Blank Vault, or OPC LifeOS Blank Vault as your own main vault. Blank vaults do not duplicate plugin binaries; if the plugins are not installed yet, copy them from the complete package's top-level Plugin/ folder into .obsidian/plugins/.
Scenario 3: Use LifeOS Pro in an Existing Repository
- Copy
.obsidian/plugins/lifeos-profrom any LifeOS Pro example vault to the.obsidian/pluginsdirectory of your existing repository
.obsidian directory is a hidden folder, if you cannot see it, you need to display it through the following method
- MacBook: Use the shortcut key Command + Shift + .
- Windows: In the current folder, select "View > Show", then select "Hidden items" to view hidden files and folders
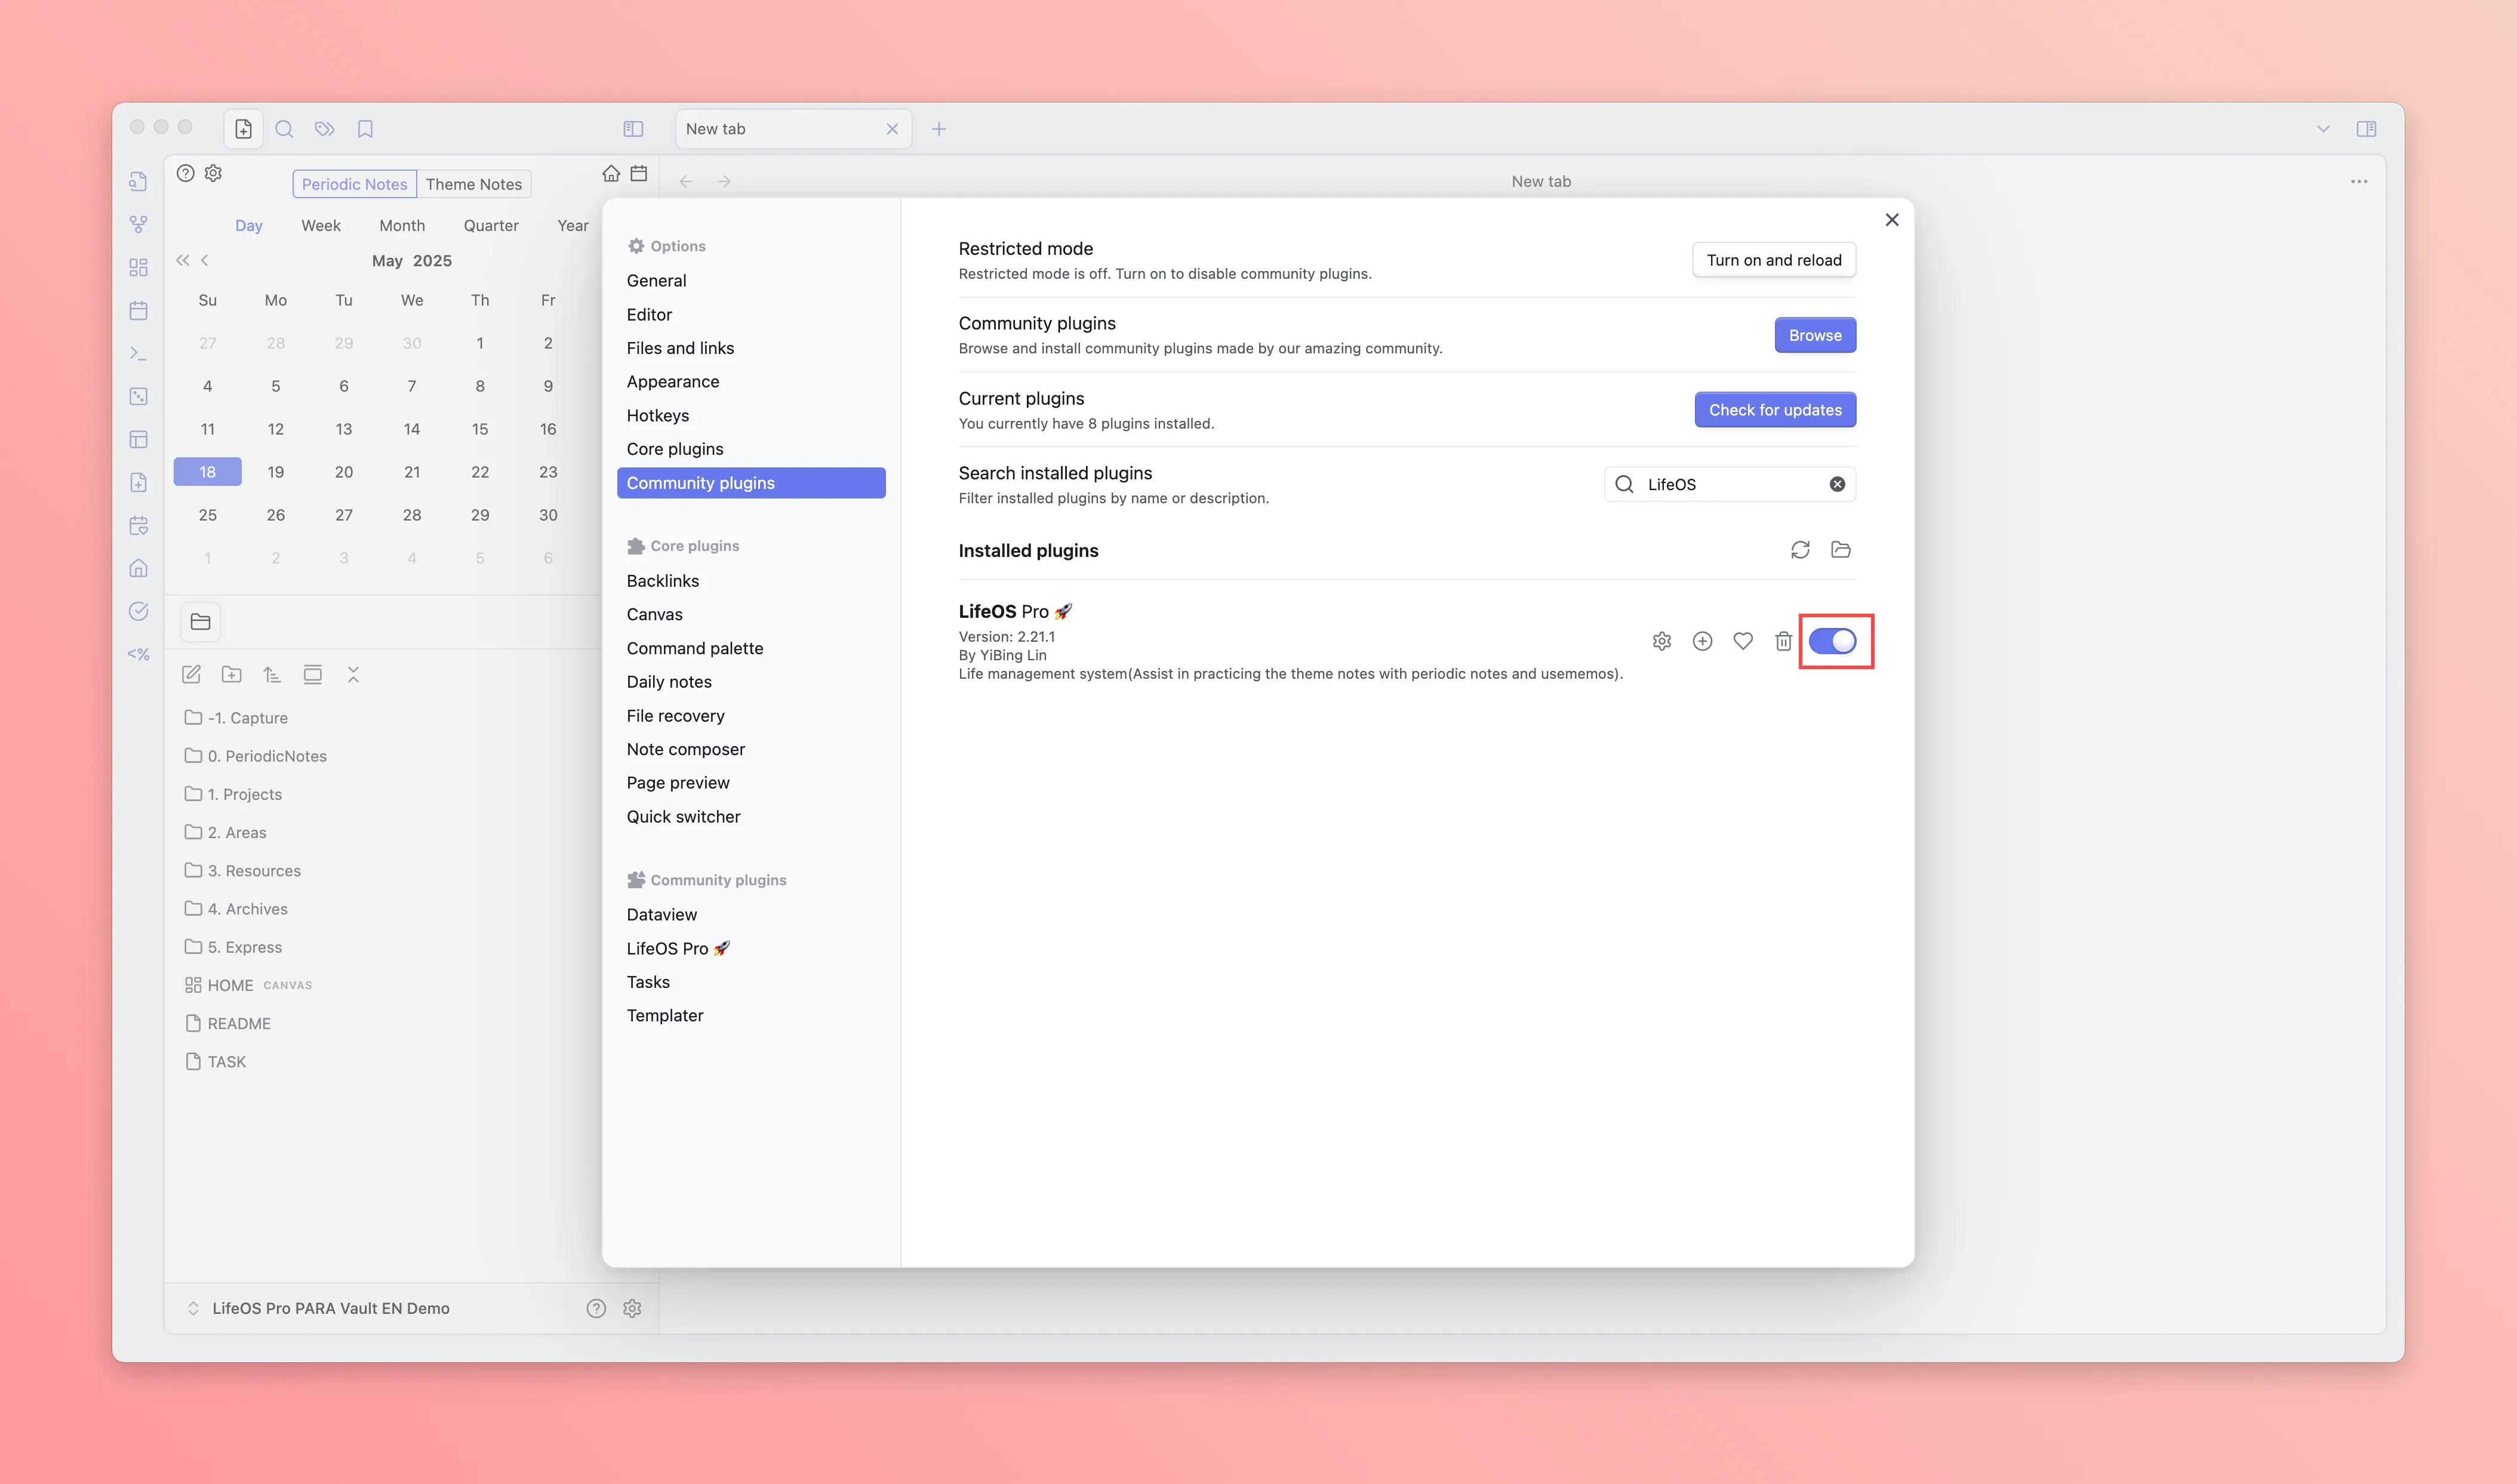
- Find LifeOS Pro in the third-party plugin list and enable it
-
Prefer opening the matching
Blank Vaultas a new main vault. If you must merge with an existing repository, copy.lifeos, templates, and the folder structure from the selected blank vault. PARA, IPO, GTD, and OPC use different structures, so choose only one instead of mixing them together. -
If you did not copy the full
.obsidiansettings, make sure the community plugins used by that example vault are installed and enabled. The GTD vault mainly relies on Tasks queries; older templates may still use Dataview or Templater. -
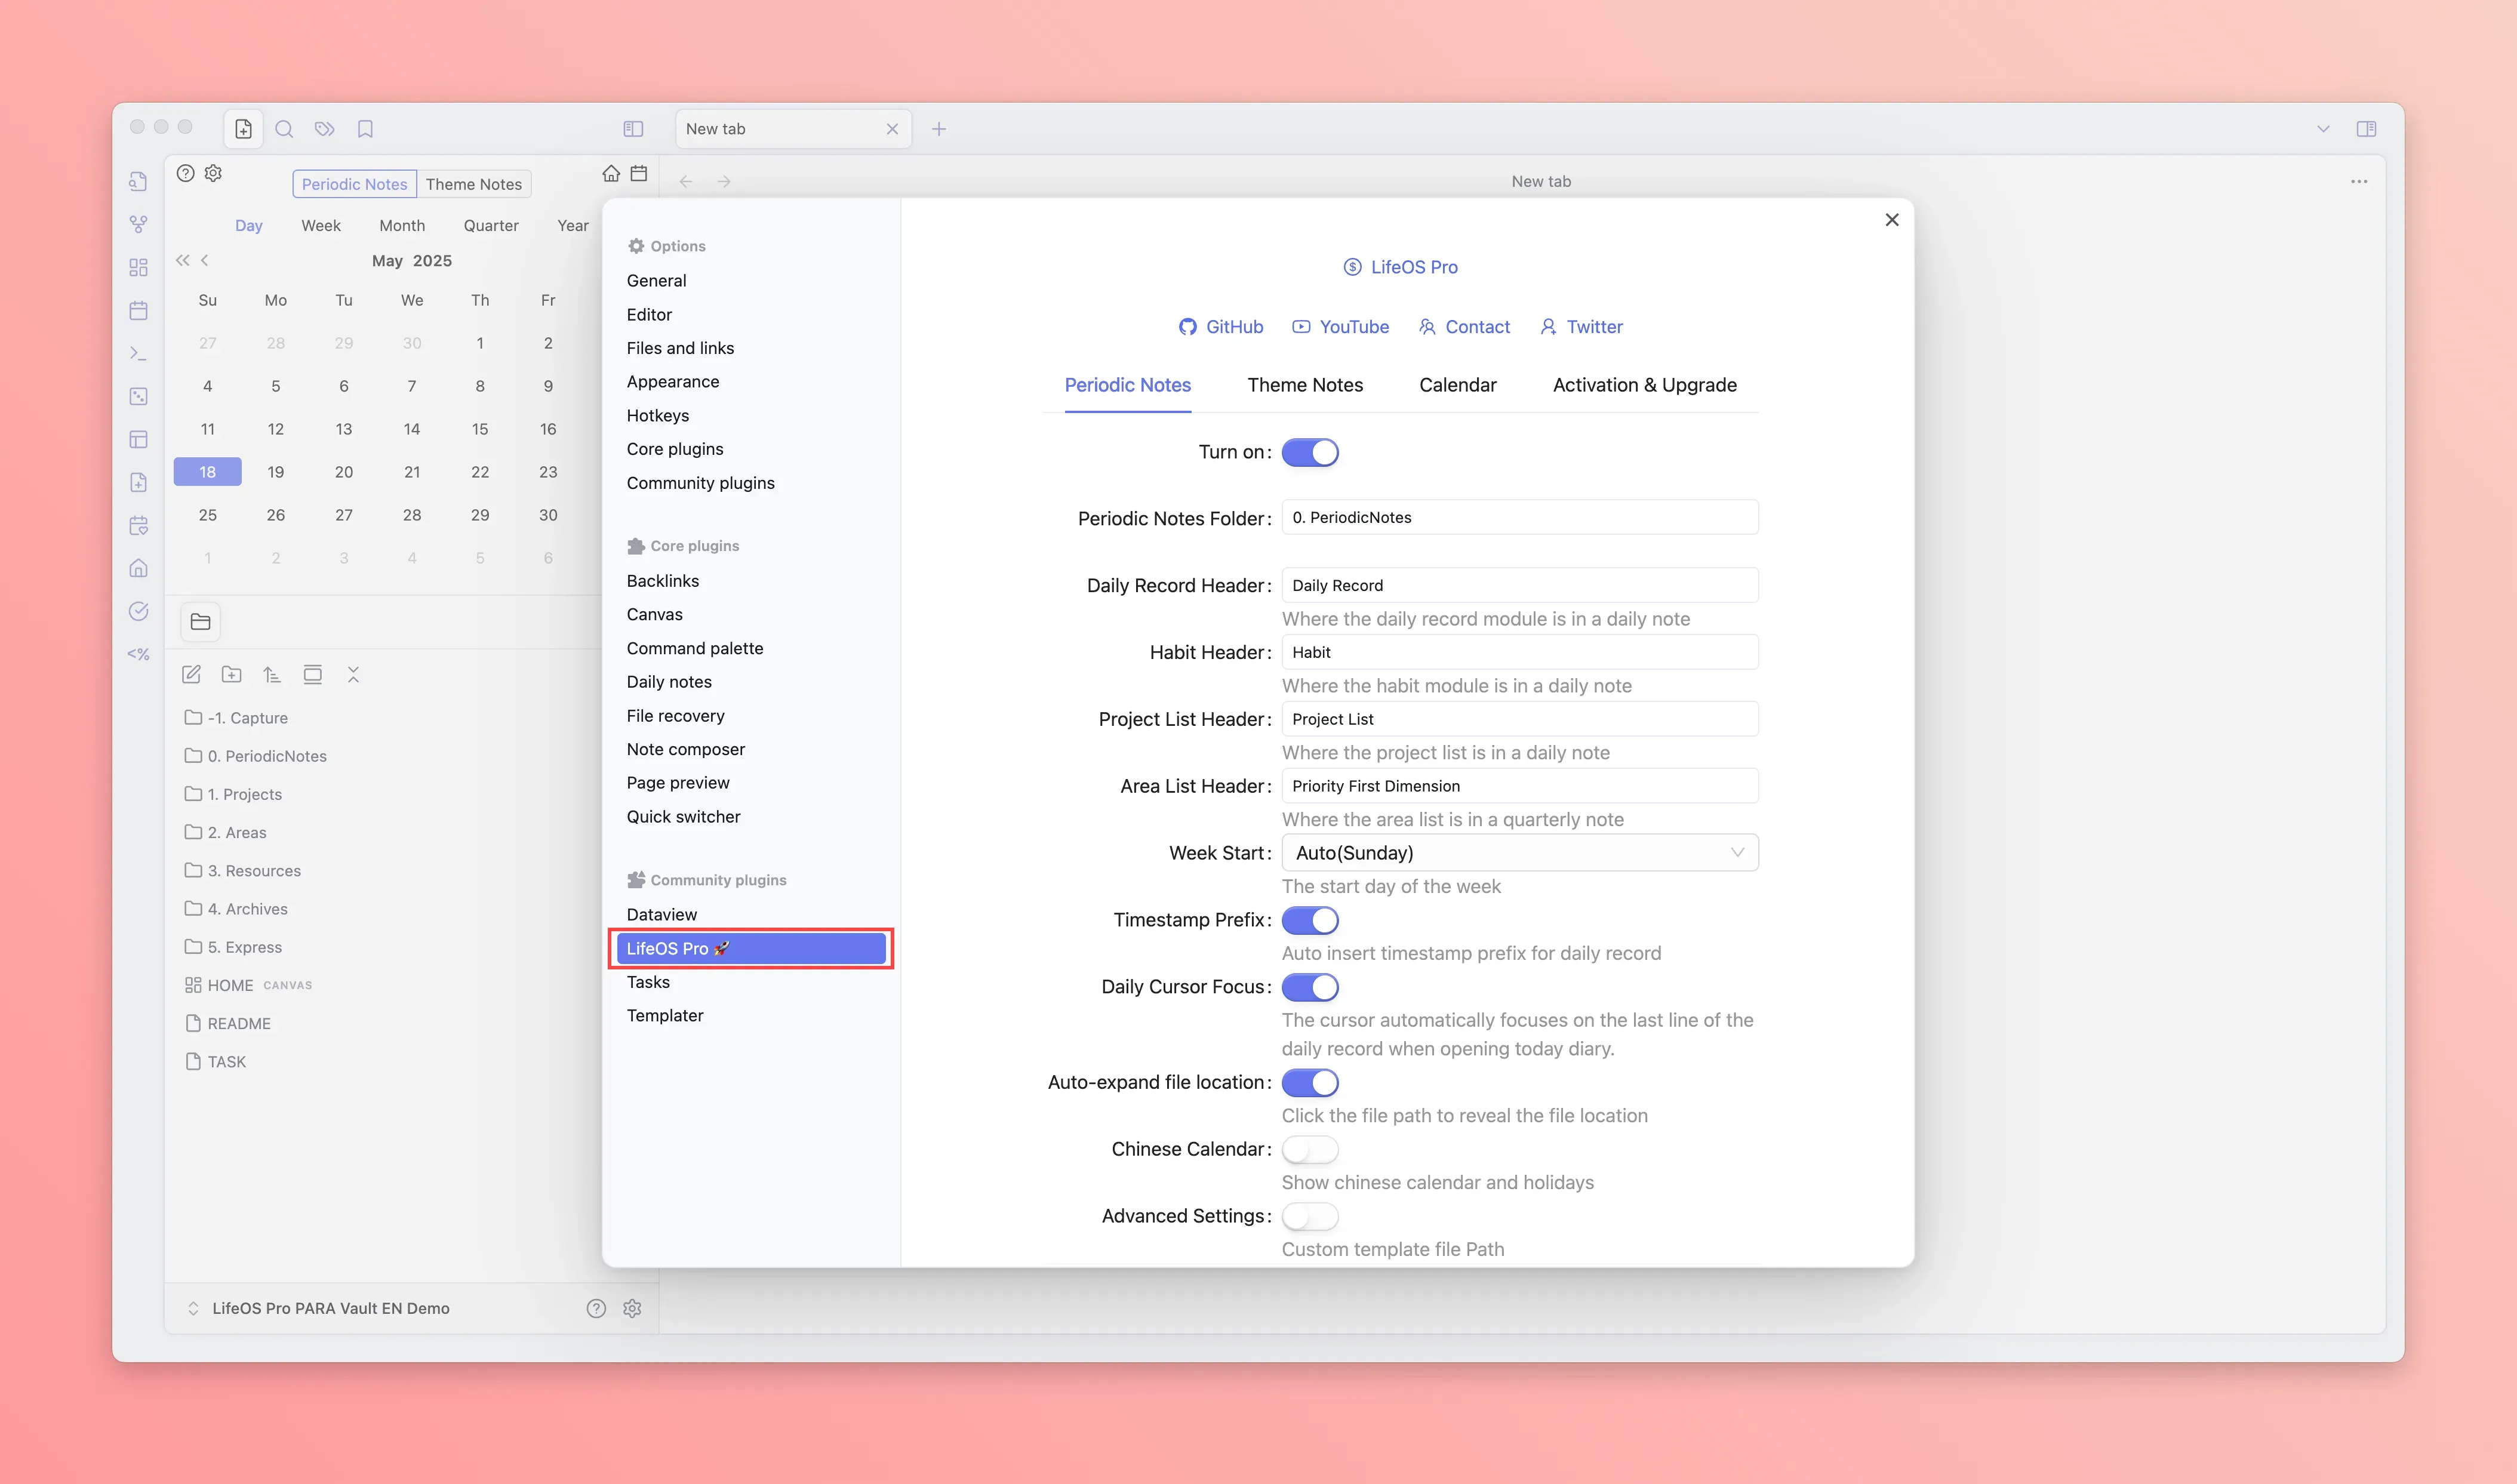
Open the LifeOS Pro plugin configuration page in the 'third-party plugin'
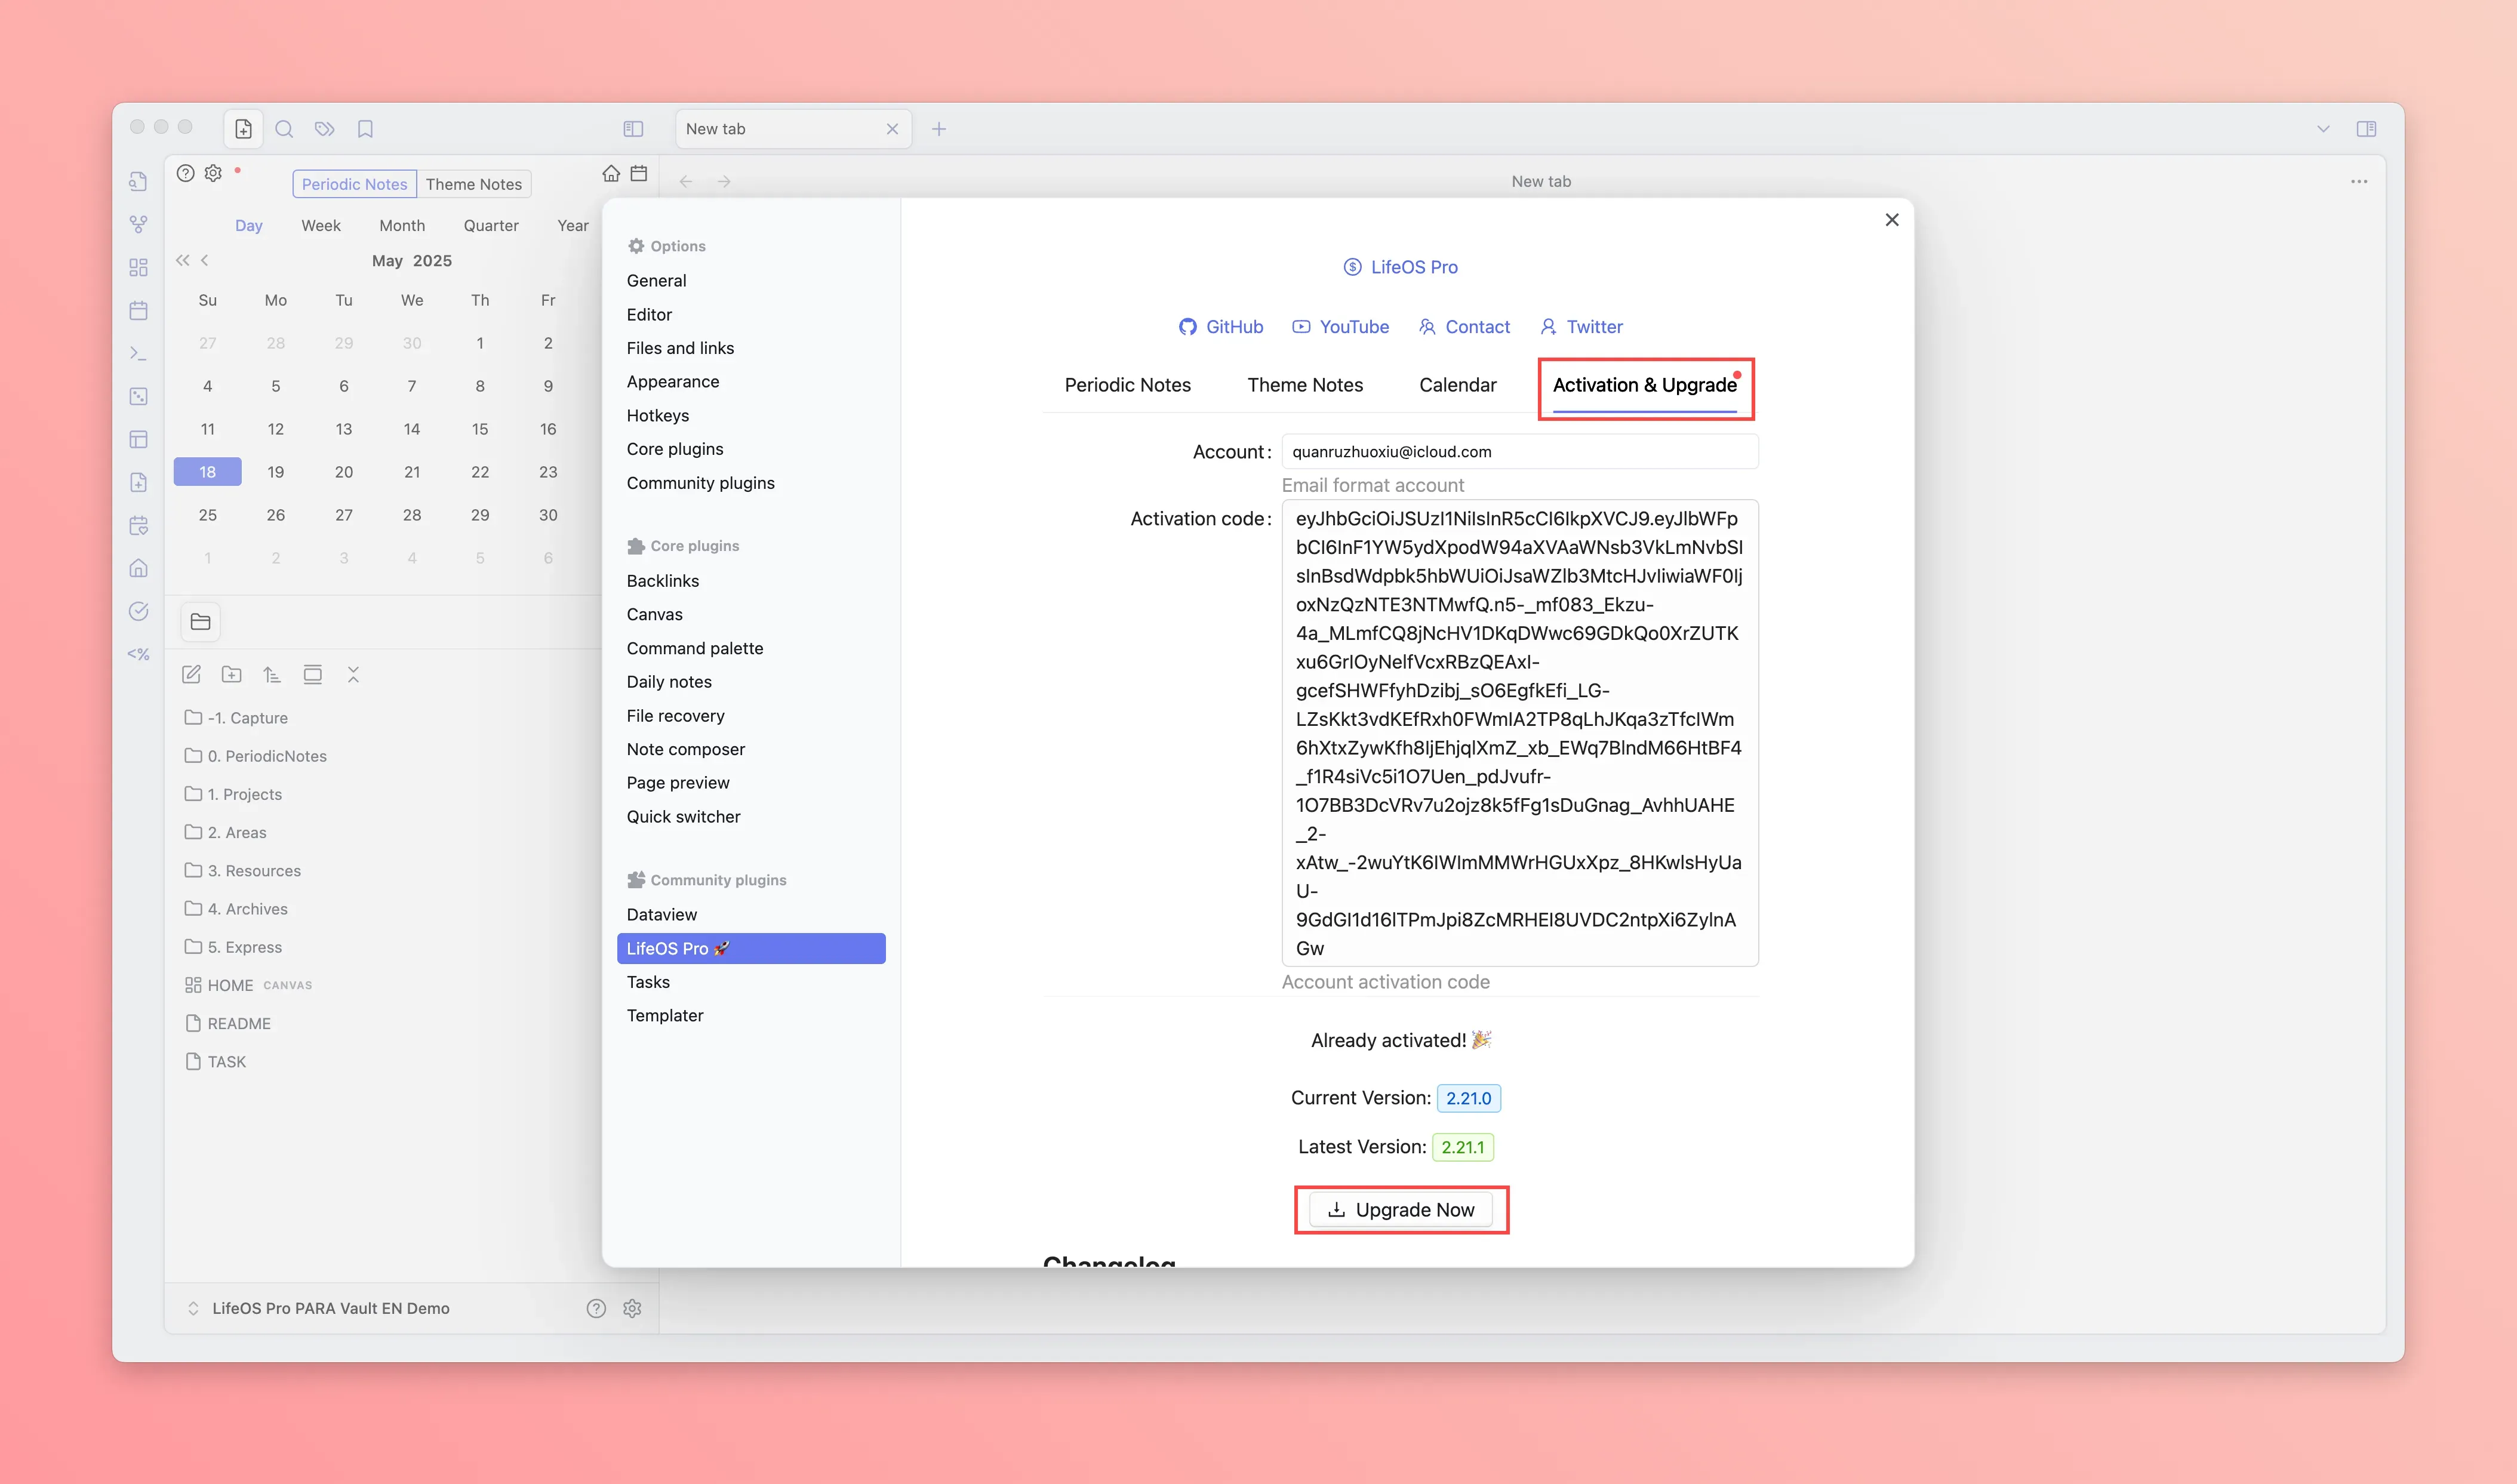
- Click the 'activate upgrade' panel, input the email and activation code (usually in the email you received), and click the 'upgrade now' button at the bottom to upgrade to the latest version of the plugin
-
Restart Obsidian
-
The left sidebar will show the 'calendar', 'home', 'file new' icons, click to experience
-
Go to Pro Version to view more usage instructions
Read next after setup
After installation, plugin activation, and the example vault check are done, read these case studies. They are not extra setup steps. They show how to use LifeOS Pro in daily work, projects, research, and reviews.
- A Day with Obsidian LifeOS — plan the morning, execute during the day, and close the loop
- Manage a Full Project with LifeOS Pro — use theme notes to hold project context
- A Research Workflow with Obsidian LifeOS — collect sources and turn them into output
- Make Obsidian Notes Askable with DeepAsk — connect AI after your notes are already working
- Run a Useful Weekly Review with LifeOS — bring daily notes, tasks, and projects back together
Next Step
Expand the left 'knowledge base directory', continue to read the current manual!
Reference Material
How to Migrate to LifeOS/Obsidian
See How to Migrate to LifeOS/Obsidian.
Main System and Sub System of LifeOS
See Main System and Sub System.