Calendar Subscription
LifeOS Pro supports multiple ways to subscribe to remote calendars, allowing you to centrally manage all your schedules in Obsidian.
Subscription Methods Comparison
Import from CalDAV Account
Subscribe to iCloud Calendar (Two-way Sync)
iCloud Calendar supports two-way sync: not only can you view iCloud calendar events in Obsidian, but you can also push tasks from Obsidian to iCloud Calendar, enabling reminders on iOS, Android, macOS, Windows, Linux, and other platforms.
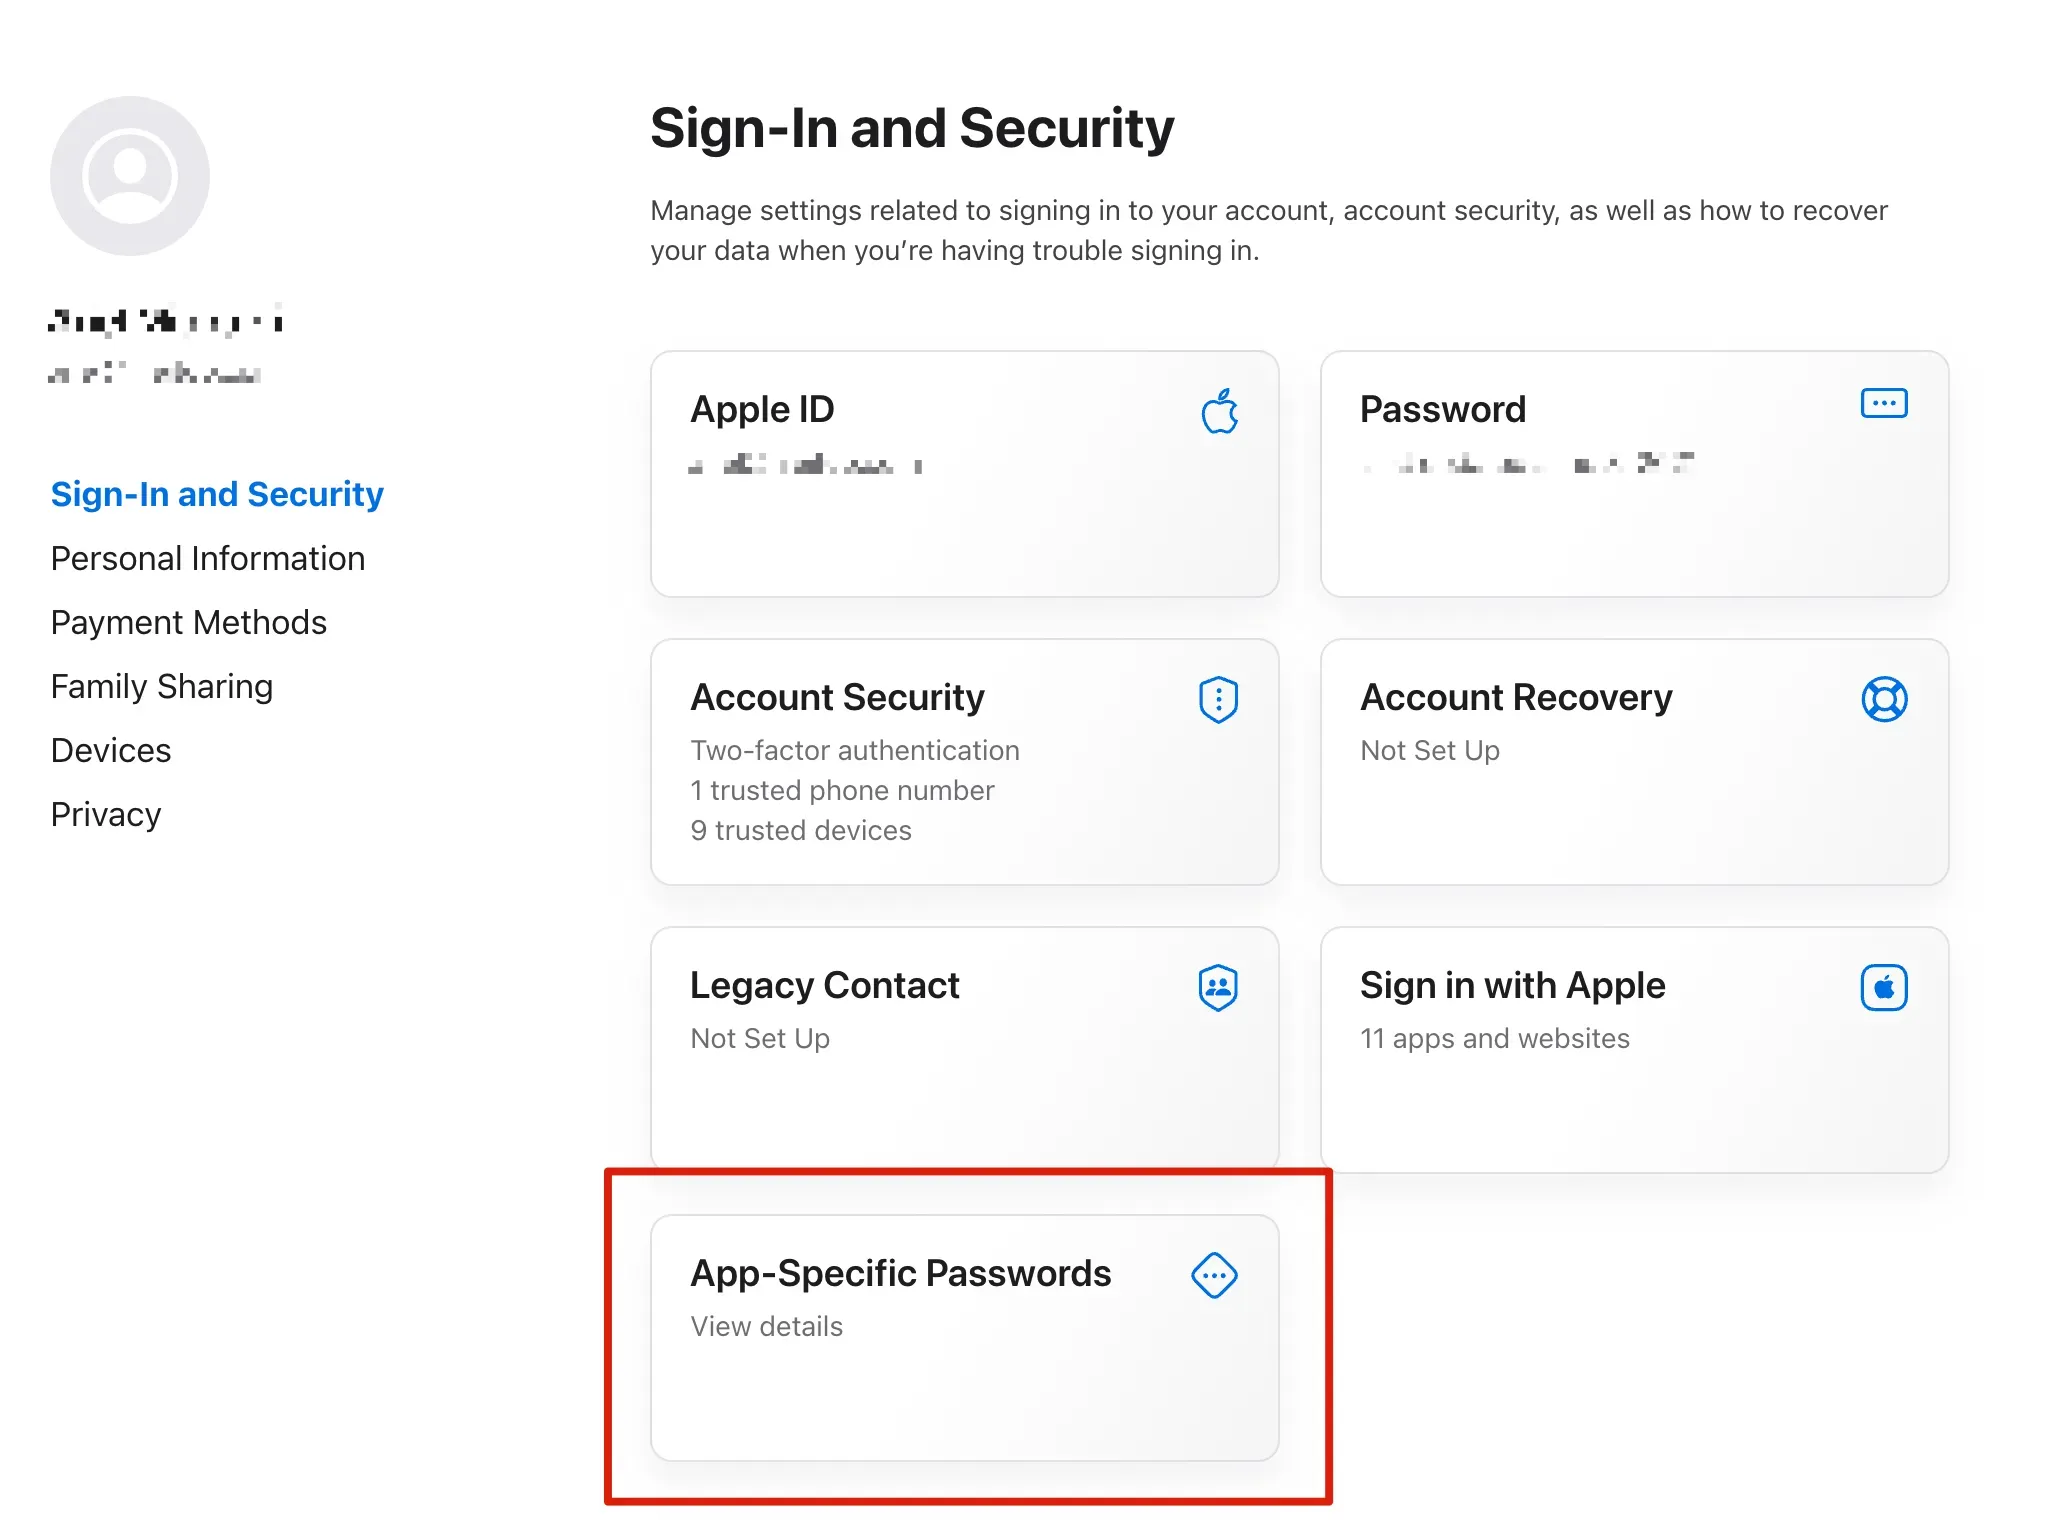
Step 1: Get App-Specific Password
- Visit https://icloud.com, after login, open https://account.apple.com/account/manage
- Click to generate an "App-Specific Password". You need to name the password first, for example, "Calendar"
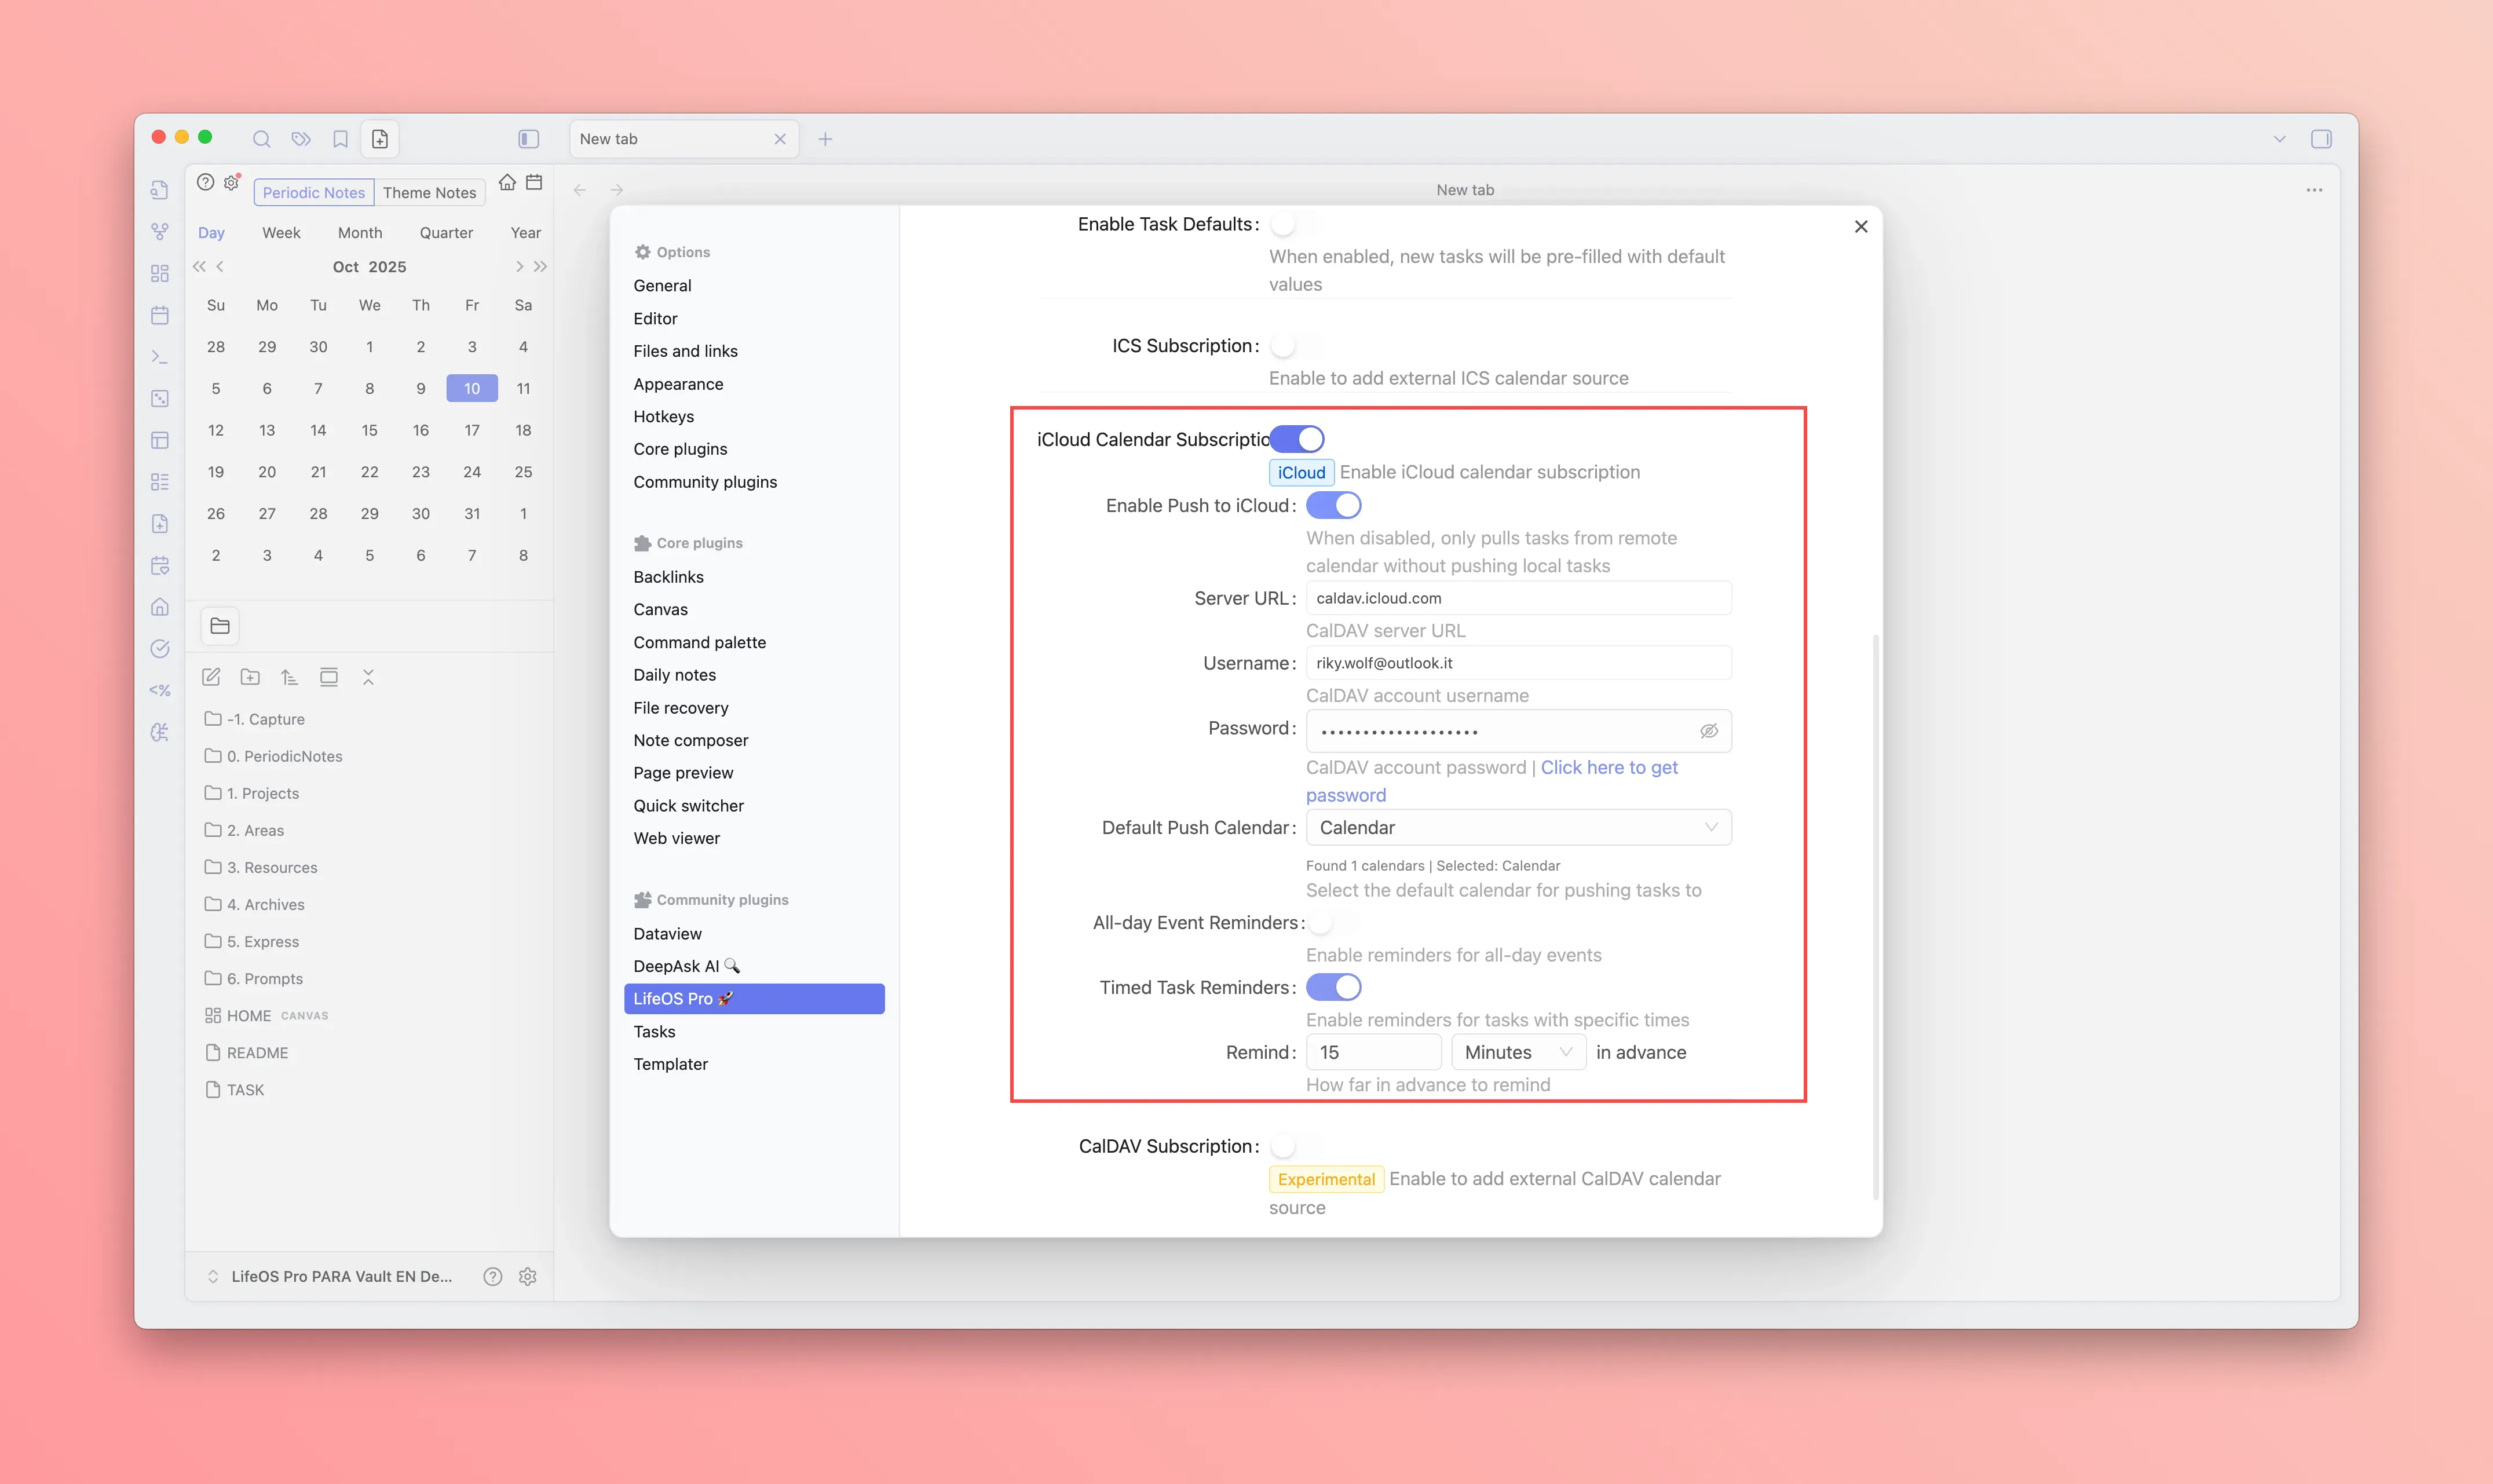
Step 2: Configure iCloud Calendar
- In the calendar configuration page of the LifeOS Pro plugin settings, enable "iCloud Calendar Subscription"
- Enter your Apple ID (username) and the app-specific password generated in the previous step
- Enter
caldav.icloud.comfor the server address - The plugin will automatically fetch your iCloud calendar list, select the default push calendar
iCloud Sync Features
- Enable Push to iCloud: When enabled, local tasks can be pushed to iCloud Calendar; when disabled, only pulls tasks from remote without pushing local tasks
- Delete Completed Tasks: When enabled, completed and cancelled tasks will be automatically deleted from iCloud Calendar
- Reminder Settings: Configure reminders separately for all-day events and timed tasks
- All-day event reminders: Set how many days in advance and the specific reminder time
- Timed task reminders: Set how many minutes/hours/days/weeks in advance to remind
Subscribe to Google Calendar (Two-way Sync)
Google Calendar supports two-way sync: not only can you view Google Calendar events in Obsidian, but you can also push tasks from Obsidian to Google Calendar, enabling reminders on Android, iOS, Web, and other platforms.
Step 1: Create Google Cloud OAuth Credentials
- Visit Google Cloud Console and sign in with your Google account
- Create a new project (or select an existing one)
- In the left menu, click "APIs & Services" → "Enabled APIs & services"
- Click "+ ENABLE APIS AND SERVICES", search for and enable CalDAV API
- In the left menu, click "Credentials" → "+ CREATE CREDENTIALS" → "OAuth client ID"
- Select "Desktop app" for application type
- Enter "LifeOS" or any name you prefer
- After creation, copy the generated "Client ID" and "Client secret"
Step 2: Configure Google Calendar
- In the calendar configuration page of the LifeOS Pro plugin settings, enable "Google Calendar Subscription"
- Enter the "Client ID" and "Client Secret" obtained in the previous step
- Click the "Connect" button, and a browser will open the Google authorization page
- If you see "This app isn't verified" warning, click "Advanced" → "Go to LifeOS (unsafe)" to continue authorization
- After successful authorization, click the "Refresh" button to fetch the calendar list, and select the default push calendar
Google Sync Features
- Delete Completed Tasks: When enabled, completed and cancelled tasks will be automatically deleted from Google Calendar
- Reminder Settings: Configure reminders separately for all-day events and timed tasks
- All-day event reminders: Set how many days in advance and the specific reminder time
- Timed task reminders: Set how many minutes/hours/days/weeks in advance to remind
Due to Google's strict verification process for third-party applications, personally created OAuth apps will display this warning. This is normal and you can safely proceed with authorization, as this is your own app that only accesses the calendar data you authorize.
Subscribe to CalDAV Calendar
CalDAV is a universal calendar sync protocol that allows you to view remote schedules in Obsidian. Some CalDAV services also support two-way sync (pushing tasks to remote calendars).
Supported platforms: Feishu, DingTalk, WeCom, Tencent Meeting, QQ Mail, etc.
Feishu CalDAV only supports one-way sync (read-only) and cannot push tasks to Feishu calendars via CalDAV protocol (PUT requests return 409 error). If you need phone reminders, please use iCloud Calendar, Google Calendar, or DingTalk Calendar as your "Default Write Calendar".
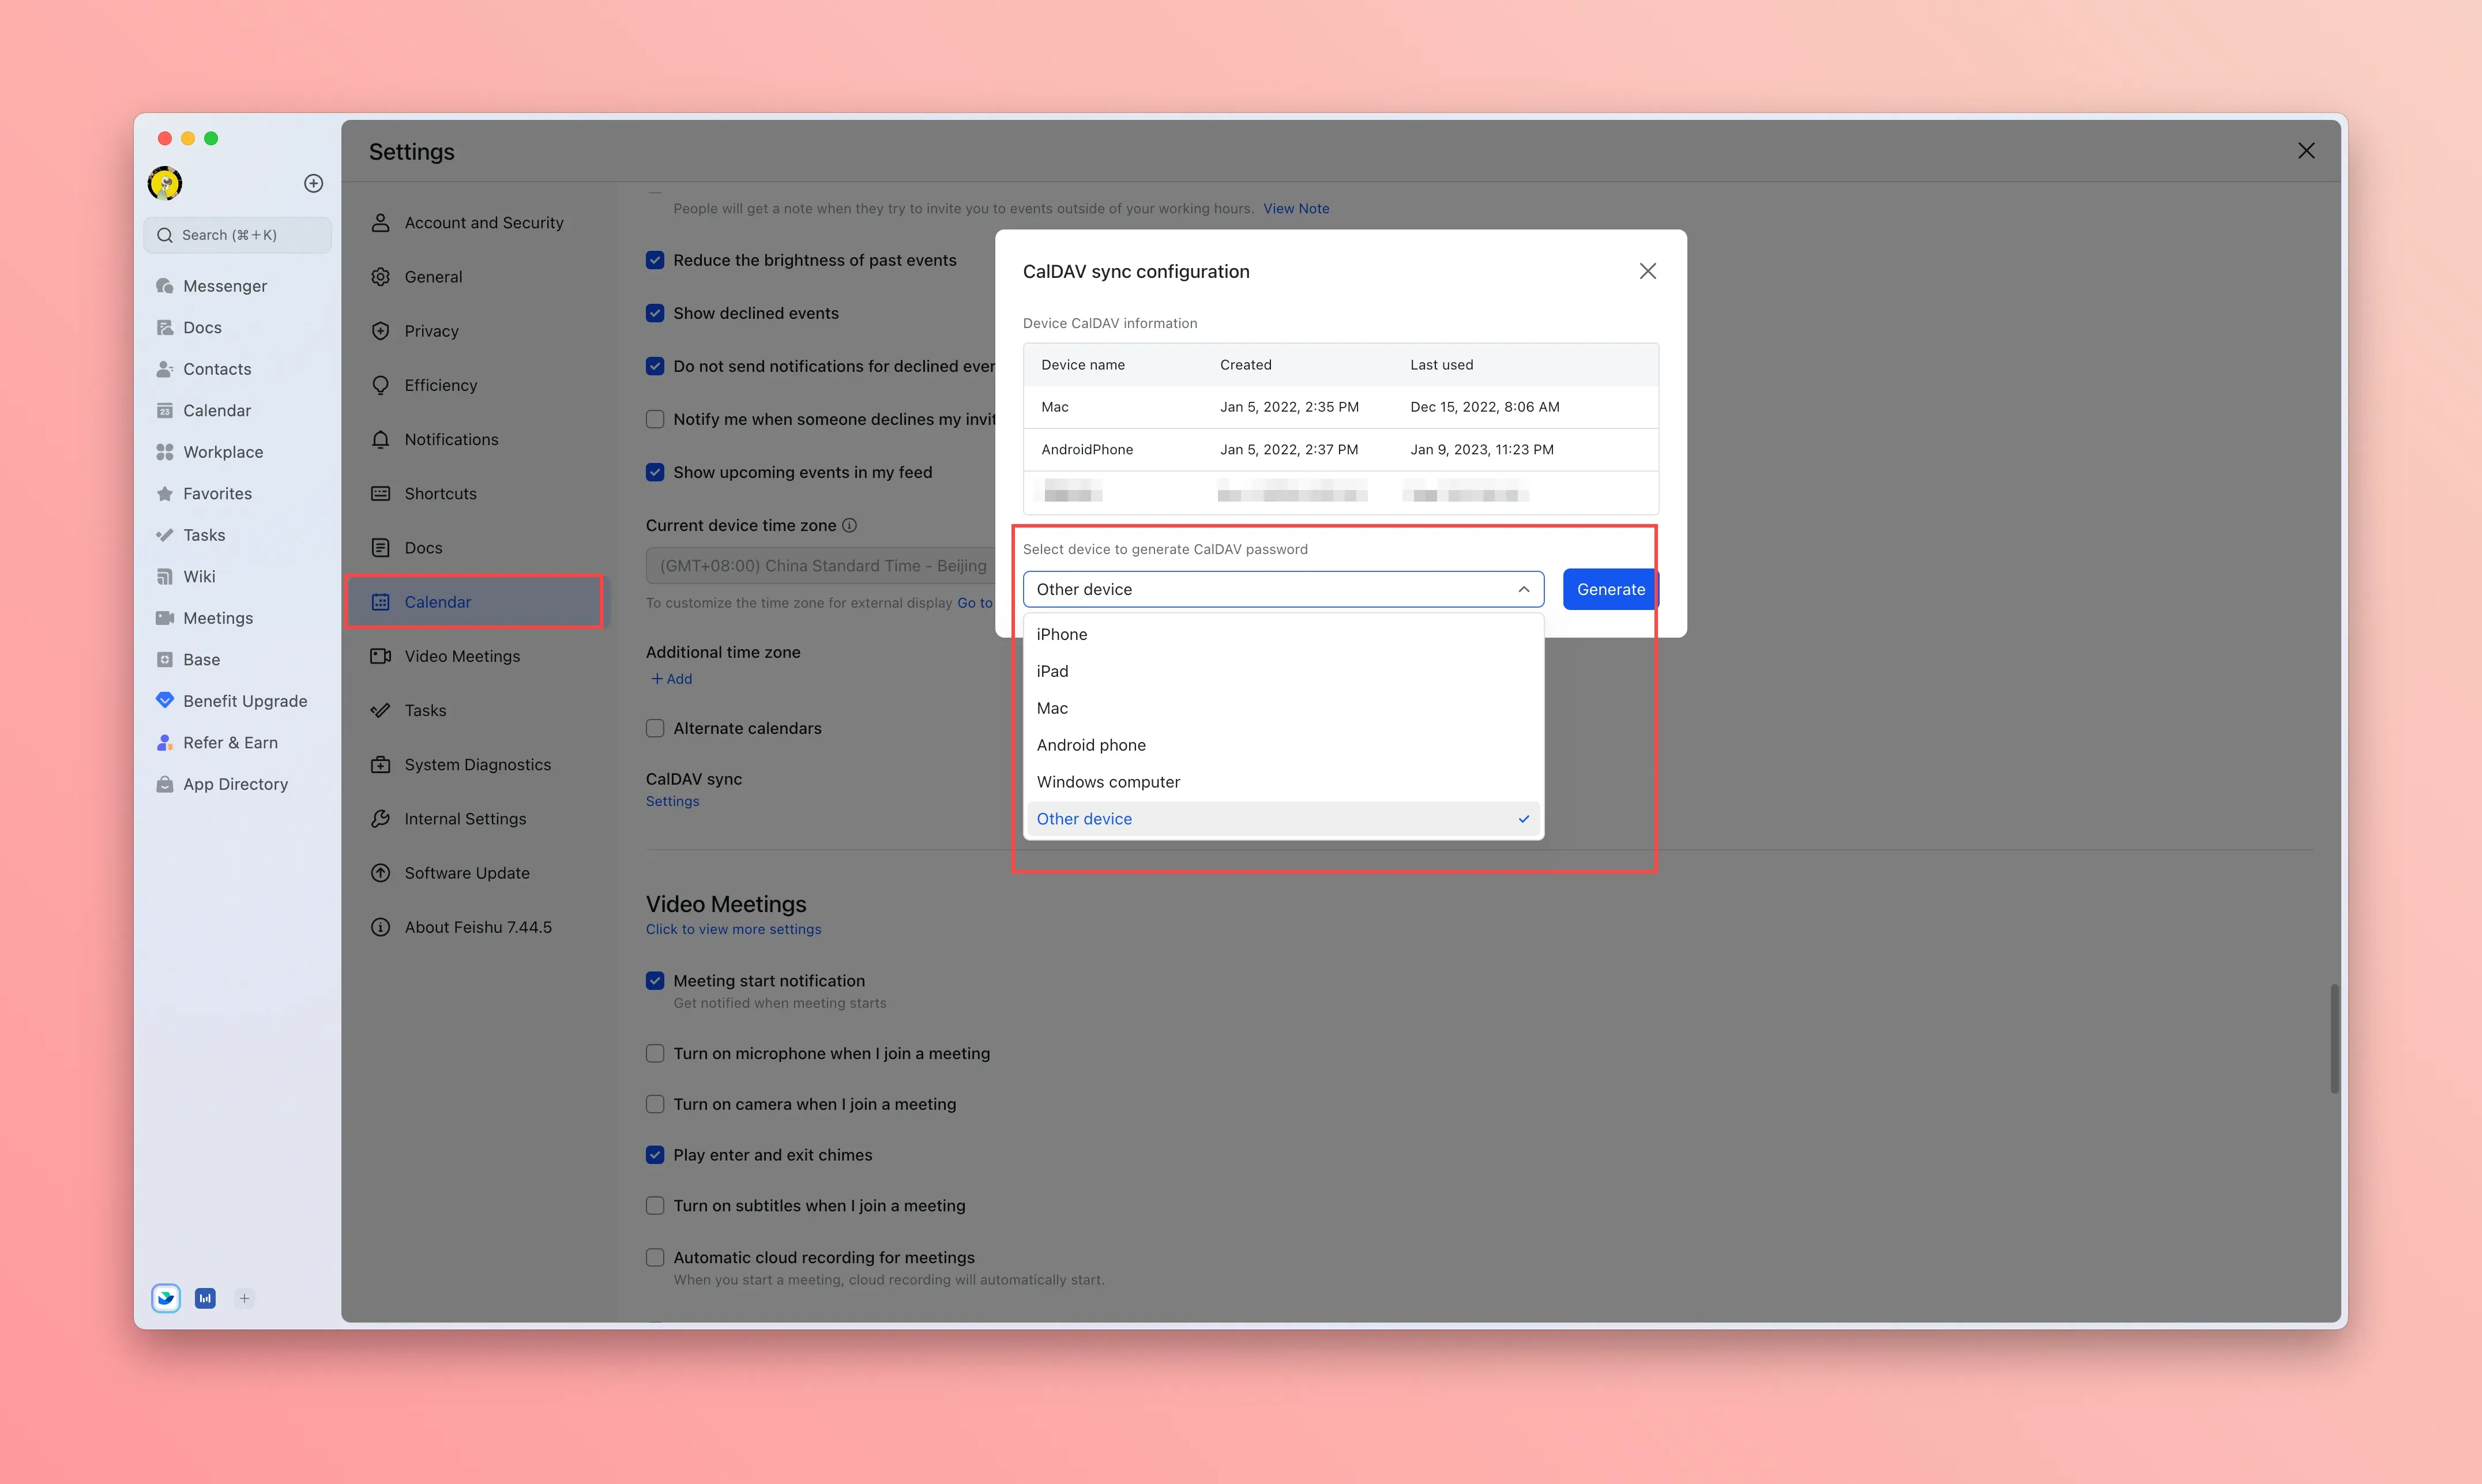
Using Feishu as an example (subscription/read-only):
- In the settings page of the "Feishu" desktop client, select calendar settings, click CalDAV sync configuration, select Other device, and generate the login username, password, and server address
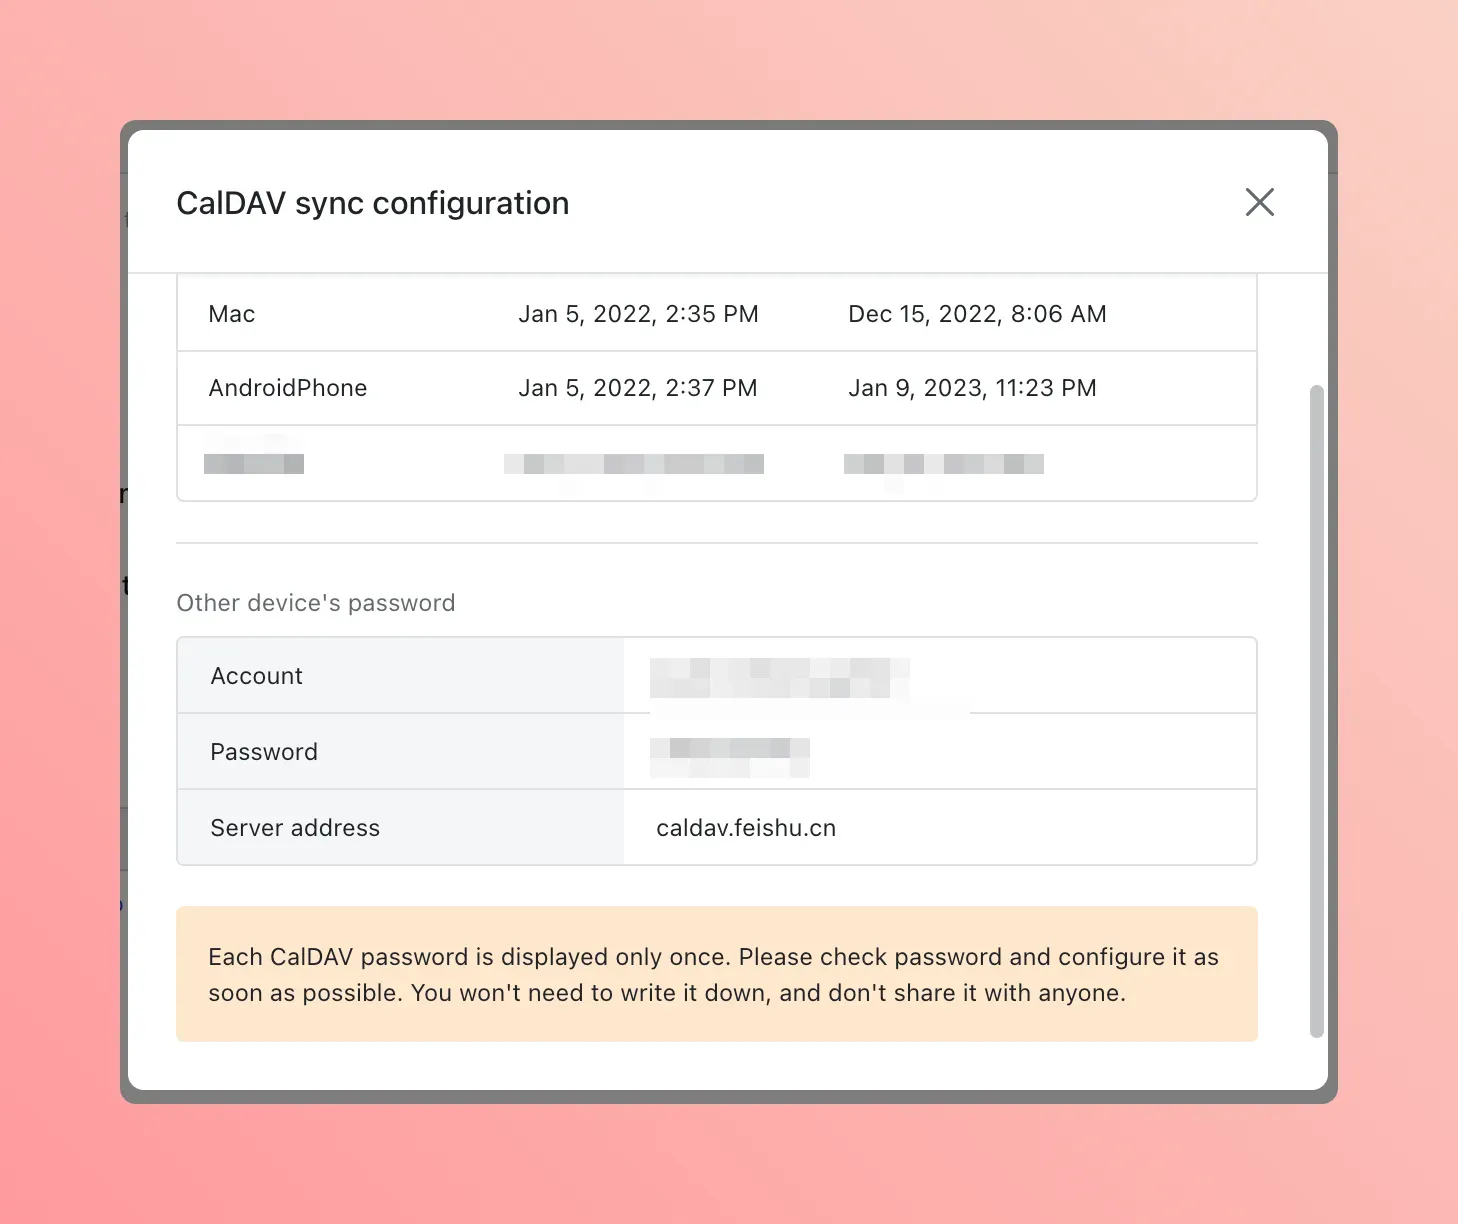
- In the calendar configuration page of the LifeOS Pro plugin settings, enable "CalDAV Calendar Subscription", and enter the username and generated password. The server address is
https://caldav.feishu.cn
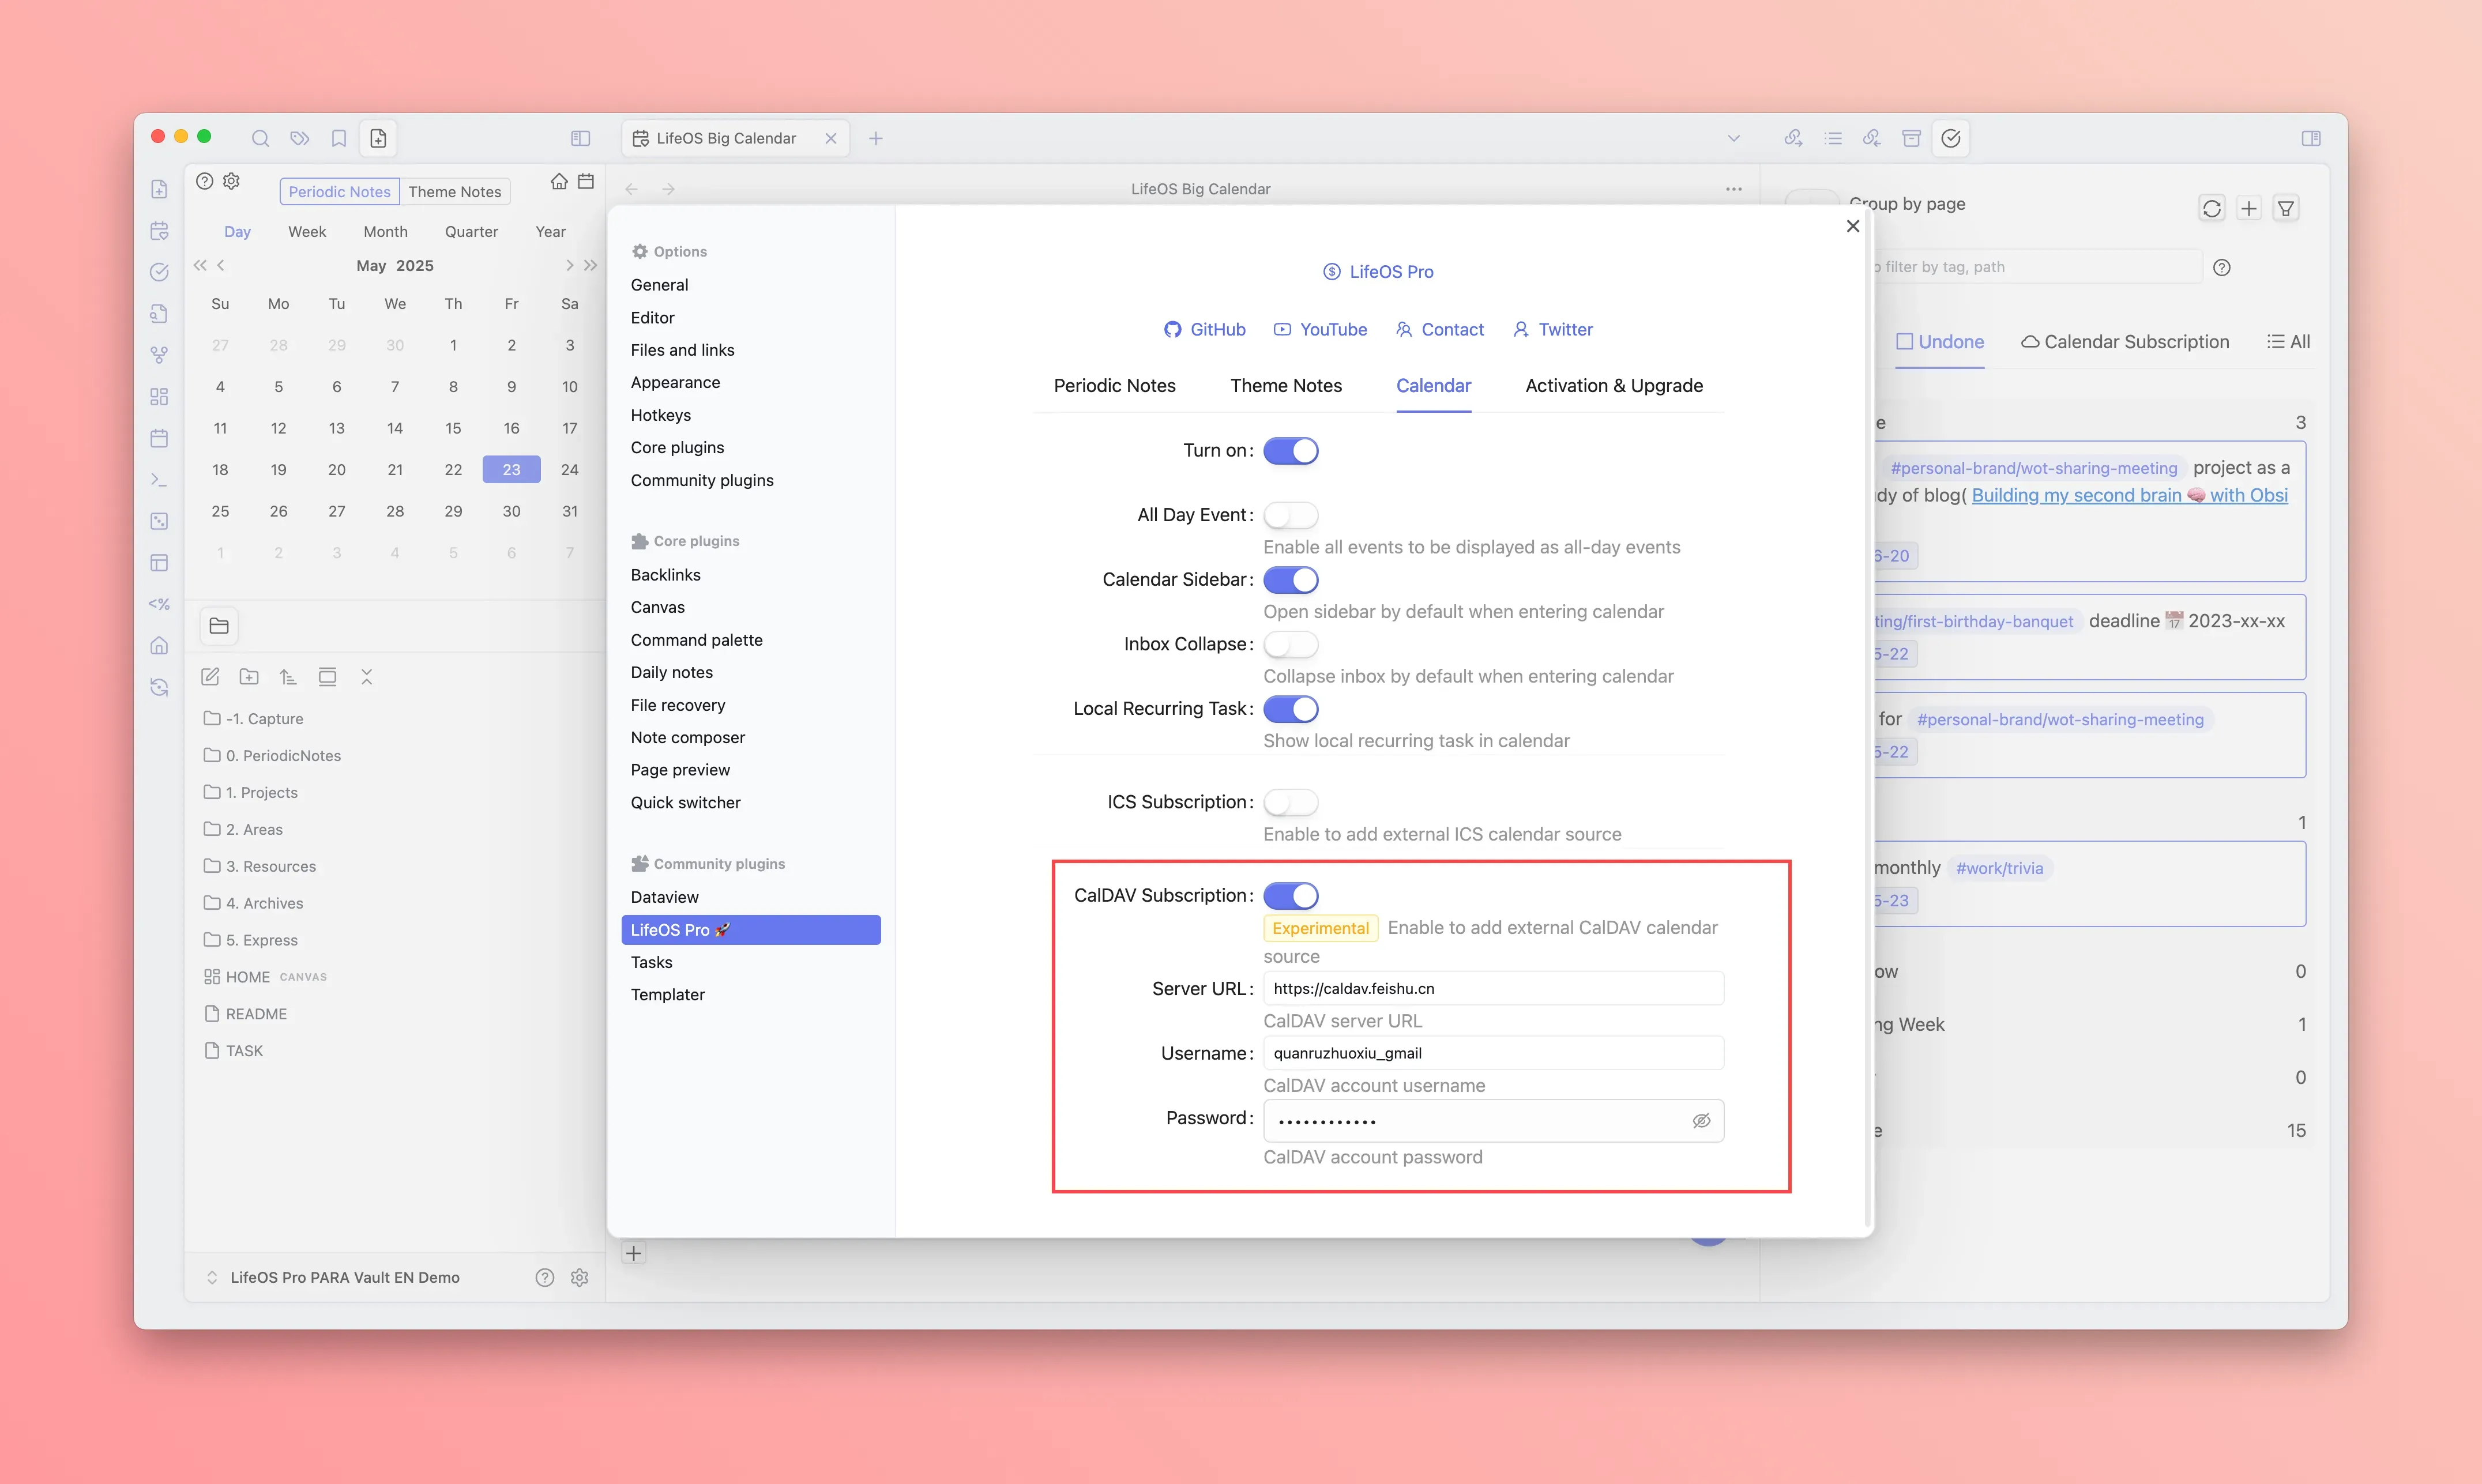
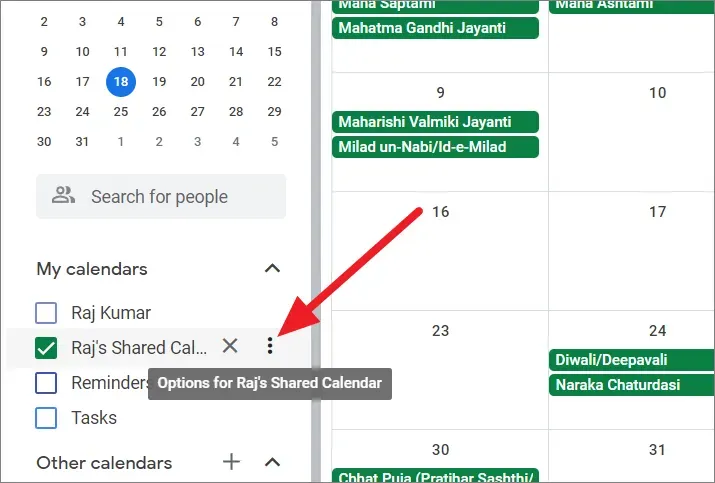
Adding Multiple CalDAV Configurations
If you need to subscribe to multiple CalDAV calendars (e.g., both Feishu and DingTalk), click "Add CalDAV Configuration" to add additional CalDAV servers.
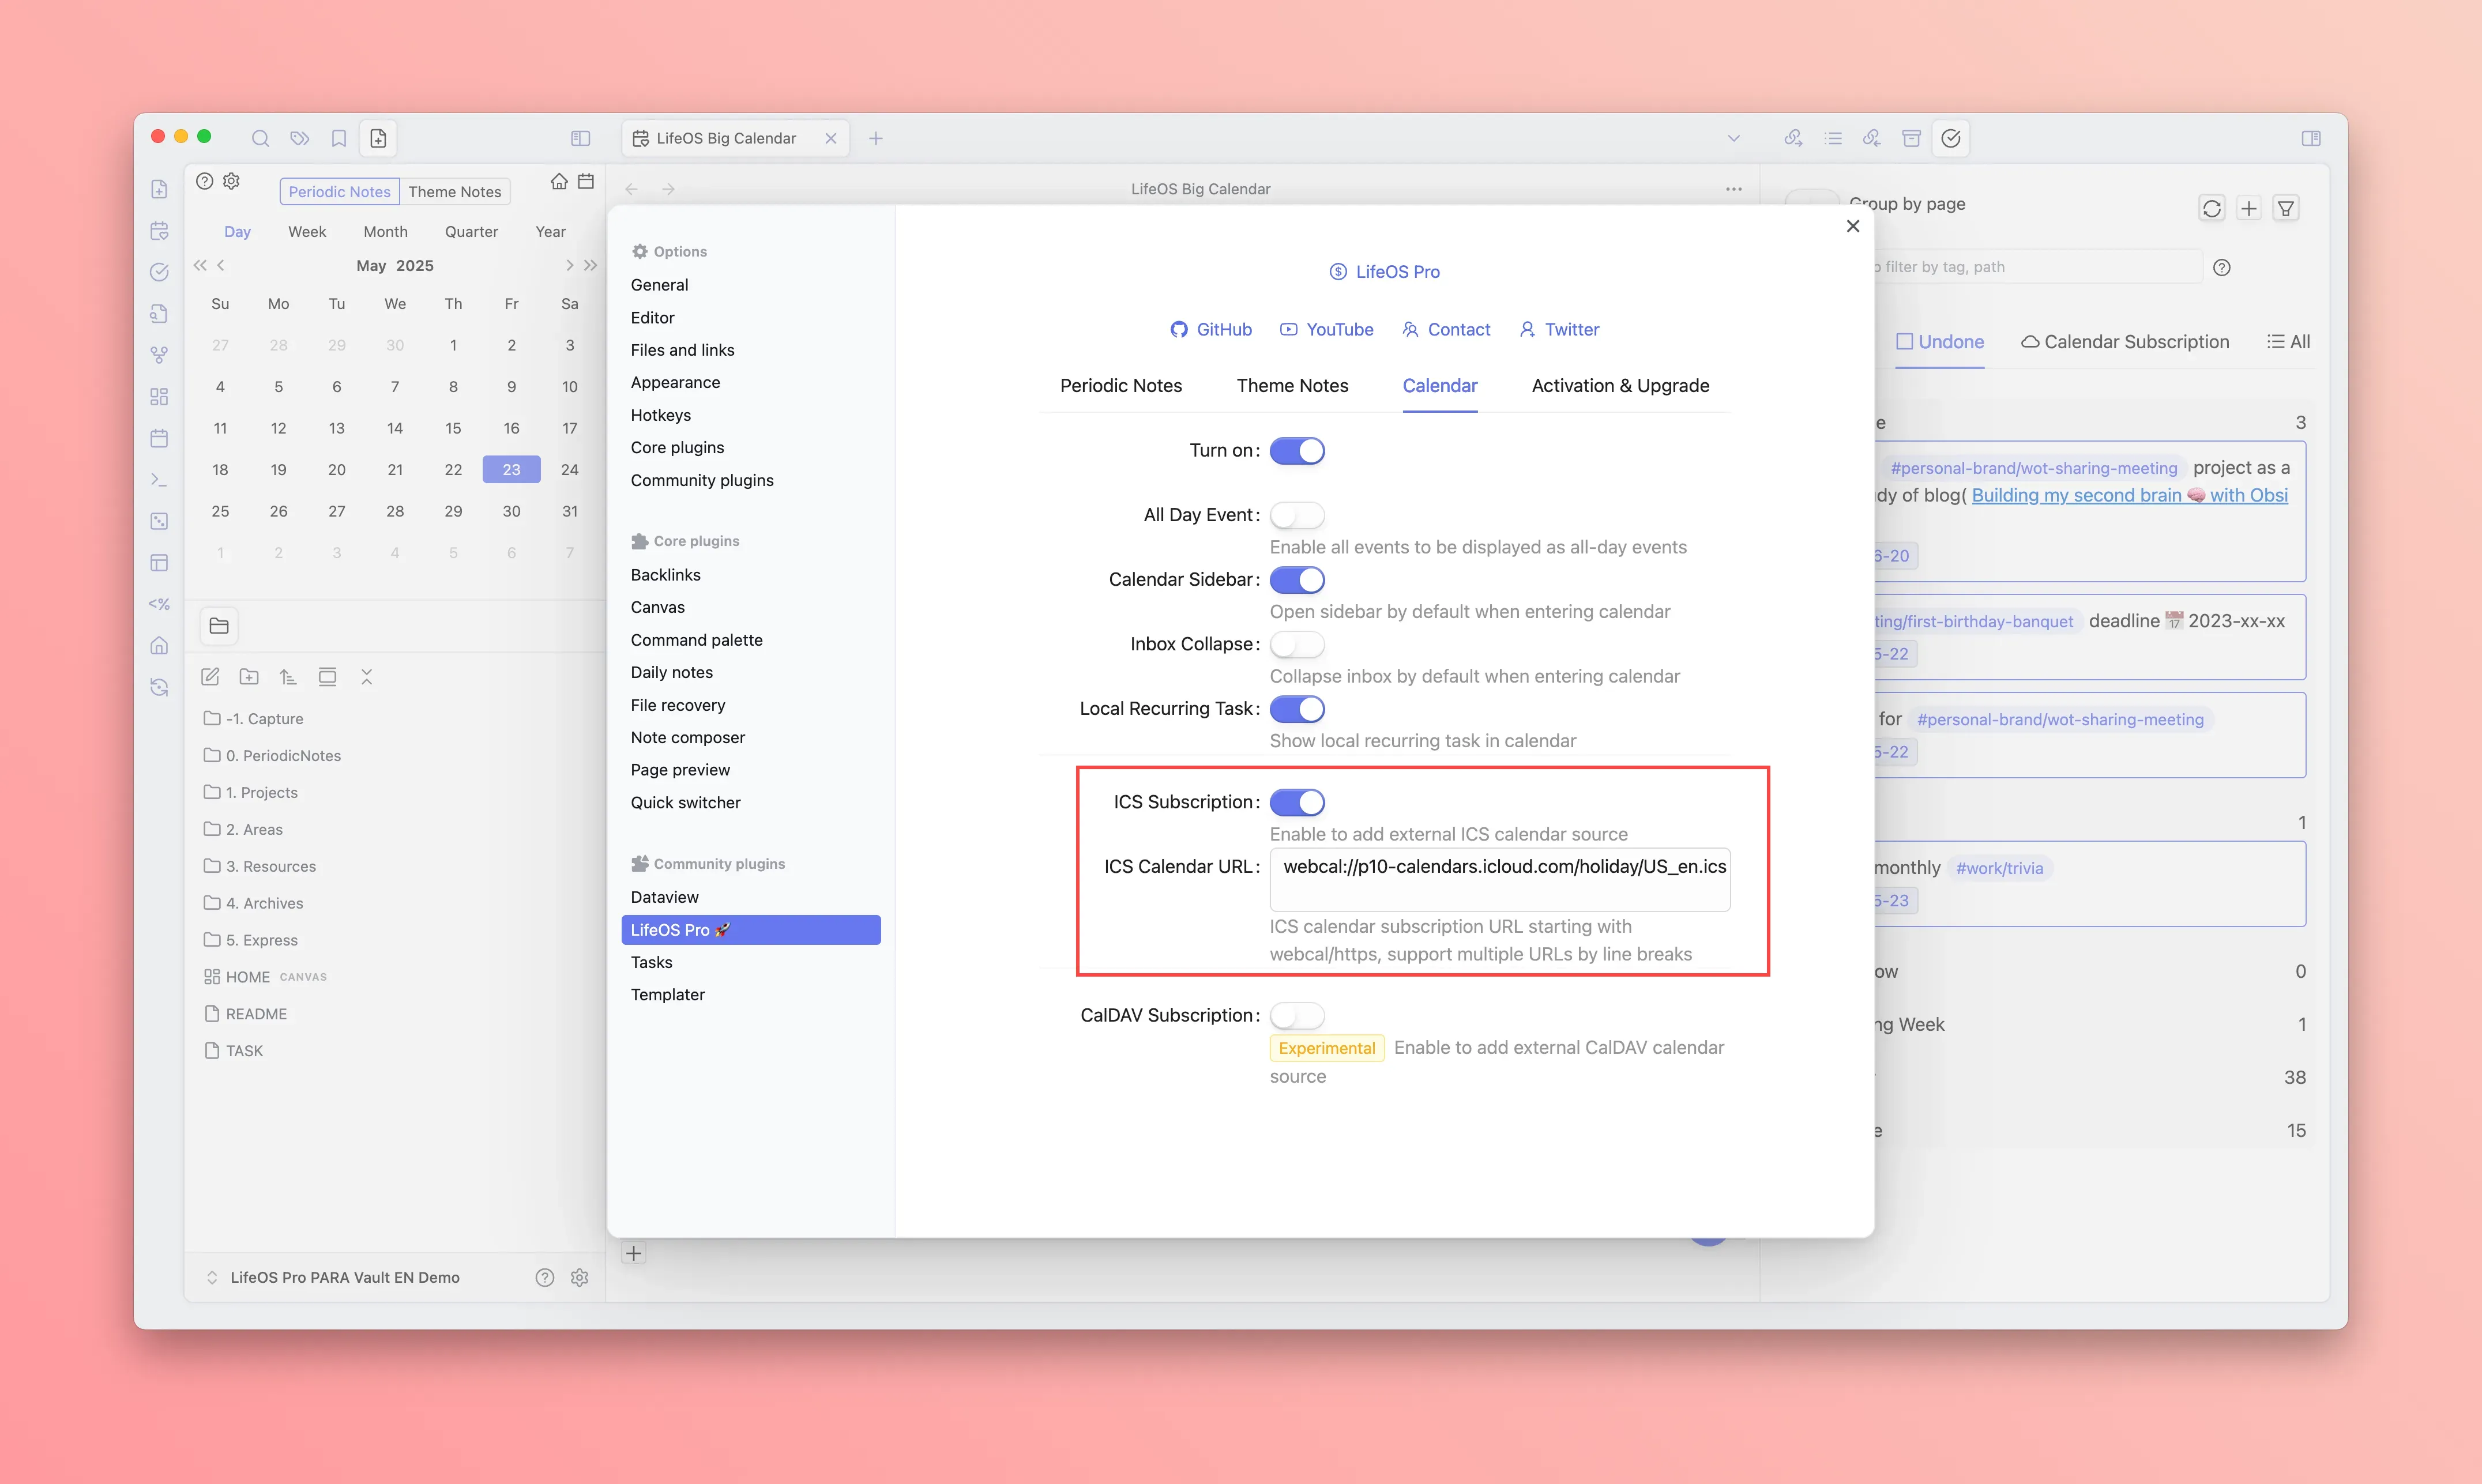
Import from URL (ICS Subscription)
ICS calendar subscription is a universal calendar subscription method, subscribing to calendar events via URL address, in read-only mode.
Subscribe to TickTick Tasks
- Open TickTick, click on the avatar in the upper left corner to enter the settings page
- Select "Connections & Import" from the left sidebar, then select "Subscribe to TickTick" on the right
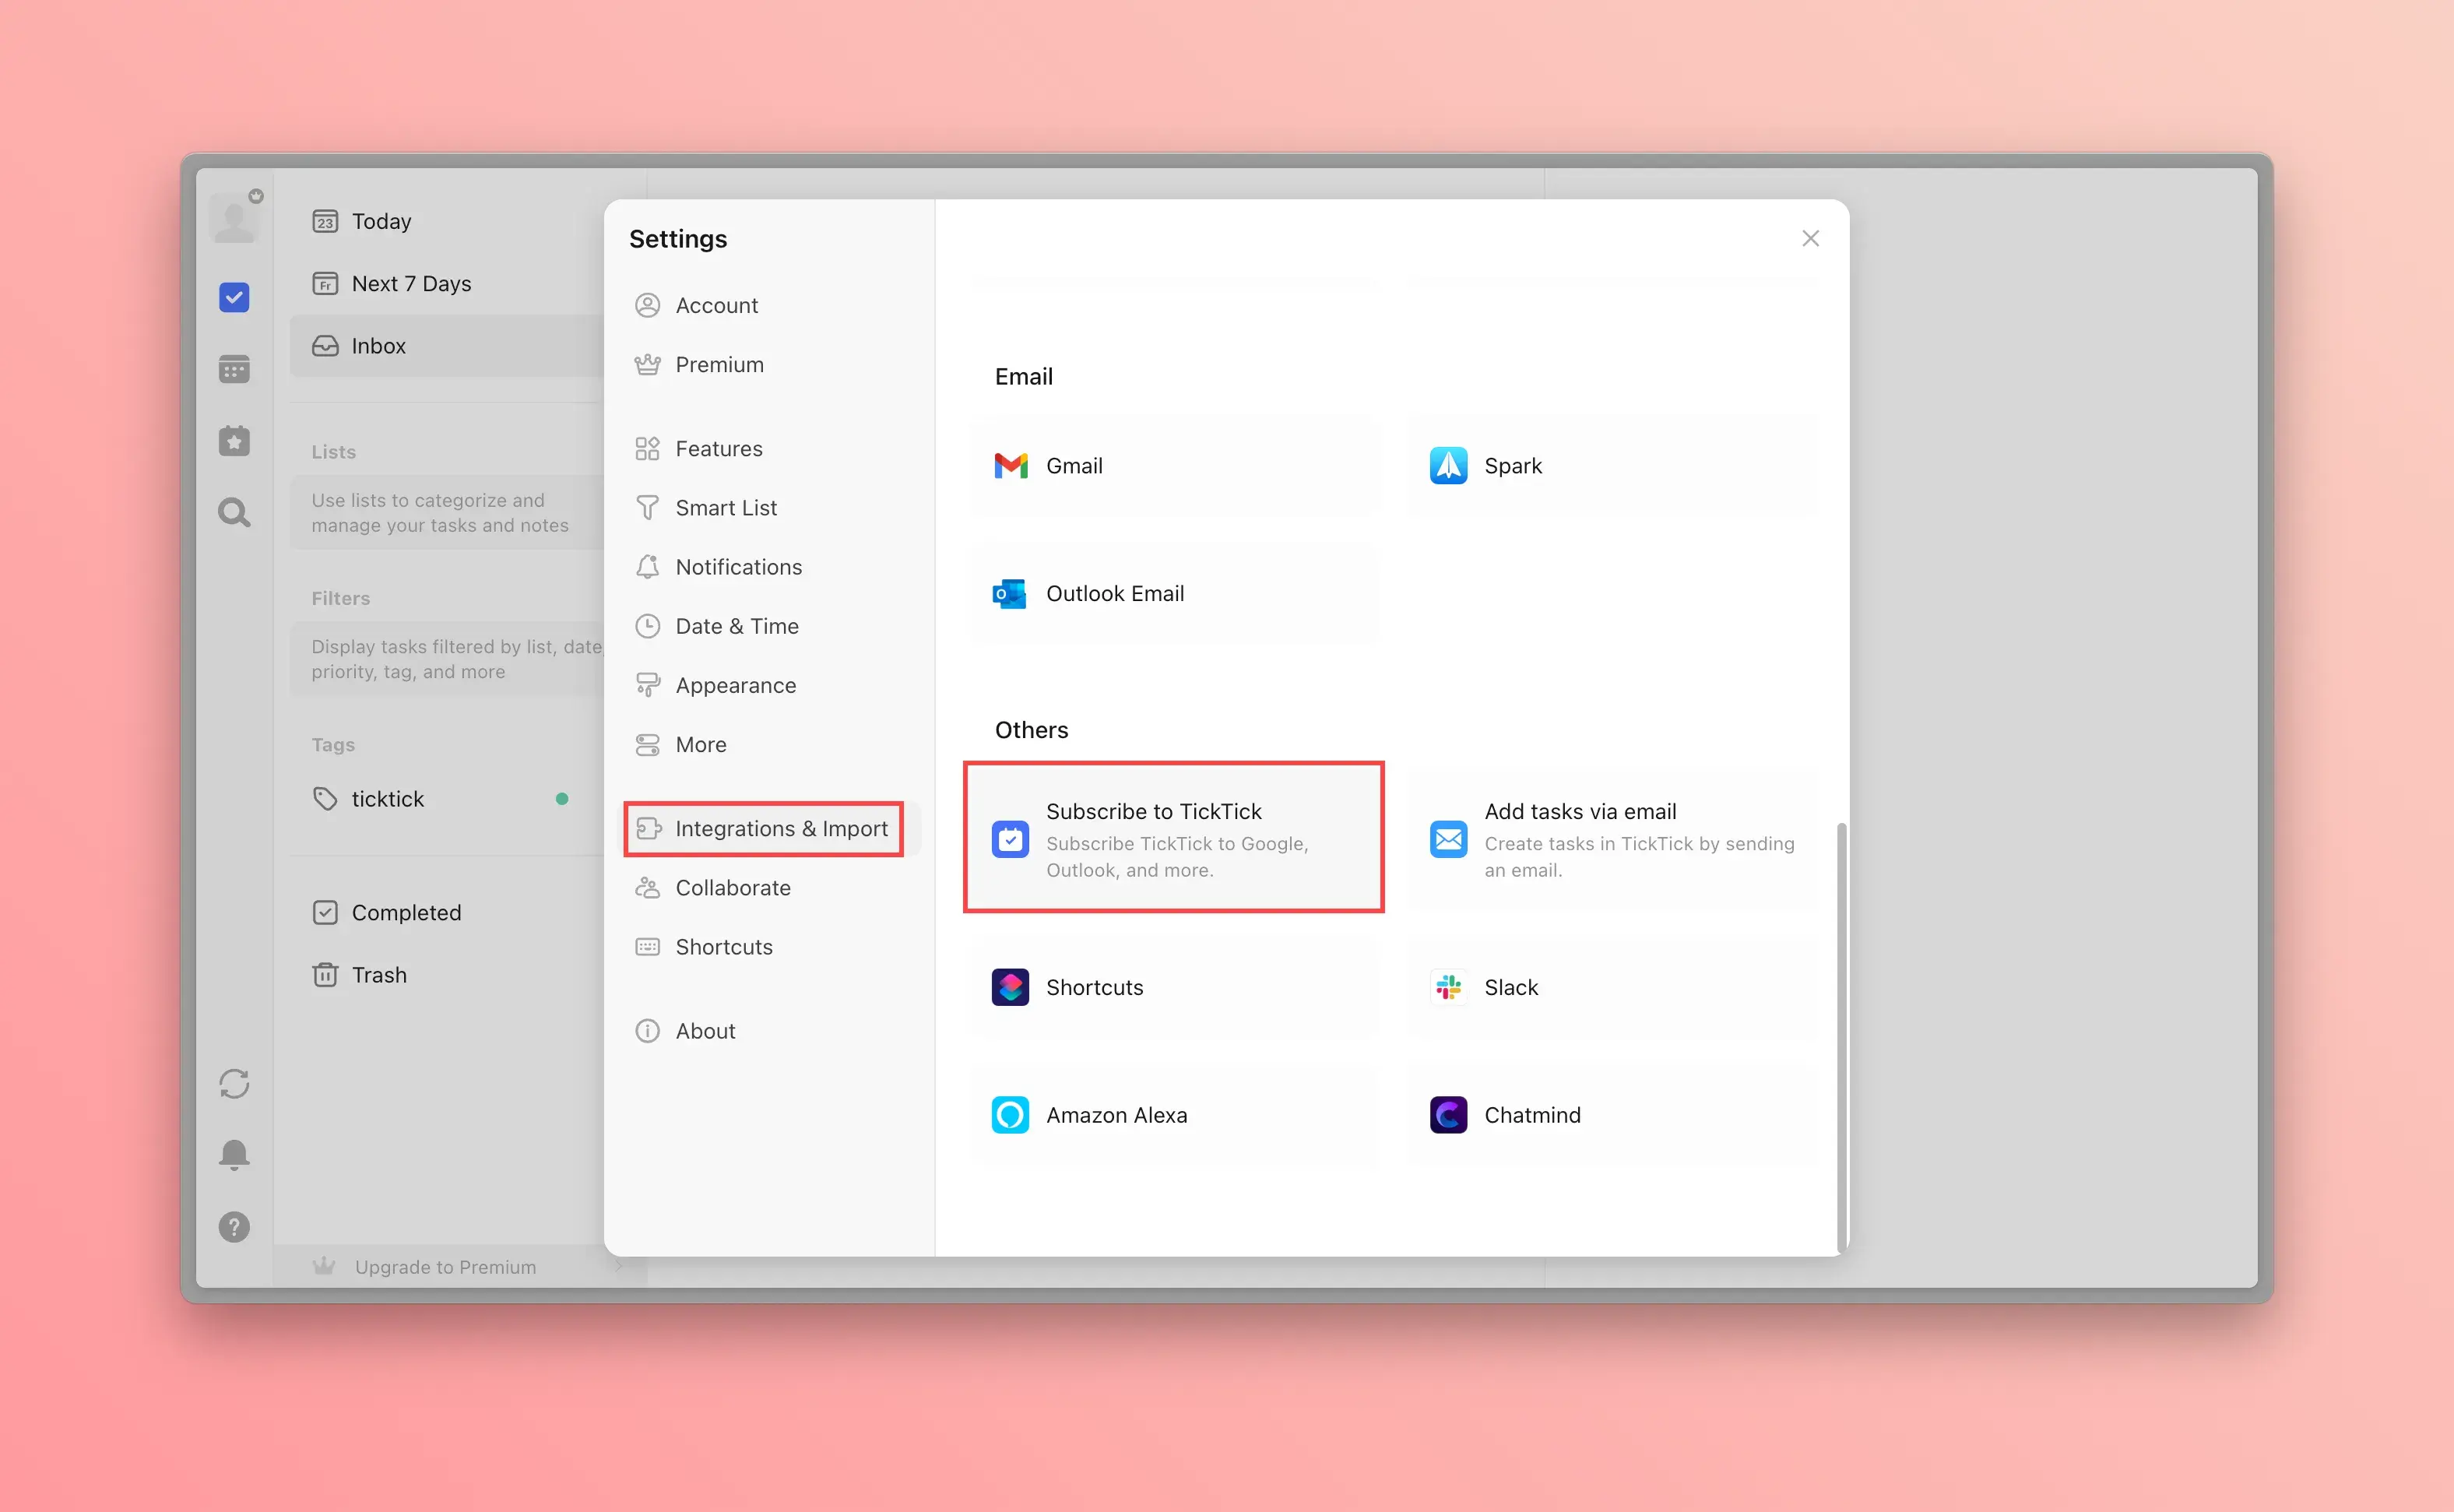
- Click "Get URL", select the list you want to subscribe to, and an ICS subscription URL will be generated
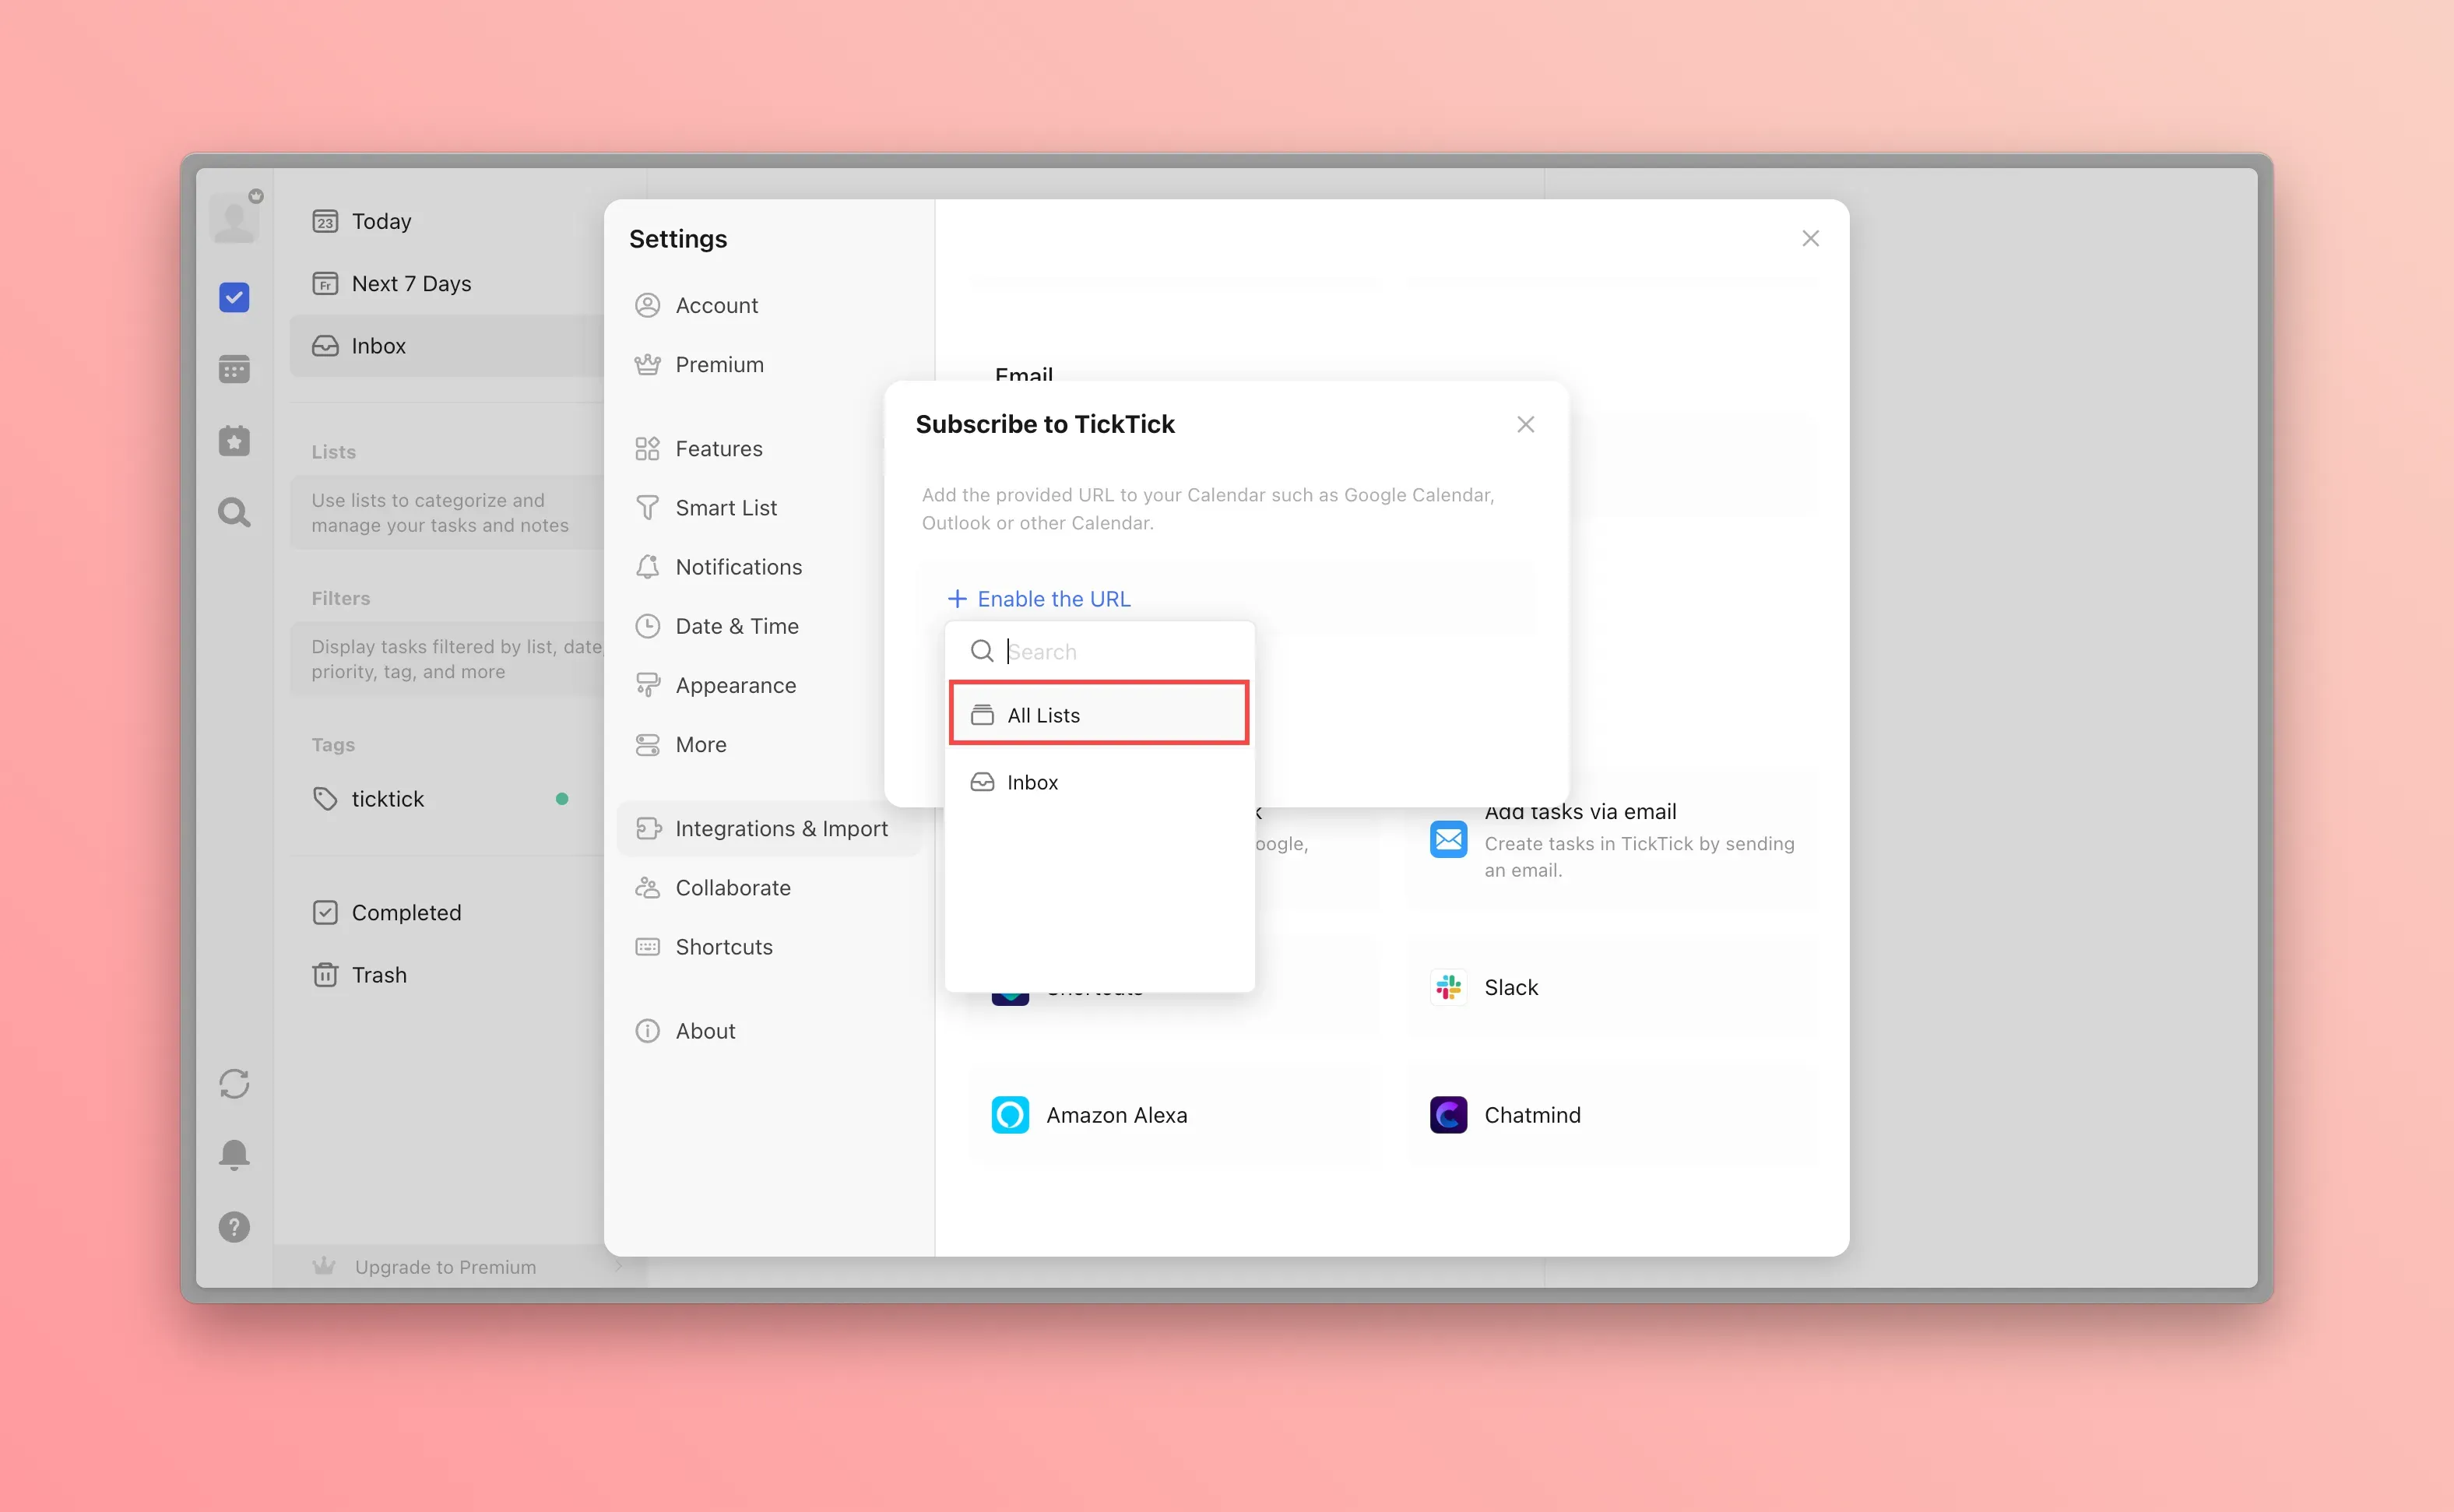
- Go to the calendar configuration page in the LifeOS Pro plugin settings, enable "ICS Calendar Subscription", paste the previously generated URL link to complete the subscription

Subscribe to iCloud Calendar (ICS Method)
If you only need one-way viewing of iCloud Calendar, you can use the ICS method for simpler configuration.
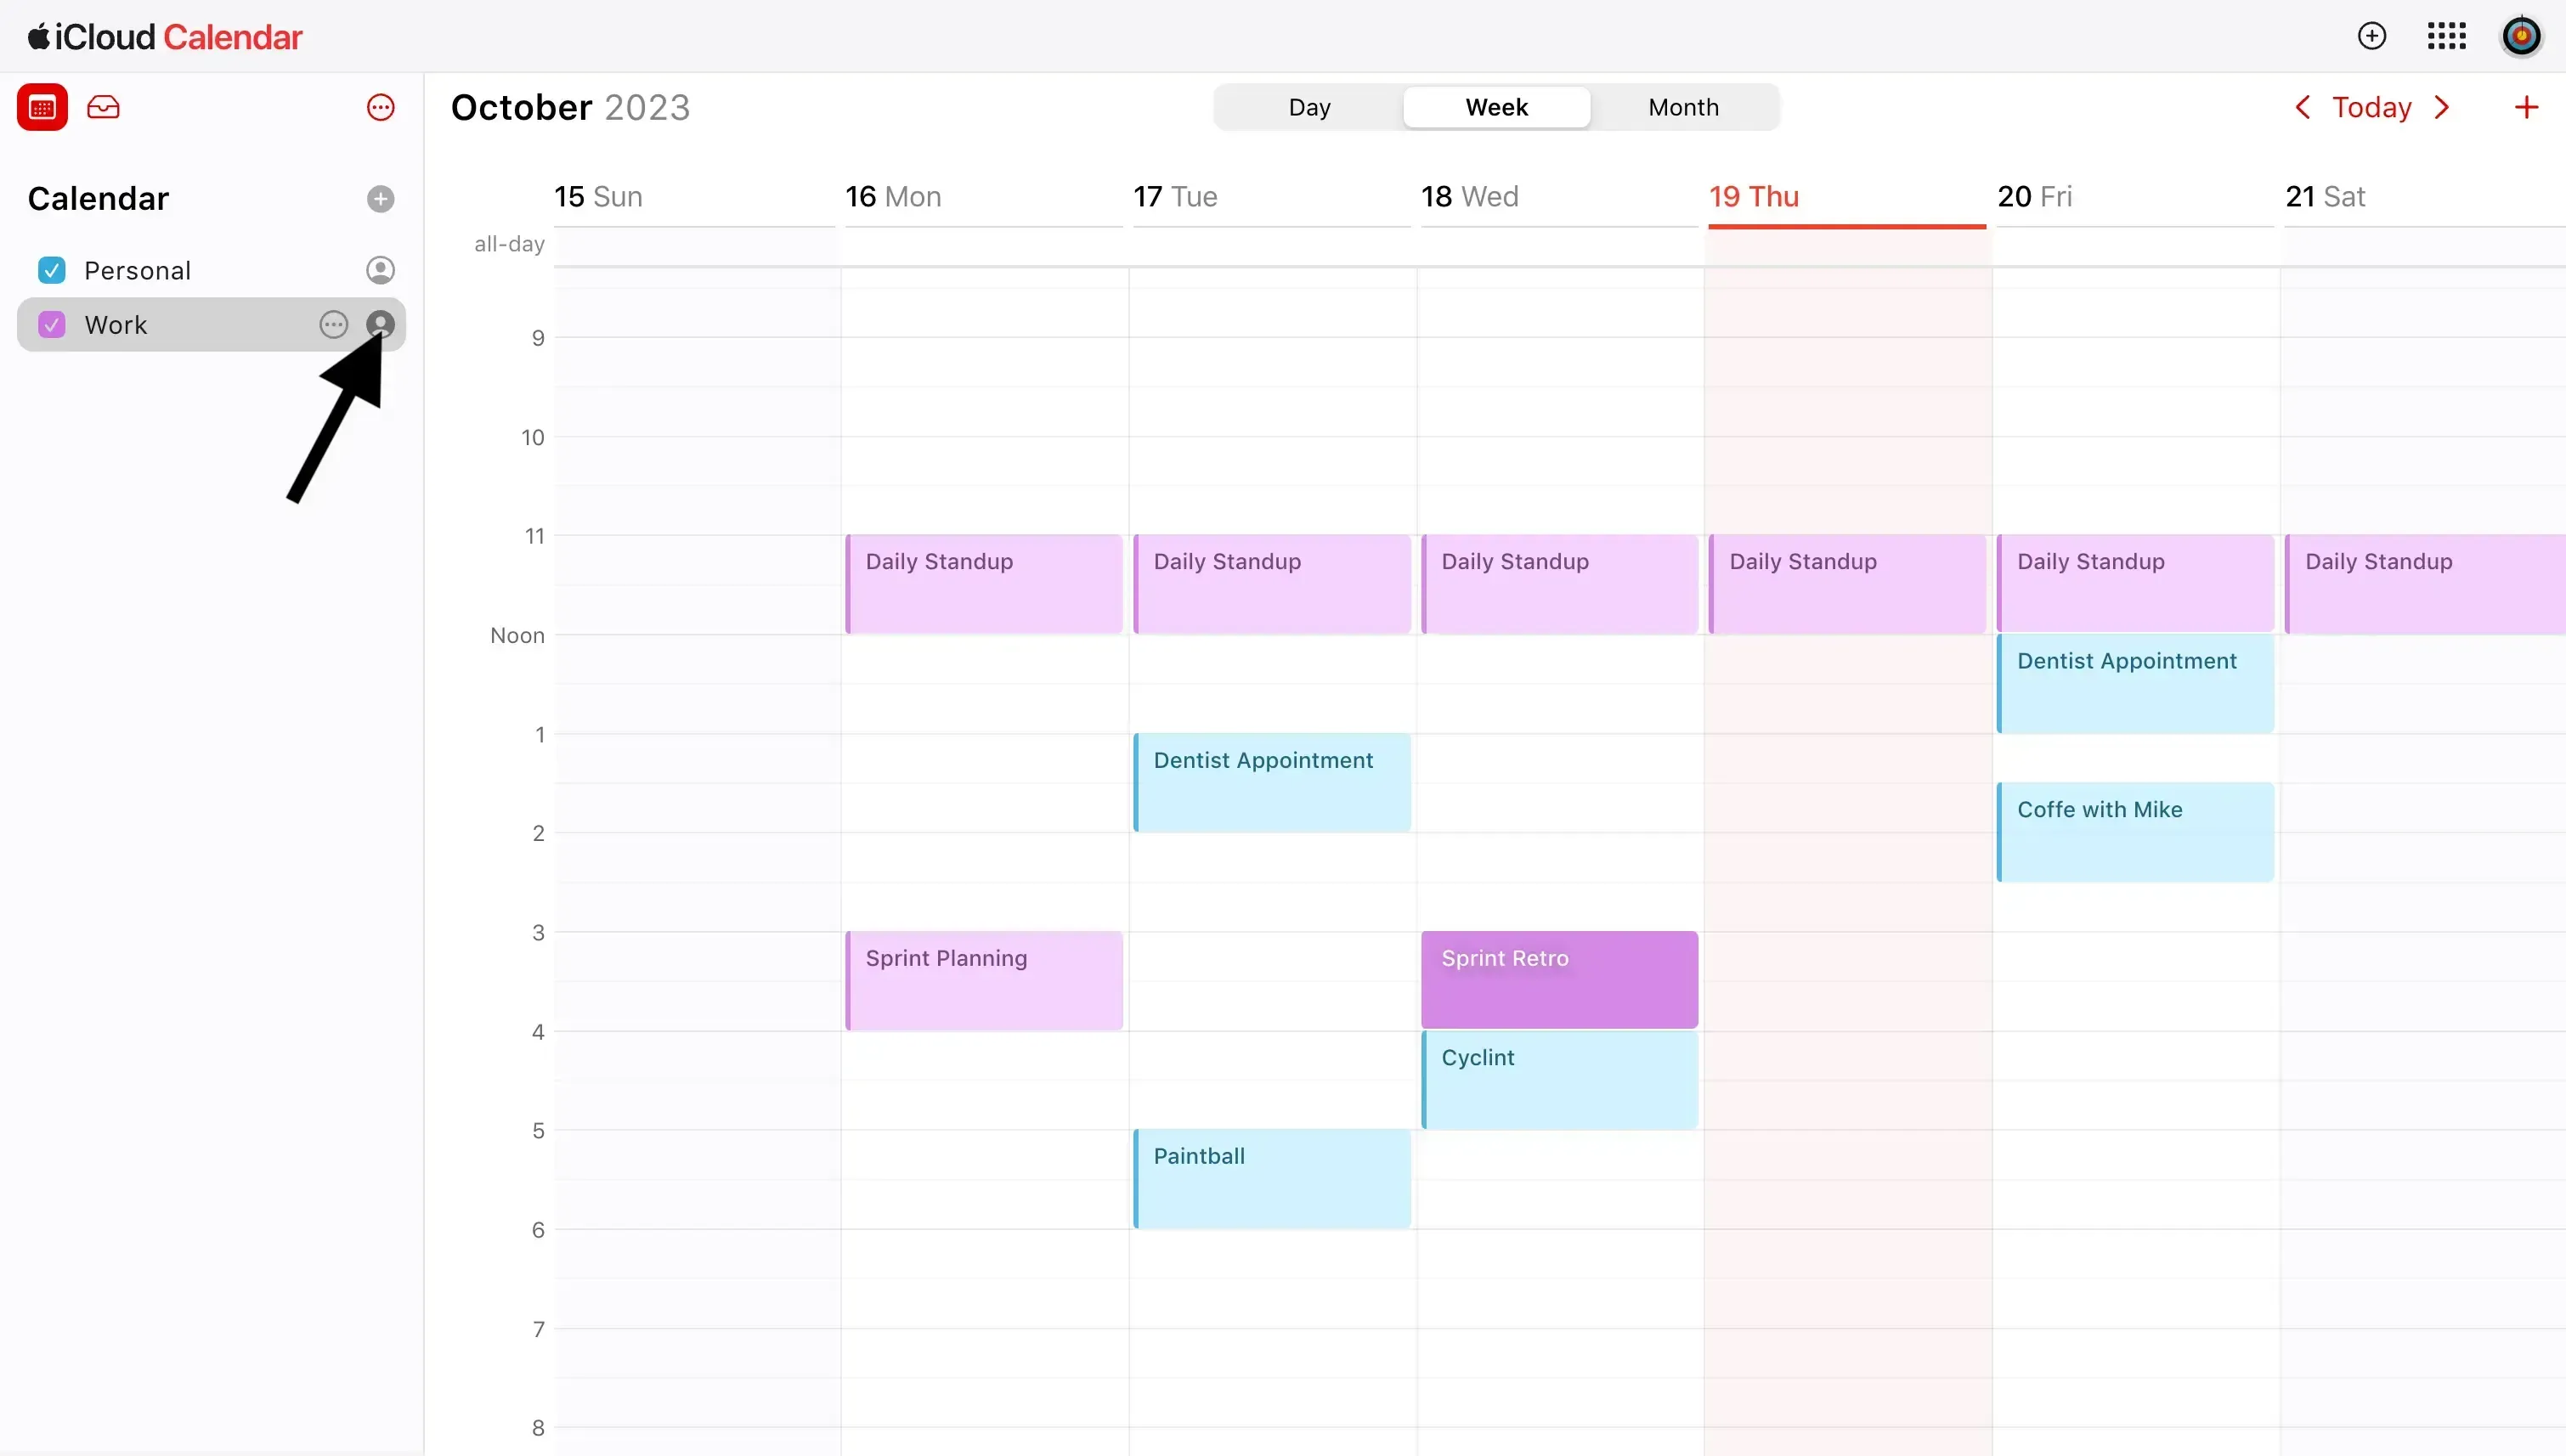
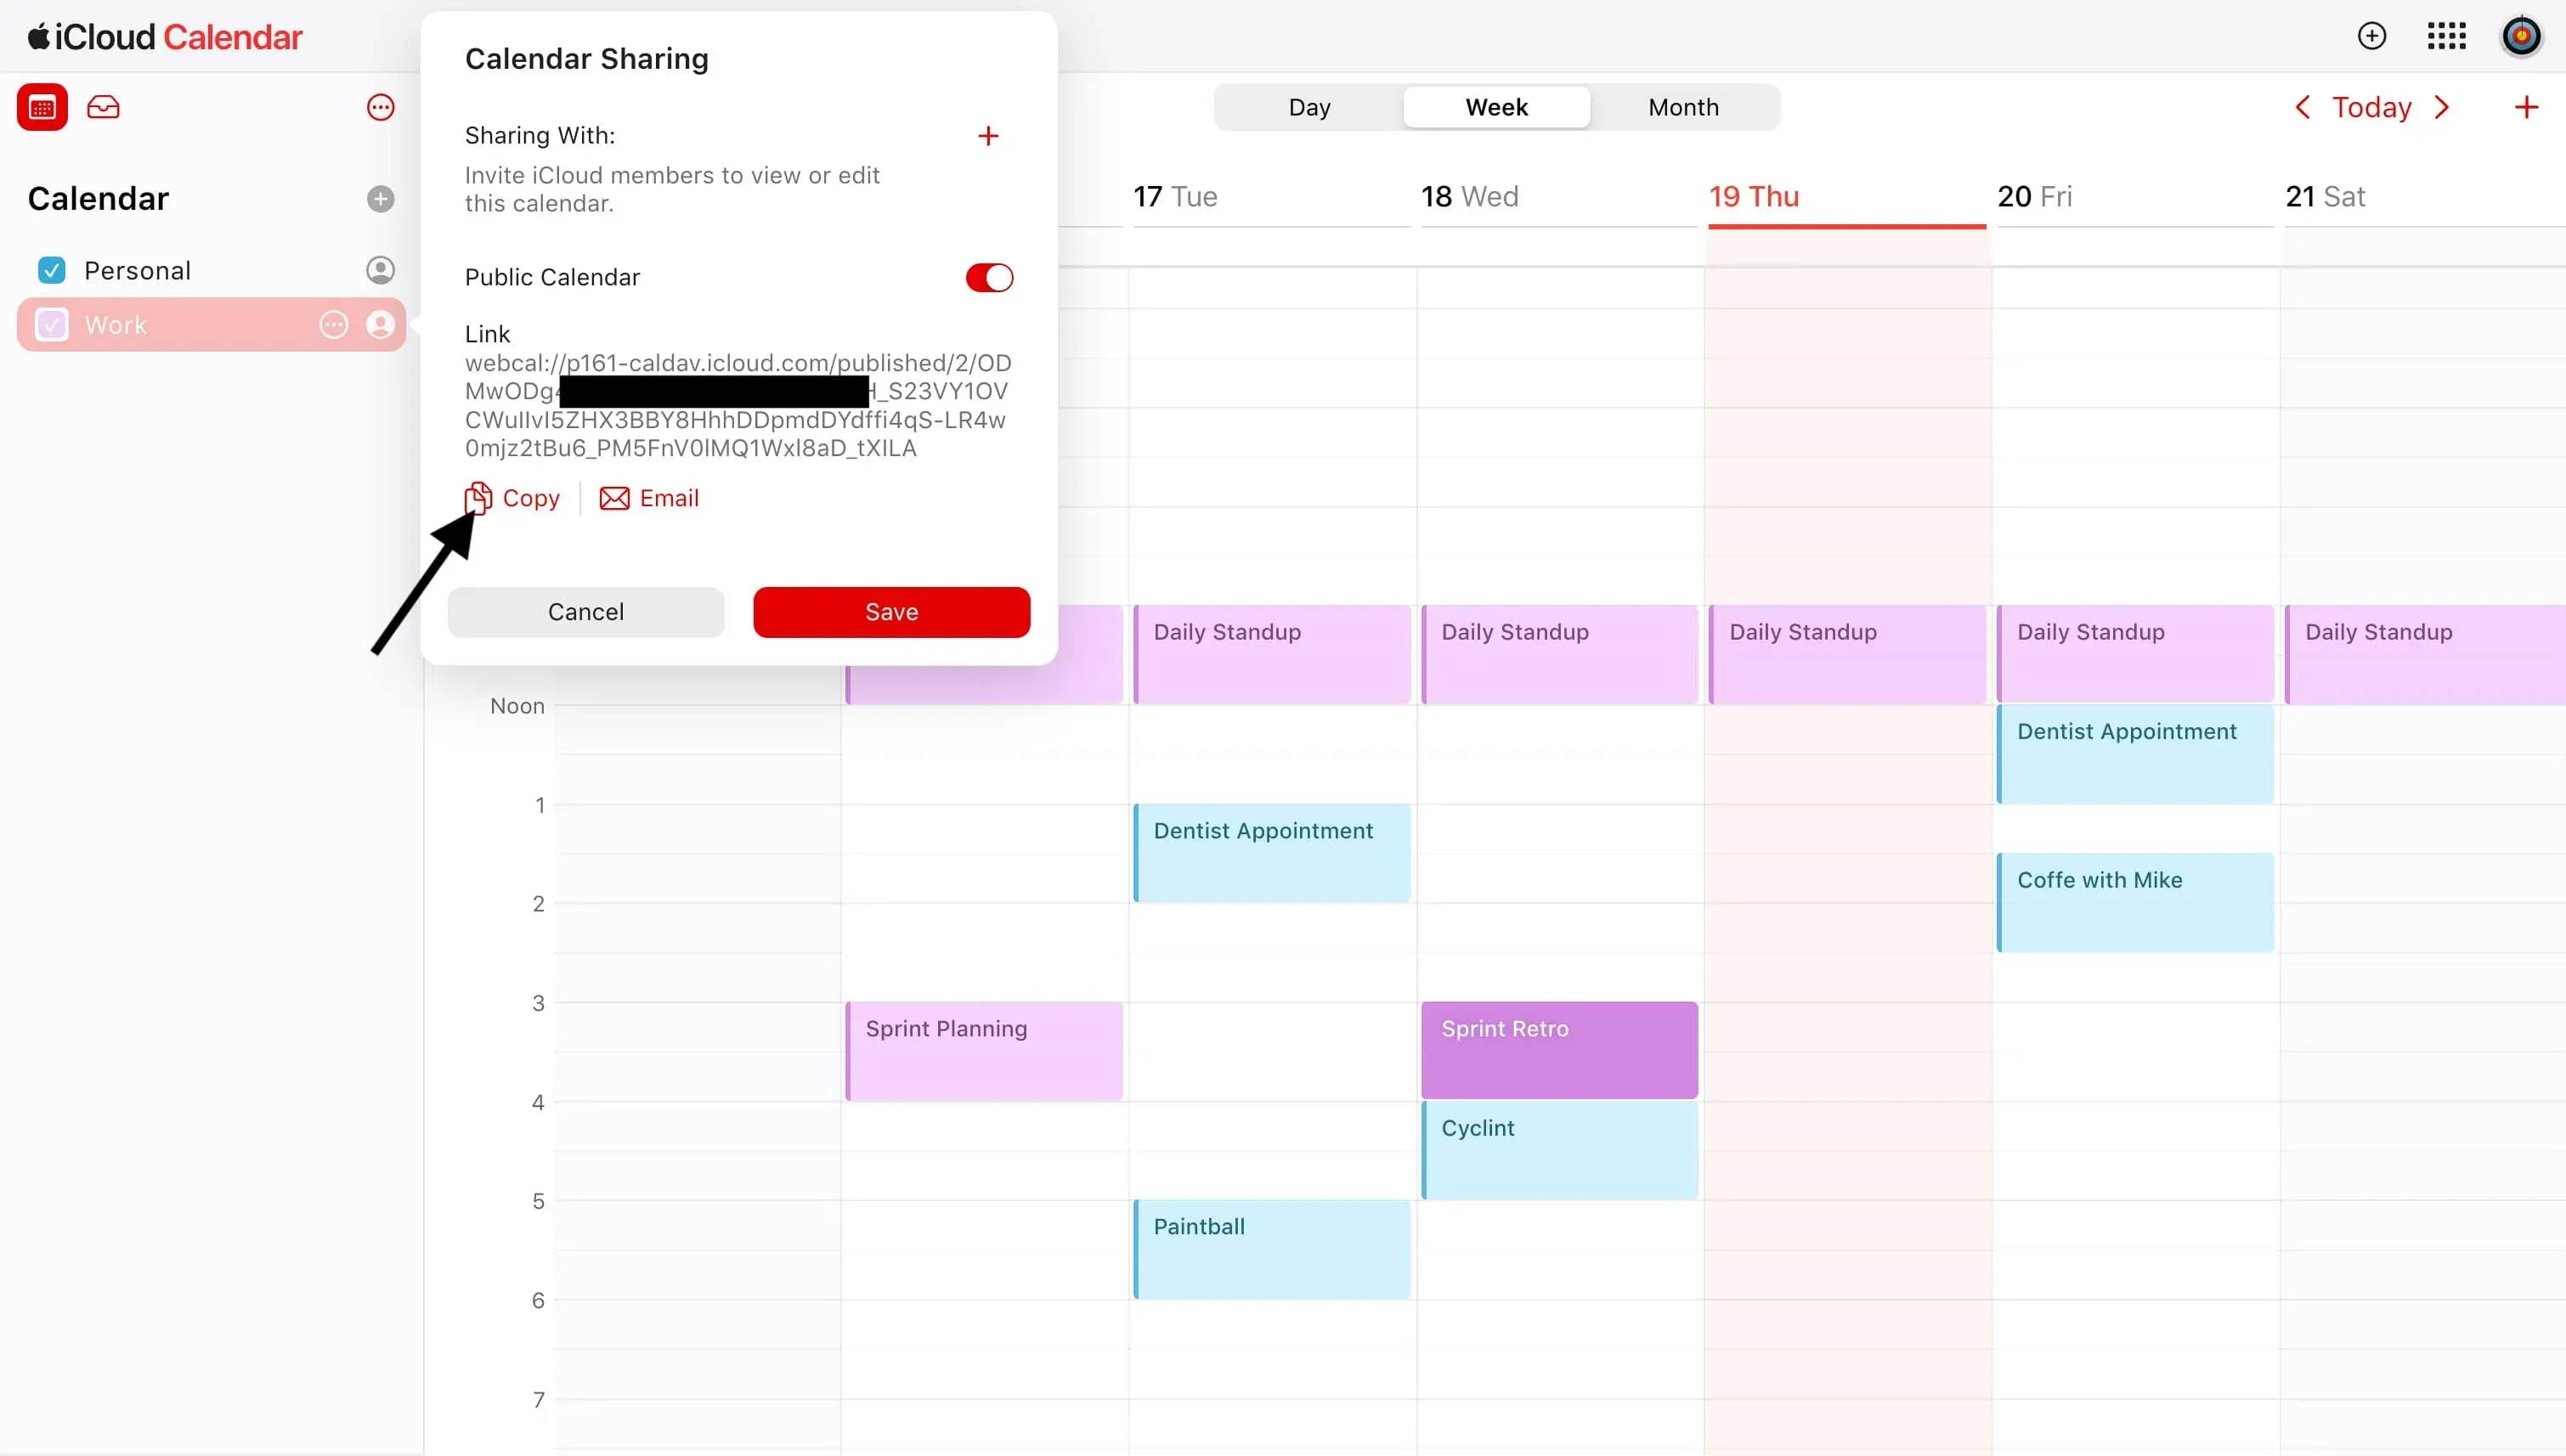
- Open the Mac client of Apple Calendar, select the calendar you want to sync from your iCloud account, right-click to bring up the menu, and select "Share Calendar"
- Check the box in front of "Public Calendar"

- Right-click again on the shared calendar, you will see the generated link address, copy the complete link
- Go to the calendar configuration page in the LifeOS Pro plugin settings, enable "ICS Calendar Subscription", paste the previously generated URL link to complete the subscription
Subscribe to Google Calendar (ICS Method)
If you only need one-way viewing of Google Calendar, you can use the ICS method for simpler configuration without creating OAuth credentials.
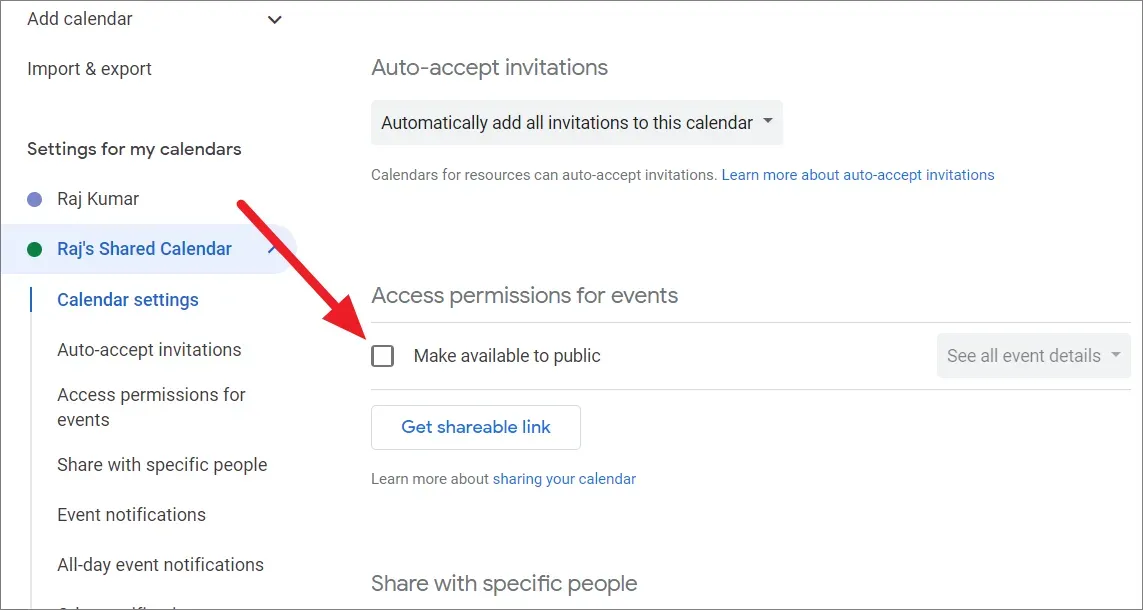
- Open Google Calendar, in the calendar list on the left, select the calendar you want to subscribe to, right-click to bring up the menu, and click "Settings and sharing"
- In the calendar settings, find "Secret address in iCal format" under "Integrate calendar", and copy the complete link
- Go to the calendar configuration page in the LifeOS Pro plugin settings, enable "ICS Calendar Subscription", paste the previously generated URL link to complete the subscription

Subscribe to Outlook Calendar
- Open the settings of your Outlook mailbox, click "Calendar" - "Shared calendars" - "Publish a calendar", select the calendar to share, and select "Can view all details". After selection, click "Publish"

- After clicking "Publish", you will see the "ICS" link address, copy the complete link address

- Go to the calendar configuration page in the LifeOS Pro plugin settings, enable "ICS Calendar Subscription", paste the previously generated URL link to complete the subscription

Adding Multiple ICS Configurations
If you need to subscribe to multiple ICS calendars, you can:
- Enter multiple addresses in the URL input box by line breaks
- Or click "Add ICS Configuration" to add additional configurations with custom names